Difference between revisions of "Cinder Drift"
(→Images) |
|||
| Line 90: | Line 90: | ||
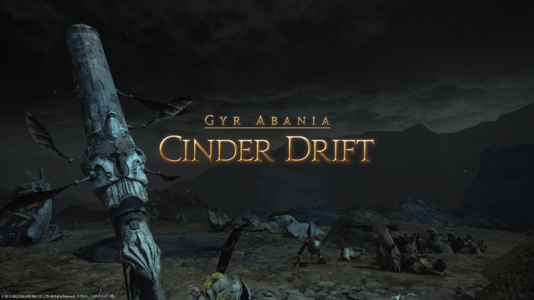
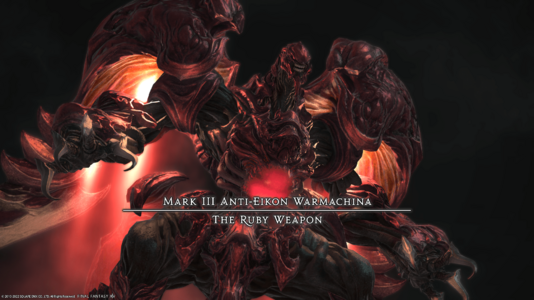
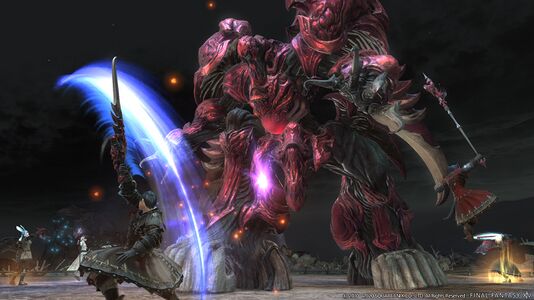
==Images== | ==Images== | ||
<gallery mode="packed"> | <gallery mode="packed" heights=200px> | ||
Cinder Drift NM.png | |||
Cinder Drift boss.png | |||
File:cinder drift1.jpg | File:cinder drift1.jpg | ||
</gallery> | </gallery> | ||
Revision as of 02:26, 30 October 2022
- See also: Cinder Drift (Extreme)
Cinder Drift
- Level
- 80 (Sync: 80)
- Item Level
- 455
- Difficulty
- Normal
- Party size
- Full Party
8 man • 2 2
2  4
4 
- Unsyncing
- Allowed
- Time limit
- 60 minutes
- Roulette
- Trials
- Tomestones
 12
12 - Req. quest
 Ruby Doomsday
- Entrance
- Eorzean Alliance Headquarters (X:6.2, Y:6.1)
- Location
- Cinder Drift
- Region
- Gyr Abania
- Patch
- 5.2
“Though the original Ultima Weapon, piloted by Gaius van Baelsar, was destroyed in the decisive battle at the Praetorium, Garlemald has been secretly developing its successor. Now, this diabolical melding of Allagan and Garlean technologies has been deployed to annihilate those who would oppose the Empire. At the behest of none other than Gaius Baelsar himself, you cross the scorched battlefield of the Ghimlyt Dark to halt this crimson menace before it lays waste to Eorzea.
— In-game description
Cinder Drift is a level 80 trial introduced in patch 5.2 with Shadowbringers.
Requirements
Complete the level 80 quest ![]() Ruby Doomsday by speaking to Resistance Officer in The Lochs (X:36.4 Y:31.8). Pre-requisite quest is
Ruby Doomsday by speaking to Resistance Officer in The Lochs (X:36.4 Y:31.8). Pre-requisite quest is ![]() Old Enemies, New Threats.
Old Enemies, New Threats.
Guide
 Mark III Anti-Eikon Warmachina: The Ruby Weapon
(Phase 1) Ruby Weapon's Abilities
Your showdown with the Mark III Anti-Eikon Warmachina - otherwise known as The Ruby Weapon, an iconic boss from Final Fantasy VII - takes place within in a circular arena containing no death-walls or fatal drops.
- Stamp - causes Ruby Weapon to stomp on its primary target with a vicious tank-buster.
- Optimized Ultima - unleashes unavoidable raid-wide damage.
- Flexiclaw - causes Ruby Weapon to plunge its elongated claws into the ground whilst hovering in the air, forming eight cracks in the floor which begin traveling in cardinal and inter-cardinal directions, alternating between long and short distances - long cracks reaching the outer edge of the arena, and short cracks stopping beyond halfway to the edges. Once the cracks finish traveling, Ruby Weapon unleashes Ravensclaw.
- Ravensclaw - spawns an AoE circle directly under Ruby Weapon. Shortly afterward, AoE circles will also appear at the end of all eight cracks that were formed by Flexiclaw. After a brief delay, all AoE circles explode, inflicting moderate damage and applying a stackable
 Vulnerability Up to anyone caught in the blast(s).
At this point, Ruby Weapon will now cast either Liquefaction or Undermine at random.
- Undermine - causes all cracks to explode after a brief delay, indicated by a glowing telegraph surrounding all crack-lines. To avoid, players must move away from the cracks or stand between them, as failure to do so will result in high damage and a stack of
 Vulnerability Up.
- Liquefaction - causes the entire arena to degrade into swirling quick-sand that slowly pulls all players into the ground. To avoid being dragged to an early grave, players must stand on the cracks.
After casting one of these abilities, Ruby Weapon will retract its claws and the fight resumes as normal.
- Ruby Ray - causes Ruby Weapon to face a random player and charge up a massive straight-line AoE that will slaughter anyone standing in its path. As the name implies, Ruby Ray is indicated by a swelling of red energy. Once you see Ruby Weapon charging up, move behind it (or beside it) as soon as possible.
- Helioclaw - causes Ruby Weapon to hover in the air and plant its flexible claws into the earth once more. While hovering, three AoE circles will form beneath Ruby Weapon, as well as a tri-lined "fan" pattern. After a brief delay, the AoE circles beneath Ruby Weapon will continuously explode while traveling in the direction of the pattern. To avoid, players should stand in-between the fan-lines and be ready to move away from the center (initially), then inward as the circles begin traveling to the outside of the arena.
- High-Powered Homing Laser - applies a stack-marker to two random players. As a result, the group will need to split in half to help soak each marker.
- Ravensflight - causes Ruby Weapon to leap to the outer edge of the battlefield and begin charging up. After a delay, Ruby Weapon will repeatedly dash across the arena in different directions, inflicting high damage to anyone caught in its path. Whilst charging up, telegraphs will display the order (and direction) of Ruby Weapon's flight, giving players a brief opportunity to discern safe locations. Anyone caught in Ruby Weapon's path will suffer high damage, and poor placement can easily result in taking multiple hits in a row. Watch out!
- Ruby Dynamics - after completing its flight-path, Ruby Weapon will land in the arena and prepare the swipe the entire arena with its extended claws, indicated by a massive donut AoE. To avoid, players must move within Ruby Weapon's hitbox as soon as possible.
- Homing Laser - marks the entire raid with large AoE circles, forcing everyone to spread out. After a brief delay, all circles will explode simultaneously for high damage. As always, make sure not to overlap other players with your own AoE circle.
From here on, Ruby Weapon will cycle through all previously displayed abilities until the second Ravensflight. If not defeated by then, Ruby Weapon will begin to long-cast a special version of Optimized Ultima. If Ruby Weapon survives long enough to successfully cast Optimized Ultima, the raid will be unavoidably wiped.
If Ruby Weapon is defeated, players are treated to a transitional animation into a new phase. Unlike similar fights in the game, reaching the next phase serves as a checkpoint. As a result, wiping during the second phase will simply restart the fight at the beginning of the phase (rather than force the group to restart from the first phase).
(Phase 2) Nael van Darnus Abilities
- Meteor Project - starts a background timer that eventually leads to the summoning of Dalamud. The timer's progress will be indicated via text-comments throughout the course of the battle. Players will also notice the backdrop gradually undergoing various changes. At the timers climax, Dalamud crashes down into the background, resulting in a catastrophic spectacle that heavily damages the entire raid.
- Negative Personae - spawns two Nael-themed adds - each called Raven's Image - which must be tanked away from each other, one add per tank. Whilst these adds are alive, Nael van Darnus will remain untargetable.
- Meteor Stream - causes all damage dealers to be marked with a blue-circle AoE shortly after the adds arrive. These circles will eventually inflict high damage to all marked players (and anyone else caught in their AoE circles), so be sure to spread out and avoid overlapping.
- Raven's Claw - causes both Raven's Image adds to simultaneously assault their primary target with a devastating 5-hit tank-buster. Due to being a multi-hit combo rather than a single blow, tanks may be caught off-guard by the staggered damage. Make sure to utilize mitigation cooldowns!
At this point, the group will have to contend with another batch of Meteor Stream (AoE circles) and will very likely notice the change of atmosphere and background, with Dalamud fully visible as it hurtles towards the ground. By now, both adds should either be slain (or close to death), rendering Nael van Darnus targetable. Once Dalamud has fully descended, the entire raid will take tremendous damage. Assuming the raid survives, Nael will recast Meteor Project, creating a new background timer that will lead to another summoning of Dalamud.
- Magitek Meteor - causes Nael to summon an enormous meteor that will slowly descend into the battlefield over time.
- Magitek Comet - summons four comets that plummet into the arena (indicated by proximity markers), dealing damage to all players based on how close they are to the point(s) of impact. Due to falling in a circle around Nael, all players should move into her hitbox to avoid the brunt of the damage. Shortly after the comets have landed, players will notice the Magitek Meteor slowly reaching the arena centre. Players must hide behind fallen comets before the Magitek Meteor hits the ground - failure to do so results in a grisly demise.
- Mark II Magitek Meteor - creates four small circle-telegraphs within the arena that will slowly move in a direction indicated by arrows within the circle. After travelling a short distance, comets will land at the final location. If a comet is allowed to hit the platform, the raid will immediately be wiped. To prevent this, players must 'catch' the comets by standing within the circle-telegraphs after they have stopped moving. However, 'catching' a comet will inflict continuous damage to the player and render them unable to act. Players who did not catch a comet will need to destroy the caught comets in order to save their teammates from being crushed to death. It is wise to have each tank catch a comet, then have free members of the raid destroy comets caught by any non-tanks first.
- Bradamante - causes Nael to attack players via two straight-line AoEs. Simply move out of the telegraph(s) as soon as possible.
By now, the Meteor Project Timer (2) will be nearing completion, causing Dalamud to descend once again and inflict massive raid-wide damage. Assuming the raid survives the ordeal, Nael van Darnus will refresh the timer with a third and final Meteor Project.
- Outrage - causes Nael to repeatedly bombard the raid with unavoidable raid-wide damage until she is defeated. Players will have until Dalamud descends for the third time to achieve victory. If Nael has not been defeated by then, Dalamud's fall will obliterate the raid and force you to restart the fight from the beginning of the phase.


