Difference between revisions of "The Tower of Babil"
| Line 66: | Line 66: | ||
#Arrive at the Iron Womb. 0/1 | #Arrive at the Iron Womb. 0/1 | ||
#Defeat [[Anima (Boss)|Anima]]. 0/1 | #Defeat [[Anima (Boss)|Anima]]. 0/1 | ||
==Enemies== | |||
* [[Babil Slasher]] | |||
* [[Babil Nimrod]] | |||
* [[Babil Bit]] | |||
* [[Babil Satellite]] | |||
* [[Babil Canis Pugnax]] | |||
* [[Tempered Imperial]] (Machinist) | |||
* [[Tempered Imperial]] (Lancer) | |||
* [[Tempered Imperial]] (Marauder) | |||
* [[Babil Reaper]] | |||
* [[Tempered Imperial]] (Rogue) | |||
* [[Babil Predator]] | |||
* [[Babil Sky Armor]] | |||
* [[Babil Helldiver]] | |||
* [[Babil Colossus]] | |||
* [[Babil Rearguard]] | |||
* [[Babil Avenger]] | |||
* [[Babil Death Machine]] | |||
* [[Tempered Imperial]] (Corrupted) | |||
* [[Babil Hexadrone]] | |||
* [[Babil Gunship]] | |||
* [[Babil Roader]] | |||
* [[Babil Armored Weapon]] | |||
* [[Babil Hypertuned Specimen]] | |||
==Bosses== | ==Bosses== | ||
Latest revision as of 19:06, 11 October 2024
The Tower of Babil
- Level
- 83 (Sync: 84)
- Item Level
- 505
- Difficulty
- Normal
- Party size
- Light Party
4 man • 1 1
1  2
2 
- Unsyncing
- Allowed
- Time limit
- 90 minutes
- Duty Finder
- Dungeons (Endwalker)
- Roulette
- Leveling
- Req. quest
 Gateway of the Gods
- Entrance
- Garlemald (X:10.9, Y:7.9, Z:-1.7)
- Modes
- Duty Support, Trust, Explorer
- Trust EXP
- 7,590,500
- Patch
- 6.0
“From the ruins of the Garlean imperial palace rises the Tower of Babil, a monstrous edifice constructed by Fandaniel and Zenos's enthralled hordes. While its exact purpose has yet to be ascertained, it is here that the would-be orchestrators of the Final Days await the Warrior of Light, who now spearheads a daring mission to infiltrate the tower and vanquish the Telophoroi once and for all.
— In-game description
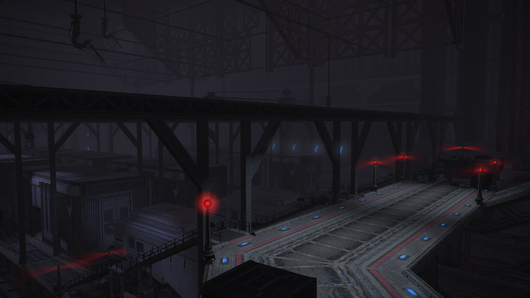
The Tower of Babil is a level 83 dungeon introduced in patch 6.0 with Endwalker.
Duty Support
- Party member selection is available.
| G'raha Tia | Thancred | Urianger | Alphinaud | Alisaie | Y'shtola | Estinien | |
|---|---|---|---|---|---|---|---|

|

|

|

|

|

|

| |
| Class | |||||||
| Role | Any | Tank | Healer | Healer | DPS | DPS | DPS |
Objectives
- Arrive at Magitek Servicing. 0/1
- Clear Magitek Servicing. 0/1
- Arrive at Martial Conditioning. 0/1
- Clear Martial Conditioning. 0/1
- Arrive at the Iron Womb. 0/1
- Defeat Anima. 0/1
Enemies
- Babil Slasher
- Babil Nimrod
- Babil Bit
- Babil Satellite
- Babil Canis Pugnax
- Tempered Imperial (Machinist)
- Tempered Imperial (Lancer)
- Tempered Imperial (Marauder)
- Babil Reaper
- Tempered Imperial (Rogue)
- Babil Predator
- Babil Sky Armor
- Babil Helldiver
- Babil Colossus
- Babil Rearguard
- Babil Avenger
- Babil Death Machine
- Tempered Imperial (Corrupted)
- Babil Hexadrone
- Babil Gunship
- Babil Roader
- Babil Armored Weapon
- Babil Hypertuned Specimen
Bosses
Note that failing any mechanics in these fights will result in the player who failed them receiving a two minute stacking ![]() Vulnerability Up debuff.
Vulnerability Up debuff.
 Barnabas
At the start of the fight, the boss will perform a Ground and Pound on Lugae, and summon a ring around the arena that gives the player a fifteen second ![]() Electrocution debuff, dealing damage over time.
Electrocution debuff, dealing damage over time.
- Ground and Pound: Line AOE with a delayed marking that targets a random player
- Dynamic Pound: The boss moves to the north edge of the arena and a line AoE appears across the stage. It will pulse with a Polarity, while players are assigned a Polarity of their own. Players with the same Polarity as the AoE's Polarity will be pushed back, and players with a Polarity that is opposite the AoE's Polarity will be pulled in. Therefore if their polarity is the opposite of the one on the AoE they must move away to the edge of the arena (so they'll be pulled in to a safe spot). If they are the same Polarity, they must move to the edge of the AoE (so they'll be pushed into a safe spot). When the cast finishes, players will be stunned in place and pushed/pulled towards the AoE in accordance with their polarity. Failing this could also knock players into the ring at the edge of the arena.
- Shocking Force: A random player receives a stack marker, requiring all players to stack in one place to mitigate damage.
- Dynamic Scrapline: Both the players and the boss receive a Polarity and are tethered together. The boss also calls a point-blank AoE. The mechanics are the same as Dynamic Pound: same-Polarity will cause a knockback, opposite-Polarity will cause a pulled-in effect. Failing this mechanic deals heavy damage and considerable knockback.
- Thundercall: The boss summons three lightning orbs around the arena and drops a point-blank AoE. Players must stand in the safe spaces away from the boss and between the orbs when they go off, or will take heavy damage and knockback.
These mechanics repeat until the boss is defeated.
 Lugae
Lugae
- Thermal Suppression: Unavoidable roomwide AoE. Mitigate and heal through.
- Magitek Missle: Two random players are targeted for AoEs. Move out of the way to avoid.
- Magitek Ray: The boss fires a line AoE in the direction of a random player.
The boss will then move to the center of the arena and the two plates will become active. the boss will use one of two abilities at random:
- Magitek Chakram: Summons Chakrams on the arena's perimeter. Players need to step on the Purple Plate to debuff themselves with Minimum so the attack misses them.
- Downpour: The arena fills with water and players are debuffed with
 Heavy and a stack of Breathless every second. After eight stacks, the player is automatically defeated. Stepping on the Green Plate will debuff players with Toad to remove the stacking debuff and resist further stacks.
During both of these phases the boss will fire various attacks so players must be ready to move, especially while debuffed with Toad and unable to use any skills or spells. It should be noted that stepping on the incorrect plate can be reversed if players simply step on the plate again.
- Magitek Explosion: Three large bombs will drop on the arena after the cast. After a short while they will explode in untelegraphed cross-line AoEs that extend across the arena. Players will need to determine the safe zone to stand in before they explode.
From here the boss will repeat attacks until it is defeated.
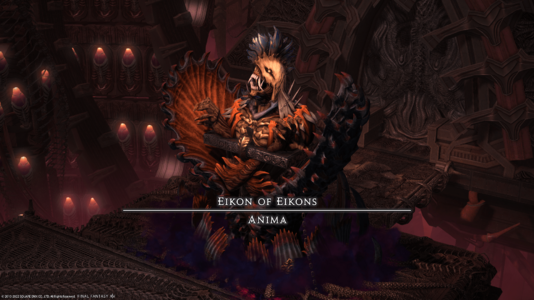
 Eikon of Eikons: Anima
- Lunar Nail: Nails will drop onto the edge of the arena and the center. The nails will tether to one another, and any of the quadrants of the arena that have tethers on all four sides will be filled by an AoE. Players must move to the safe quadrants of the arena to avoid.
- Phantom Pain: Cast to execute the AoE from Lunar Nail.
- Mega Graviton: Unavoidable room-wide AOE. This will summon a Mega-Graviton in each corner of the room.
- Pater Patriae: Line AOE down the center of the room.
- Aetherial Pull: Each Mega-Graviton will tether to a player, who must then run to the opposite side of the arena. The tether will turn from jagged arrows to a thin, straight line once players have moved far enough. Pater Patriae will fire, then players will be pulled towards their Mega-Graviton. If players don't move far enough away, they will take heavy damage and a
 Vulnerability Up stack. The pull-in can be prevented with actions such as Arm's Length and Surecast.
 - Boundless Pain: The boss will begin drawing Aether, and once the cast finishes, all players will be pulled to the center of the room and hit by a continuous AoE that slowly expands outwards. Players must run to the corners of the room to escape. Each second in the AoE deals about 2500 damage.
- Imperatum: Players are pulled into the floor to face the lower half of Anima, and a Chaos gauge slowly begins to fill. If players fail to defeat the lower half before the gauge fills, Oblivion will wipe the party.
- Obliviating Claw.: Two sets of claws will spawn on the east and west edges of the arena, one side before the other. Players must determine which side is spawning first, as they are the first claws that will move across the arena, and stand in the gap between claws, then repeat for the second set.
- Erupting Pain: Two random players are marked with following AoEs. Players should place these on the east and west edges of the arena and run across to the opposite side, being sure not to cross over each other while the remaining two players stay clear of them.
- Oblivion: If players defeated the lower Anima before the Chaos gauge fills, this will deal very little damage and take players back to the upper Anima fight where the attacks will repeat. If not, the party will be wiped here.
The boss will loop its attacks, minus Imperatum until it is defeated.
Loot
- See also: Imperial Weapons, Imperial Armor and Imperial Accessories
 Barnabas
 Lugae
Lugae
 Anima
Anima
- Anima Card (Drops at a fixed rate)
Treasure Coffers
 Treasure Coffer 1 (X:13.4 Y:13.8)
 Treasure Coffer 2 (X:10.8 Y:13.6)
 Treasure Coffer 3 (X:11.2 Y:11.9)
| Name | Type | Item Level | Rarity | Quantity |
|---|---|---|---|---|
| Imperial Coat of Fending | Body | 530 | Green | 1 |
| Imperial Coat of Maiming | Body | 530 | Green | 1 |
| Imperial Coat of Striking | Body | 530 | Green | 1 |
| Imperial Coat of Scouting | Body | 530 | Green | 1 |
| Imperial Coat of Aiming | Body | 530 | Green | 1 |
| Imperial Coat of Casting | Body | 530 | Green | 1 |
| Imperial Coat of Healing | Body | 530 | Green | 1 |
| Imperial Bracelet of Fending | Bracelets | 530 | Green | 1 |
| Imperial Bracelet of Slaying | Bracelets | 530 | Green | 1 |
| Imperial Bracelet of Aiming | Bracelets | 530 | Green | 1 |
| Imperial Bracelet of Casting | Bracelets | 530 | Green | 1 |
| Imperial Bracelet of Healing | Bracelets | 530 | Green | 1 |
| Imperial Ring of Fending | Ring | 530 | Green | 1 |
| Imperial Ring of Slaying | Ring | 530 | Green | 1 |
| Imperial Ring of Aiming | Ring | 530 | Green | 1 |
| Imperial Ring of Casting | Ring | 530 | Green | 1 |
| Imperial Ring of Healing | Ring | 530 | Green | 1 |
 Treasure Coffer 4 (X:10.3 Y:10.8)
Achievements
This duty is associated with the following achievements:
| Name | Points | Task | Reward | Patch |
|---|---|---|---|---|
| Mapping the Realm: The Tower of Babil | 10 | Discover every location within the Tower of Babil. | - | 6.0 |
Images
Gear Images
Dungeon Images
Other Images
Dungeon Dialogue Infographic Part 1 (credits: TrustInsighters)


