Difference between revisions of "Syrcus Tower"
| Line 43: | Line 43: | ||
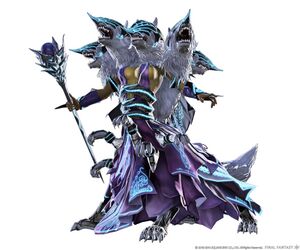
===Glasya Labolas=== | ===Glasya Labolas=== | ||
This fight occurs on a big, circular central platform surrounded on all sides by smaller platforms connected by one-way launch pads and is a two phase fight interrupted by an intermission in the middle. | |||
Unlike Scylla, you'll want to tank Glasya in the center of the arena. The usual ground-targeted AoEs appear here and can be dodged easily. Glasya also summons adds. Small ones (clockwork something?) can be killed easily, but form a line to Glasya and either draw power from him or give him power. A DPS or healer needs to stand in the small shaded area next to the add and intercept the line. This stuns the player but allows the add to be killed. | |||
Big adds which resemble Clockwork Men from Rise of Legends also spawn. They only spawned once for us, but may spawn multiple times in phase 1. These adds will spawn with six energy nodes that cause Glasya to reflect all magical and physical damage so long as they are connected to him. The clockwork men can intercept these power lines and should, as they cannot be brought below 1 HP until they are connected by power lines. | |||
Around 40% in our attempt, the intermission occurred. | |||
Intermission Phase - Assault on the platform rings | |||
Glasya will now return to the center of the stage and activate the three hitherto dormant teleportation pads on the central platform. He also begins to cast a spell, and the effect is simple - if you are still on the central platform when it completes, YOU DIE (which killed off a majority of our raid in our only attempt). | |||
You will be launched to an outer platform. Groups should, as a rule, stay together and DPS down the add which appears on the platform, then move on to the next platform in the circle (remember, these launch pads are one way only). Group A starts on the upper left, Group /b/ on the lower center, and Group C on the upper right. If all goes well, you will need to clear 3-4 platforms and then everyone returns to the center. | |||
In the event that most people die, the situation is still salvageable since any group can make a complete circuit of the outer arena and still kill all of the adds which spawn. | |||
It is possible that Glasya's health regenerates during the intermission but I am not certain. Safety is more important than speed at any rate. | |||
Glasya will occasionally bombard an outer platform with electricity, electrifying the platform and dealing heavy damage to anyone on it. So if the ground beneath you lights up, move. | |||
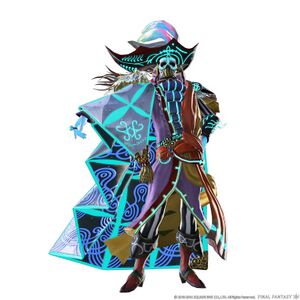
===Amon=== | ===Amon=== | ||
Revision as of 12:38, 8 July 2014
- Main article: Crystal Tower
Syrcus Tower is the second section of the Crystal Tower dungeon. It is scheduled to be released in patch 2.3. The raid composition is 3 tanks, 6 healers and 15 DPS (1:2:3 ratio). It differs from the classic 1:1:2 ratio of other dungeons and trials.
Players can only receive 1 piece of loot per week from the Syrcus Tower. It doesn't matter if the player Need or Greed, she can only have 1 piece of loot per week. Loot lockout resets every Tuesday 1:00 AM PDT.
- A fourth treasure chest may occasionally appear upon defeating the last boss of Syrcus Tower. The above restrictions do not apply to this treasure chest.
Unlock
- Quest: Syrcus Tower (Quest)
- Location: Rammbroes in Mor Dhona (x30,y12)
- Prerequisite: For Prosperity quest (Completion of Labyrinth of the Ancients questline)
Objectives
Bosses
Scylla
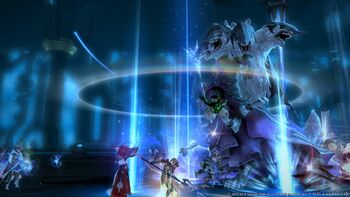
Scylla has two phases and can be tanked in the middle, or to the north. Most groups will choose middle, but north is highly preferable since you will need a lot of room to maneuver.
Phase 1
Scylla will spawn staves throughout the fight which cast an annoying centered AoE around themselves for about 2k damage. The AoE is a donut rather than a circle, meaning it is perfectly safe to be right next to it. More of a nuisance than a serious threat AS LONG AS people aren't frozen in the blast strip.
Three distinct pillars of Lightning are found in the boss arena. They will be needed for the intermission phase. Assign each group to a pillar - A takes far left, /b/ takes center, and C takes far right.
Elemental balls - Random DPS and healers will be marked to be followed by balls of elemental energy. Lightning balls appear purple, ice balls appear blue, and flame balls appear red. You will have to deal with this mechanic throughout the fight.
How to handle: Lightning ball - Neutralized by the lightning pillar. Running them into the lightning pillar energizes the pillar, which is denoted by panels of light on the ground next to the pillar. Three charges are needed and will produce a red marker indicating that the pillar is fully charged. Lightning balls detonate for heavy raidwide damage after about 15 seconds if not run into a pillar.
Ice ball - Trail a target and will freeze that target after a set duration of time. This is unavoidable and cannot be stopped. What you can (and should) do is make sure that people around you aren't caught in the freeze, an important consideration for melee. Thaws after 30 seconds. Flame ball - will chase a target and detonate after about 15 seconds. Can be used to thaw frozen targets, and you should. Thawing a frozen target leaves behind a patch of water on the ground which confers very high fire resistance.
In this phase Scylla will also be doing raidwide AoE and damage as a whole is fairly heavy, which can be problematic if the healers are undergeared.
Transition - Daybreak (she used this around 40% once, and 25% on our kill attempt)
Daybreak - Scylla casts Daybreak, which petrifies everyone in the room for 30 seconds. If your lightning pillars are not fully charged by this point, everyone is petrified, which can lead to a wipe (but can be salvaged if you have a healer LB3). How to avoid: it's the same mechanic as Ancient Flare from the artist formerly known as Acheron and now Phlegiston. Each group must stack on a small platform energized by the lightning orbs, which raises a shield that contains the Daybreak cast. If stacking is not properly performed, then the shield fails. As do you.
Phase 2
Adds spawn. Have the offtanks pick them up and burn them. Not really too threatening.
Ice orbs and Flame orbs continue to spawn. Lightning orbs no longer spawn. Continue to deal with the orb mechanic as before. Scylla will now cast Ancient Flare at regular intervals and it has a long cast time, meaning everyone should be able to see it coming. To handle this mechanic, stand in the puddles of water created by the thawed orbs, which confers high fire resistance. Ancient flare will evaporate the water and hit you for around 400 damage. Which is highly preferable to being hit for 4k damage if you lack the resistance.
Overall this fight is extremely hectic, reminiscent of Thanatos in the Labyrinth of the Ancients.
- When the blue ice ball tracks to a player, the player has to run towards a player with the red flaming ball. When the two balls collide they will cancel each other out. Normally the blue ball will freeze.
Glasya Labolas
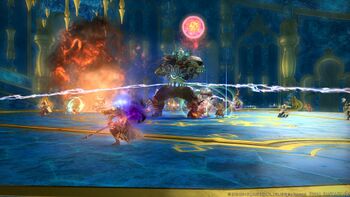
This fight occurs on a big, circular central platform surrounded on all sides by smaller platforms connected by one-way launch pads and is a two phase fight interrupted by an intermission in the middle.
Unlike Scylla, you'll want to tank Glasya in the center of the arena. The usual ground-targeted AoEs appear here and can be dodged easily. Glasya also summons adds. Small ones (clockwork something?) can be killed easily, but form a line to Glasya and either draw power from him or give him power. A DPS or healer needs to stand in the small shaded area next to the add and intercept the line. This stuns the player but allows the add to be killed.
Big adds which resemble Clockwork Men from Rise of Legends also spawn. They only spawned once for us, but may spawn multiple times in phase 1. These adds will spawn with six energy nodes that cause Glasya to reflect all magical and physical damage so long as they are connected to him. The clockwork men can intercept these power lines and should, as they cannot be brought below 1 HP until they are connected by power lines. Around 40% in our attempt, the intermission occurred.
Intermission Phase - Assault on the platform rings
Glasya will now return to the center of the stage and activate the three hitherto dormant teleportation pads on the central platform. He also begins to cast a spell, and the effect is simple - if you are still on the central platform when it completes, YOU DIE (which killed off a majority of our raid in our only attempt).
You will be launched to an outer platform. Groups should, as a rule, stay together and DPS down the add which appears on the platform, then move on to the next platform in the circle (remember, these launch pads are one way only). Group A starts on the upper left, Group /b/ on the lower center, and Group C on the upper right. If all goes well, you will need to clear 3-4 platforms and then everyone returns to the center. In the event that most people die, the situation is still salvageable since any group can make a complete circuit of the outer arena and still kill all of the adds which spawn.
It is possible that Glasya's health regenerates during the intermission but I am not certain. Safety is more important than speed at any rate. Glasya will occasionally bombard an outer platform with electricity, electrifying the platform and dealing heavy damage to anyone on it. So if the ground beneath you lights up, move.
Amon
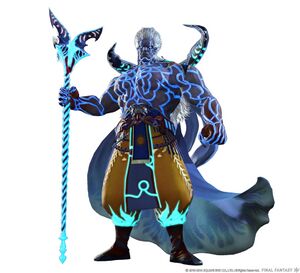
Hide behind the frozen people when he uses Curtain Call (similar mechanic to Meteor in King Behemoth).
Xande
Loot
Sands of Time - 30% droprate
Oil of Time - 30% droprate
Images
Lore
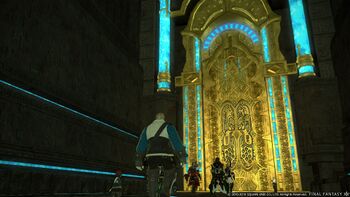
Having secured a path through the Labyrinth of the Ancients, the fellowship of NOAH finds itself before the entrance to the Crystal Tower proper. With the aid of their new comrades, Unei and Doga, the companions succeed in opening the gate whose workings had baffled even the brightest minds among them. Upon learning that dark forces have awakened within, the fellowship decides to suspend its investigative effort in favor of sealing off the tower. You must fight your way to the apex and defeat the resurrected Emperor Xande, that Eorzea might be free of his all-consuming ambition.
