Difference between revisions of "Worqor Zormor"
(→link= Ryoqor Terteh: Clearer instructions for third Fluffle Up) |
|||
| (23 intermediate revisions by 3 users not shown) | |||
| Line 12: | Line 12: | ||
| tomestones = | | tomestones = | ||
| entrance = Urqopacha | | entrance = Urqopacha | ||
| entrance-coordinates = | | entrance-coordinates = 13.1,32.7,3.3 | ||
| req-quest = The High Luminary | | req-quest = The High Luminary | ||
| modes = duty support, trust, explorer | | modes = duty support, trust, explorer | ||
| trust-exp = | | trust-exp = 6,689,500 | ||
| patch = 7.0 | | patch = 7.0 | ||
| release = Dawntrail | | release = Dawntrail | ||
}} {{TOC limit|3}} | }} {{TOC limit|3}} | ||
==Duty Support== | ==Duty Support== | ||
*Party member selection is available. | *Party member selection is available. | ||
{| {{STDT|pve align-left}} | {| {{STDT|pve align-left}} | ||
! | ! | ||
! Wuk Lamat | ! Wuk Lamat | ||
! | ! Alisaie | ||
! Krile | ! Krile | ||
|- | |- | ||
| | | | ||
| [[File:DS Wuk Lamat.png]] | | [[File:DS Wuk Lamat.png]] | ||
| [[File:DS | | [[File:DS Alisaie3.png]] | ||
| [[File:DS Krile.png]] | | [[File:DS Krile.png]] | ||
|- | |- | ||
| '''Class''' | | '''Class''' | ||
| {{WAR}} Intrepid | | {{WAR}} [[File:Red warrior.png|Warrior|20px|link=]] Intrepid | ||
| {{ | | [[File:Green Red Mage.png|Red Mage|20px|link=]] {{RDM}} [[Red Mage]] | ||
| {{PCT}} [[Pictomancer]] | | {{PCT}} [[Pictomancer]] | ||
|- | |- | ||
| Line 45: | Line 44: | ||
==Objectives== | ==Objectives== | ||
{{#ev:youtube|lp9wkxZJ5hE|350|right|Dungeon Guide by MTQcapture}} | |||
*Arrive in the calmgrounds. | |||
*Clear the calmgrounds. | |||
*Arrive on Morgardar Ridge. | |||
*Clear Morgardar Ridge. | |||
*Arrive in Karryor the Resting. | |||
*Defeat [[Gurfurlur]]. | |||
==Enemies== | ==Enemies== | ||
*[[Worqor Snowarbler]] | |||
*[[Worqor Biast]] | |||
*[[Lightning Sprite]] | |||
*[[Worqor Myrrlith]] | |||
*[[Ice Sprite]] | |||
*[[Fire Sprite]] | |||
*[[Worqor Anala]] | |||
*[[Worqor Longjaw]] | |||
*[[Worqor Sloth]] | |||
*[[Worqor Bloodsucker]] | |||
*[[Worqor Zu]] | |||
*[[Worqor Cloudtrap]] | |||
*[[Worqor Tulichu]] | |||
*[[Worqor Iguana]] | |||
*[[Worqor Pitcher Weed]] | |||
==Bosses== | ==Bosses== | ||
| Line 52: | Line 73: | ||
===[[File:Aggressive difficulty r5.png|link=]] [[Ryoqor Terteh]]=== | ===[[File:Aggressive difficulty r5.png|link=]] [[Ryoqor Terteh]]=== | ||
*'''Frosting Fracas''': Party-wide magical damage. Also causes a dangerous AoE to appear on the border of the arena. | |||
*'''Fluffle Up''': Summons four untargetable '''Rorrioh Teh''' adds, each with an orange arrow indicator denoting where they are facing. Two of them will telegraph an AoE ('''Ice Scream''') that covers a quadrant of the arena, followed by the other two. | |||
*'''Cold Feet''': The boss will tether and freeze two adds, temporarily delaying their cast as indicated with {{combat message|Ryoqor Terteh captures its own minions in ice!}} The unfrozen adds will fire their AoEs first, so move in front of the frozen adds, then dodge back to the previously unsafe locations. | |||
*'''Fluffle Up''': Summons four untargetable '''Qorrioh Teh'''. Two of them will telegraph a large point-blank AoE ('''Frozen Swirl'''), followed by the other two. The boss will freeze two with '''Cold Feet''' again, which can be handled as before. | |||
*'''Snowscoop''': The boss summons multiple untargetable '''Snowball''' adds on the sides of the arena. These will telegraph two sets of line AoEs ('''Snow Boulder'''), while each player will receive a spread AoE marker ('''Sparkling Sprinkling'''). Players should dodge the line AoEs while not overlapping. | |||
*'''Fluffle Up / Cold Feet''': Now summons four untargetable '''Rorrioh Teh''' adds and four untargetable '''Qorrioh Teh''' adds, which function as before. This time, there will be a combination of the circle and line AoEs. To resolve this variation, stand in the quadrant with both a frozen '''Rorrioh Teh''' add facing into it and a frozen '''Qorrioh Teh''' add in its middle, making sure not to step in circle AoEs from other quadrants. Once the unfrozen adds finish casting, move into the visible safe space. | |||
===[[File:Aggressive difficulty r5.png|link=]] [[Kahderyor]]=== | ===[[File:Aggressive difficulty r5.png|link=]] [[Kahderyor]]=== | ||
*'''Wind Unbound''': Party-wide magical damage. | |||
*'''Crystalline Crush''': Spawns a tower with a stack marker. The AoE will leave behind crystalline debris ({{combat message|The crystallized rock shatters into pieces!}}) | |||
*'''Earthen Shot''': Spread AoE on each player. The rock debris will also telegraph a large point-blank AoE with a yellow indicator. | |||
*'''Wind Shot''': Donut AoE on each player. The rock debris will now telegraph a donut AoE with a green indicator. Players should all stack within the safe spot of the green donut. | |||
*'''Crystalline Storm''': Spawns three narrow line AoEs that leave behind purple rock debris. | |||
*'''Wind Shot''': Donut AoE on each player. The rock debris telegraph AoEs to their sides, leaving narrow lines in the purple debris safe. | |||
*'''Earthen Shot''': Spread AoE on each player. The rock debris will now telegraph wide line AoEs that leave narrow regions safe. | |||
*'''Seed Crystals''': Spread marker AoE on each player. Will begin encasing each player in crystal, applying [[File:Seed crystals icon.png|link=]] '''Seed Crystals''', which will become [[File:Seed crystals icon.png|link=]] '''Crystal Burden''' upon expiration, preventing movement and slowing actions. If this effect expires, players will be inflicted with [[File:Seed crystals icon.png|link=]] '''Crystallized''' and die. Players must destroy the '''Crystalline Debris''' on them to remove the debuffs. | |||
*'''Sharpened Sights''': Will grant a buff causing a telegraphed gaze attack ('''Eye of the Fierce''') to be combined with its next two attacks. | |||
**'''Stalagmite Circle''': Telegraphed large point-blank AoE. | |||
**'''Cyclonic Ring''': Telegraphed donut AoE. | |||
===[[File:Aggressive difficulty r6.png|link=]] Dawn's Elector: [[Gurfurlur]]=== | ===[[File:Aggressive difficulty r6.png|link=]] Dawn's Elector: [[Gurfurlur]]=== | ||
*'''Heaving Haymaker''': Party-wide magical damage. Also spawns a dangerous AoE around the arena. | |||
*'''Stonework''': Spawns a small square AoE that will become an elemental image, initially either fire or water | |||
**'''Water''': Telegraphed knockback and magical damage ('''Great Flood''') from one side of the arena. Can be prevented with knockback immune actions. | |||
**'''Fire''': Cascading square AoEs that eventually hit the entire arena (similar to Evil Earth in [[Eden's Gate: Sepulture]]). Also gives each player a spread AoE marker ('''Volcanic Drop'''). | |||
*'''Sledgehammer''': Three-hit line stack AoE. Heal and mitigate through. | |||
*'''Arcane Stomp''': Spawns multiple orbs that will begin moving towards the boss, applying a stack of {{buff|damage up 2}} [[Damage Up]]. If the boss receives too many stacks, its next attack will wipe the party. Players must soak the orbs to prevent them from reaching the boss, which will also grant a stack of damage up to the player. | |||
*'''Enduring Glory''': Party-wide magical damage. Will wipe the party if the boss has too many Damage Up stacks. Can use a tank limit break to survive if he has more than 6 stacks. | |||
*'''Stonework''': Now spawns a wind image in the middle the arena, telegraphing a knockback and dealing magical damage ('''Windswrath'''). Will also spawn four tornadoes that will move along a row of the arena, which should be dodged. Note that there will be a second knockback from the middle when the tornadoes are active. The knockbacks can be prevented with knockback immune actions. | |||
*'''Stonework''': Spawns both a fire and water image, causing both of their original attacks to be combined. | |||
==Loot== | ==Loot== | ||
{{see also|Zormor Weapons|Zormor Armor|Zormor Accessories}} | {{see also|Zormor Weapons|Zormor Armor|Zormor Accessories}} | ||
===[[File:Silver Coffer (small).png|link=]] [[Ryoqor Terteh]]=== | ===[[File:Silver Coffer (small).png|link=]] [[Ryoqor Terteh]]=== | ||
{{Drops list|Ryoqor Terteh}} | |||
===[[File:Silver Coffer (small).png|link=]] [[Kahderyor]]=== | ===[[File:Silver Coffer (small).png|link=]] [[Kahderyor]]=== | ||
{{Drops list|Kahderyor}} | |||
===[[File:Gold Coffer (small).png|link=]] [[Gurfurlur]]=== | ===[[File:Gold Coffer (small).png|link=]] [[Gurfurlur]]=== | ||
*{{Item icon|Ryoqor Terteh Card}} (Drops at a fixed rate.) | |||
{{Drops list|Gurfurlur}} | |||
===Treasure Coffers=== | ===Treasure Coffers=== | ||
====[[File:Bronze Coffer (small).png|link=]] Treasure Coffer 1 (X: | ====[[File:Bronze Coffer (small).png|link=]] Treasure Coffer 1 (X:9.3 Y:12.2)==== | ||
{{Drops table header|show-levels=n}} | {{Drops table header|show-levels=n}} | ||
{{Drops table row|Zormor Chaplets of Fending}} | |||
{{Drops table row|Zormor Chaplets of Maiming}} | |||
{{Drops table row|Zormor Chaplets of Striking}} | |||
{{Drops table row|Zormor Chaplets of Scouting}} | |||
{{Drops table row|Zormor Chaplets of Aiming}} | |||
{{Drops table row|Zormor Chaplets of Casting}} | |||
{{Drops table row|Zormor Chaplets of Healing}} | |||
{{Drops table row|Zormor Gaiters of Fending}} | |||
{{Drops table row|Zormor Gaiters of Maiming}} | |||
{{Drops table row|Zormor Sandals of Striking}} | |||
{{Drops table row|Zormor Sandals of Scouting}} | |||
{{Drops table row|Zormor Gaiters of Aiming}} | |||
{{Drops table row|Zormor Gaiters of Casting}} | |||
{{Drops table row|Zormor Sandals of Healing}} | |||
{{Drops table row|Zormor Bracelet of Fending}} | |||
{{Drops table row|Zormor Bracelet of Slaying}} | |||
{{Drops table row|Zormor Bracelet of Aiming}} | |||
{{Drops table row|Zormor Bracelet of Casting}} | |||
{{Drops table row|Zormor Bracelet of Healing}} | |||
{{Drops table row|Zormor Ring of Fending}} | |||
{{Drops table row|Zormor Ring of Slaying}} | |||
{{Drops table row|Zormor Ring of Aiming}} | |||
{{Drops table row|Zormor Ring of Casting}} | |||
{{Drops table row|Zormor Ring of Healing}} | |||
{{Table footer}} | {{Table footer}} | ||
====[[File:Bronze Coffer (small).png|link=]] Treasure Coffer 2 (X: | ====[[File:Bronze Coffer (small).png|link=]] Treasure Coffer 2 (X:8.0 Y:11.9)==== | ||
{{Drops table header|show-levels=n}} | {{Drops table header|show-levels=n}} | ||
{{Drops table row|Zormor Cap of Fending}} | |||
{{Drops table row|Zormor Cap of Maiming}} | |||
{{Drops table row|Zormor Cap of Striking}} | |||
{{Drops table row|Zormor Cap of Scouting}} | |||
{{Drops table row|Zormor Turban of Aiming}} | |||
{{Drops table row|Zormor Cap of Casting}} | |||
{{Drops table row|Zormor Turban of Healing}} | |||
{{Drops table row|Zormor Bottoms of Fending}} | |||
{{Drops table row|Zormor Bottoms of Maiming}} | |||
{{Drops table row|Zormor Sarouel of Striking}} | |||
{{Drops table row|Zormor Sarouel of Scouting}} | |||
{{Drops table row|Zormor Bottoms of Aiming}} | |||
{{Drops table row|Zormor Bottoms of Casting}} | |||
{{Drops table row|Zormor Sarouel of Healing}} | |||
{{Drops table row|Zormor Earrings of Fending}} | |||
{{Drops table row|Zormor Earrings of Slaying}} | |||
{{Drops table row|Zormor Earrings of Aiming}} | |||
{{Drops table row|Zormor Earrings of Casting}} | |||
{{Drops table row|Zormor Earrings of Healing}} | |||
{{Drops table row|Zormor Necklace of Fending}} | |||
{{Drops table row|Zormor Necklace of Slaying}} | |||
{{Drops table row|Zormor Necklace of Aiming}} | |||
{{Drops table row|Zormor Necklace of Casting}} | |||
{{Drops table row|Zormor Necklace of Healing}} | |||
{{Table footer}} | {{Table footer}} | ||
====[[File:Bronze Coffer (small).png|link=]] Treasure Coffer 3 (X: | ====[[File:Bronze Coffer (small).png|link=]] Treasure Coffer 3 (X:8.1 Y:11.2)==== | ||
{{Drops table header|show-levels=n}} | {{Drops table header|show-levels=n}} | ||
{{Drops table row|Zormor Poncho of Fending}} | |||
{{Drops table row|Zormor Poncho of Maiming}} | |||
{{Drops table row|Zormor Poncho of Striking}} | |||
{{Drops table row|Zormor Poncho of Scouting}} | |||
{{Drops table row|Zormor Poncho of Aiming}} | |||
{{Drops table row|Zormor Poncho of Casting}} | |||
{{Drops table row|Zormor Poncho of Healing}} | |||
{{Drops table row|Zormor Bracelet of Fending}} | |||
{{Drops table row|Zormor Bracelet of Slaying}} | |||
{{Drops table row|Zormor Bracelet of Aiming}} | |||
{{Drops table row|Zormor Bracelet of Casting}} | |||
{{Drops table row|Zormor Bracelet of Healing}} | |||
{{Drops table row|Zormor Ring of Fending}} | |||
{{Drops table row|Zormor Ring of Slaying}} | |||
{{Drops table row|Zormor Ring of Aiming}} | |||
{{Drops table row|Zormor Ring of Casting}} | |||
{{Drops table row|Zormor Ring of Healing}} | |||
{{Table footer}} | {{Table footer}} | ||
====[[File:Bronze Coffer (small).png|link=]] Treasure Coffer 4 (X: | ====[[File:Bronze Coffer (small).png|link=]] Treasure Coffer 4 (X:9.8 Y:9.4)==== | ||
{{Drops table header|show-levels=n}} | {{Drops table header|show-levels=n}} | ||
{{Drops table row|Paladin's Zormor Arms (IL 660)}} | |||
{{Drops table row|Zormor War Axe}} | |||
{{Drops table row|Zormor Greatsword}} | |||
{{Drops table row|Zormor Gunblade}} | |||
{{Drops table row|Zormor Spear}} | |||
{{Drops table row|Zormor Sickle}} | |||
{{Drops table row|Zormor Tonfas}} | |||
{{Drops table row|Zormor Tachi}} | |||
{{Drops table row|Zormor Daggers}} | |||
{{Drops table row|Zormor Twinfangs}} | |||
{{Drops table row|Zormor Bow}} | |||
{{Drops table row|Zormor Culverin}} | |||
{{Drops table row|Zormor Chakrams}} | |||
{{Drops table row|Zormor Rod}} | |||
{{Drops table row|Zormor Grimoire}} | |||
{{Drops table row|Zormor Rapier}} | |||
{{Drops table row|Zormor Fan Brush}} | |||
{{Drops table row|Zormor Cane}} | |||
{{Drops table row|Zormor Codex}} | |||
{{Drops table row|Zormor Star Globe}} | |||
{{Drops table row|Zormor Dzi}} | |||
{{Drops table row|Zormor Earrings of Fending}} | |||
{{Drops table row|Zormor Earrings of Slaying}} | |||
{{Drops table row|Zormor Earrings of Aiming}} | |||
{{Drops table row|Zormor Earrings of Casting}} | |||
{{Drops table row|Zormor Earrings of Healing}} | |||
{{Drops table row|Zormor Necklace of Fending}} | |||
{{Drops table row|Zormor Necklace of Slaying}} | |||
{{Drops table row|Zormor Necklace of Aiming}} | |||
{{Drops table row|Zormor Necklace of Casting}} | |||
{{Drops table row|Zormor Necklace of Healing}} | |||
{{Table footer}} | {{Table footer}} | ||
| Line 92: | Line 239: | ||
==Images== | ==Images== | ||
===Gear Images=== | ===Gear Images=== | ||
[[File:Gear worqor zormor.jpg|512px]] | |||
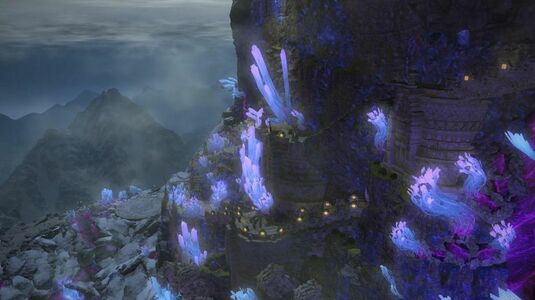
===Dungeon Images=== | ===Dungeon Images=== | ||
<gallery mode="packed" heights=200px> | <gallery mode="packed" heights=200px> | ||
Dawntrail London screenshot 4.jpg | |||
Worqor Zormor intro.jpg | |||
Worqor Zormor boss.jpg | |||
Dawntrail dungeon 2.jpg|Concept art | |||
</gallery> | </gallery> | ||
{{Duties nav|dungeon}} | {{Duties nav|dungeon}} | ||
Latest revision as of 14:16, 6 September 2024
Worqor Zormor

- Level
- 93 (Sync: 94)
- Item Level
- 635
- Difficulty
- Normal
- Party size
- Light Party
4 man • 1 1
1  2
2 
- Unsyncing
- Not Allowed
- Time limit
- 90 minutes
- Duty Finder
- Dungeons (Dawntrail)
- Roulette
- Leveling
- Req. quest
 The High Luminary
- Entrance
- Urqopacha (X:13.1, Y:32.7, Z:3.3)
- Modes
- Duty Support, Trust, Explorer
- Trust EXP
- 6,689,500
- Patch
- 7.0
“Wuk Lamat has undertaken the Feat of Proof, a challenge which has you seeking the whereabouts of the elector, High Luminary Gurfurlur. The search immerses you in the culture and history of the Yok Huy, and ultimately leads your party to the foot of the sacred peak, Worqor Zormor. The elector, you are told, awaits you at its summit, but simply scaling the soaring mountain─and surviving the mountain's denizens─will be a feat in and of itself!
— In-game description
Worqor Zormor is a level 93 dungeon introduced in patch 7.0 with Dawntrail.
Duty Support
- Party member selection is available.
| Wuk Lamat | Alisaie | Krile | |
|---|---|---|---|

|

|

| |
| Class | |||
| Role | Tank or DPS | Healer or DPS | DPS |
Objectives
- Arrive in the calmgrounds.
- Clear the calmgrounds.
- Arrive on Morgardar Ridge.
- Clear Morgardar Ridge.
- Arrive in Karryor the Resting.
- Defeat Gurfurlur.
Enemies
- Worqor Snowarbler
- Worqor Biast
- Lightning Sprite
- Worqor Myrrlith
- Ice Sprite
- Fire Sprite
- Worqor Anala
- Worqor Longjaw
- Worqor Sloth
- Worqor Bloodsucker
- Worqor Zu
- Worqor Cloudtrap
- Worqor Tulichu
- Worqor Iguana
- Worqor Pitcher Weed
Bosses
Note that failing any mechanics in these fights will result in the player who failed them receiving a 1 minute stacking ![]() Vulnerability Up debuff.
Vulnerability Up debuff.
 Ryoqor Terteh
- Frosting Fracas: Party-wide magical damage. Also causes a dangerous AoE to appear on the border of the arena.
- Fluffle Up: Summons four untargetable Rorrioh Teh adds, each with an orange arrow indicator denoting where they are facing. Two of them will telegraph an AoE (Ice Scream) that covers a quadrant of the arena, followed by the other two.
- Cold Feet: The boss will tether and freeze two adds, temporarily delaying their cast as indicated with Ryoqor Terteh captures its own minions in ice! The unfrozen adds will fire their AoEs first, so move in front of the frozen adds, then dodge back to the previously unsafe locations.
- Fluffle Up: Summons four untargetable Qorrioh Teh. Two of them will telegraph a large point-blank AoE (Frozen Swirl), followed by the other two. The boss will freeze two with Cold Feet again, which can be handled as before.
- Snowscoop: The boss summons multiple untargetable Snowball adds on the sides of the arena. These will telegraph two sets of line AoEs (Snow Boulder), while each player will receive a spread AoE marker (Sparkling Sprinkling). Players should dodge the line AoEs while not overlapping.
- Fluffle Up / Cold Feet: Now summons four untargetable Rorrioh Teh adds and four untargetable Qorrioh Teh adds, which function as before. This time, there will be a combination of the circle and line AoEs. To resolve this variation, stand in the quadrant with both a frozen Rorrioh Teh add facing into it and a frozen Qorrioh Teh add in its middle, making sure not to step in circle AoEs from other quadrants. Once the unfrozen adds finish casting, move into the visible safe space.
Kahderyor
- Wind Unbound: Party-wide magical damage.
- Crystalline Crush: Spawns a tower with a stack marker. The AoE will leave behind crystalline debris (The crystallized rock shatters into pieces!)
- Earthen Shot: Spread AoE on each player. The rock debris will also telegraph a large point-blank AoE with a yellow indicator.
- Wind Shot: Donut AoE on each player. The rock debris will now telegraph a donut AoE with a green indicator. Players should all stack within the safe spot of the green donut.
- Crystalline Storm: Spawns three narrow line AoEs that leave behind purple rock debris.
- Wind Shot: Donut AoE on each player. The rock debris telegraph AoEs to their sides, leaving narrow lines in the purple debris safe.
- Earthen Shot: Spread AoE on each player. The rock debris will now telegraph wide line AoEs that leave narrow regions safe.
- Seed Crystals: Spread marker AoE on each player. Will begin encasing each player in crystal, applying
 Seed Crystals, which will become Crystal Burden upon expiration, preventing movement and slowing actions. If this effect expires, players will be inflicted with Crystallized and die. Players must destroy the Crystalline Debris on them to remove the debuffs.
 - Sharpened Sights: Will grant a buff causing a telegraphed gaze attack (Eye of the Fierce) to be combined with its next two attacks.
- Stalagmite Circle: Telegraphed large point-blank AoE.
- Cyclonic Ring: Telegraphed donut AoE.
 Dawn's Elector: Gurfurlur
- Heaving Haymaker: Party-wide magical damage. Also spawns a dangerous AoE around the arena.
- Stonework: Spawns a small square AoE that will become an elemental image, initially either fire or water
- Water: Telegraphed knockback and magical damage (Great Flood) from one side of the arena. Can be prevented with knockback immune actions.
- Fire: Cascading square AoEs that eventually hit the entire arena (similar to Evil Earth in Eden's Gate: Sepulture). Also gives each player a spread AoE marker (Volcanic Drop).
- Sledgehammer: Three-hit line stack AoE. Heal and mitigate through.
- Arcane Stomp: Spawns multiple orbs that will begin moving towards the boss, applying a stack of
 Damage Up. If the boss receives too many stacks, its next attack will wipe the party. Players must soak the orbs to prevent them from reaching the boss, which will also grant a stack of damage up to the player.
 - Enduring Glory: Party-wide magical damage. Will wipe the party if the boss has too many Damage Up stacks. Can use a tank limit break to survive if he has more than 6 stacks.
- Stonework: Now spawns a wind image in the middle the arena, telegraphing a knockback and dealing magical damage (Windswrath). Will also spawn four tornadoes that will move along a row of the arena, which should be dodged. Note that there will be a second knockback from the middle when the tornadoes are active. The knockbacks can be prevented with knockback immune actions.
- Stonework: Spawns both a fire and water image, causing both of their original attacks to be combined.
Loot
- See also: Zormor Weapons, Zormor Armor and Zormor Accessories
 Ryoqor Terteh
Kahderyor
 Gurfurlur
 Ryoqor Terteh Card (Drops at a fixed rate.)
Treasure Coffers
 Treasure Coffer 1 (X:9.3 Y:12.2)
Treasure Coffer 2 (X:8.0 Y:11.9)
Treasure Coffer 3 (X:8.1 Y:11.2)
| Name | Type | Item Level | Rarity | Quantity |
|---|---|---|---|---|
| Body | 660 | Green | 1 | |
| Body | 660 | Green | 1 | |
| Body | 660 | Green | 1 | |
| Body | 660 | Green | 1 | |
| Body | 660 | Green | 1 | |
| Body | 660 | Green | 1 | |
| Body | 660 | Green | 1 | |
| Bracelets | 660 | Green | 1 | |
| Bracelets | 660 | Green | 1 | |
| Bracelets | 660 | Green | 1 | |
| Bracelets | 660 | Green | 1 | |
| Bracelets | 660 | Green | 1 | |
| Ring | 660 | Green | 1 | |
| Ring | 660 | Green | 1 | |
| Ring | 660 | Green | 1 | |
| Ring | 660 | Green | 1 | |
| Ring | 660 | Green | 1 |
Treasure Coffer 4 (X:9.8 Y:9.4)
Achievements
This duty is associated with the following achievements:
| Name | Points | Task | Reward | Patch |
|---|---|---|---|---|
| 10 | Discover every location within Worqor Zormor. | - | 7.0 |
Images
Gear Images

Dungeon Images


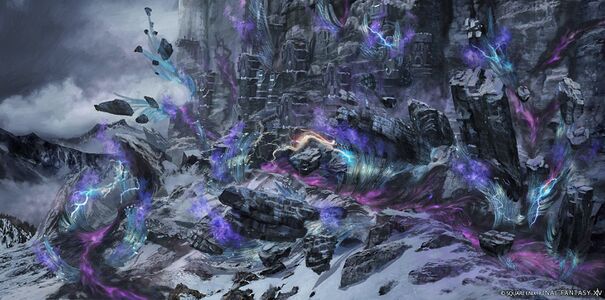
Concept art


