Difference between revisions of "The Minstrel's Ballad: Ultima's Bane"
Tag: Undo |
|||
| (47 intermediate revisions by 18 users not shown) | |||
| Line 1: | Line 1: | ||
{{ | {{EX notice}} | ||
[[ | {{otheruses|the level 50 challenge-mode [[trial]]|the [[Main Scenario]] [[trial]]|The Porta Decumana|the [[Ultimate Raid]] involving [[The Ultima Weapon]]|The Weapon's Refrain (Ultimate)}} | ||
[[ | {{Duty infobox | ||
[[ | | name = The Minstrel's Ballad: Ultima's Bane | ||
The Minstrel's Ballad: Ultima's Bane | | image = The minstrels ballad ultimas bane banner1.png | ||
| description = Inspired by tales of your victory over [[the Ultima Weapon]], the wandering minstrel come to Revenant's Toll has composed an epic ballad in your honor. However, as minstrels are wont to do, he has embellished certain details for dramatic effect. Although it can hardly be considered an accurate retelling, you cannot deny his skill with words, for as you listen to his melodious voice, you find yourself reliving the events of that fateful day in [[the Praetorium]]... | |||
| type = Trial | |||
| level = 50 | |||
| level-sync = 50 | |||
| ilvl = 61 | |||
| ilvl-sync = | |||
| difficulty = Extreme | |||
| size = 8 | |||
| time-limit = 60 | |||
| duty-finder = High-end Trials (A Realm Reborn) | |||
| roulette = mentor | |||
| location = Porta Decumana | |||
| region = Thanalan | |||
| tomestones = 15 poetics | |||
| req-quest = The Ultimate Ballad | |||
| patch = 2.1 | |||
| echo = ex-trial | |||
}} {{TOC limit|3}} | |||
==Strategy== | ==Strategy== | ||
{{#ev:youtube|p45TZywoy08|350|right}} | |||
===[[File:Aggressive difficulty r6.png|link=]] Anti-Eikon Warmachina: [[The Ultima Weapon]]=== | |||
*Ultima is a fight of speed, ability to dodge, and coordination. It's not a particularly hard fight as much as it is knowing what is coming next. Very little is random in this fight. Who is targeted by orbs, which players get eruptions, and where the magitek bits target are the only real random factors in the fight. | *Ultima is a fight of speed, ability to dodge, and coordination. It's not a particularly hard fight as much as it is knowing what is coming next. Very little is random in this fight. Who is targeted by orbs, which players get eruptions, and where the magitek bits target are the only real random factors in the fight. | ||
*Three phases are make or break points in this fight. Ifrit is the first. People tend to struggle with the dashes in this phase. Airship 2 can be dangerous as the airships deal massive damage, the lasers could hit the tanks, and ultima could use diffractive laser all during this phase. And the Final Aetheric Boon is completely win or lose. If you don't trip all 4 sets, you lose instantly. | *Three phases are make or break points in this fight. Ifrit is the first. People tend to struggle with the dashes in this phase. Airship 2 can be dangerous as the airships deal massive damage, the lasers could hit the tanks, and ultima could use diffractive laser all during this phase. And the Final Aetheric Boon is completely win or lose. If you don't trip all 4 sets, you lose instantly. | ||
*Ultima will apply the buff Negative Aetheroplasm (may need confirmation on exact name). Tanks swap at 3 stacks of the debuff, one stack is applied every ~20 seconds. If the stack reaches 5, that player dies. All | *Ultima will apply the buff Negative Aetheroplasm (may need confirmation on exact name). Tanks swap at 3 stacks of the debuff, one stack is applied every ~20 seconds. If the stack reaches 5, that player dies. All personnel not presently taking Ultima should not be in front of Ultima or risk getting a stack. Originally it was stated at 4. Reason for change is that 4 leaves really 0 room for mistakes. If you swap at 4 and the new tank eats fast heavy damage and dies, the run is over, as the original tank must take over with 4 stacks and dies on the next. At the least with 3 if this happens the original tank can take over again until the other tank is brought back up and healed up to take over. | ||
*Tank Purge is an attack repeated through every phase from Titan onward, it's an area-wide AoE that does a lot of damage. | *Tank Purge is an attack repeated through every phase from Titan onward, it's an area-wide AoE that does a lot of damage. | ||
| Line 31: | Line 47: | ||
===Phase 2: Titan=== | ===Phase 2: Titan=== | ||
Full rotation is Outer Plumes, Inner Plumes, Tank Purge, Inner Plumes, Outer Plumes. Avoid the plumes, and gather up in center for Tank Purge so the healer can heal. Tank Purge starts to show during this phase. | Full rotation is Outer Plumes, Inner Plumes, Tank Purge, Inner Plumes, Outer Plumes. Avoid the plumes, and gather up in center for Tank Purge so the healer can A.O.E. heal. Tank Purge starts to show during this phase. | ||
Average run is: Outside/Inside plumes, Tank Purge, Inner/Outer Plumes, Outer/Inner Plumes. Titan done. | Average run is: Outside/Inside plumes, Tank Purge, Inner/Outer Plumes, Outer/Inner Plumes. Titan done. | ||
| Line 76: | Line 92: | ||
==Loot== | ==Loot== | ||
*{{tomestone|Poetics|15}} [[Allagan Tomestone of Poetics]] | |||
{| | *{{Item icon|Ultima Weapon Card}} (Drops at a fixed rate.) | ||
===[[File:Gold Coffer (small).png|link=]] Treasure Coffer=== | |||
{{Drops table header}} | |||
{{Drops table row|Ultima Choker of Fending}} | |||
{{Drops table row|Ultima Choker of Slaying}} | |||
{{Drops table row|Ultima Choker of Aiming}} | |||
{{Drops table row|Ultima Choker of Casting}} | |||
{{Drops table row|Ultima Choker of Healing}} | |||
{{Drops table row|Ultima Band of Fending}} | |||
{{Drops table row|Ultima Band of Slaying}} | |||
{{Drops table row|Ultima Band of Aiming}} | |||
| [[ | {{Drops table row|Ultima Band of Casting}} | ||
| | {{Drops table row|Ultima Band of Healing}} | ||
| | {{Drops table row|Faded Copy of The Maker's Ruin}} | ||
| | {{Table footer}} | ||
| | |||
| | |||
| | |||
| | |||
| | |||
| | |||
==Lore== | ==Lore== | ||
The Wandering Minstrel is wont to regale those who would listen with the heroic deeds of adventurers. News of your death-defying feats have reached him, and he would have you recount your fateful encounter with the Ultima Weapon. | The Wandering Minstrel is wont to regale those who would listen with the heroic deeds of adventurers. News of your death-defying feats have reached him, and he would have you recount your fateful encounter with the Ultima Weapon. | ||
| Line 130: | Line 115: | ||
However, one must always be wary of the Wandering Minstrel and his gift for exaggeration. Upon hearing his ballad, you come to find your clash with the Ultima Weapon has been transformed into something far more epic than you remember. | However, one must always be wary of the Wandering Minstrel and his gift for exaggeration. Upon hearing his ballad, you come to find your clash with the Ultima Weapon has been transformed into something far more epic than you remember. | ||
==Images== | |||
<gallery heights=200px mode="packed"> | |||
Ultima Weapon concept.png | |||
ultima weapon2.jpg | |||
ultima weapon1.jpg | |||
ultima weapon3.jpg | |||
</gallery> | |||
{{ | {{Duties nav|trial}} | ||
Latest revision as of 22:15, 13 August 2024
 This article is about the level 50 challenge-mode trial. For the Main Scenario trial, see The Porta Decumana. For the Ultimate Raid involving The Ultima Weapon, see The Weapon's Refrain (Ultimate).
The Minstrel's Ballad: Ultima's Bane
- Level
- 50 (Sync: 50)
- Item Level
- 61
- Difficulty
- Extreme
- Party size
- Full Party
8 man • 2 2
2  4
4 
- Unsyncing
- Allowed
- Time limit
- 60 minutes
- Duty Finder
- High-end Trials (A Realm Reborn)
- Roulette
- Mentor
- Tomestones
 15
15 - Req. quest
 The Ultimate Ballad
- Location
- Porta Decumana
- Region
- Thanalan
- Patch
- 2.1
 The Echo
- On wipe: +5% (max +25%)
“Inspired by tales of your victory over the Ultima Weapon, the wandering minstrel come to Revenant's Toll has composed an epic ballad in your honor. However, as minstrels are wont to do, he has embellished certain details for dramatic effect. Although it can hardly be considered an accurate retelling, you cannot deny his skill with words, for as you listen to his melodious voice, you find yourself reliving the events of that fateful day in the Praetorium...
— In-game description
The Minstrel's Ballad: Ultima's Bane is a level 50 trial introduced in patch 2.1.
Strategy
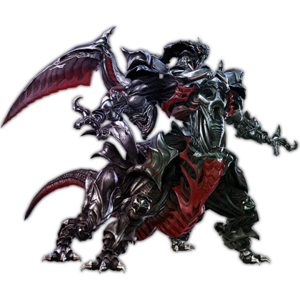
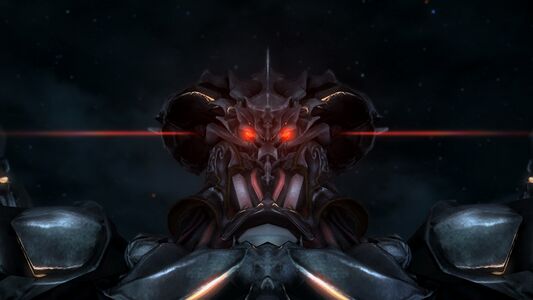
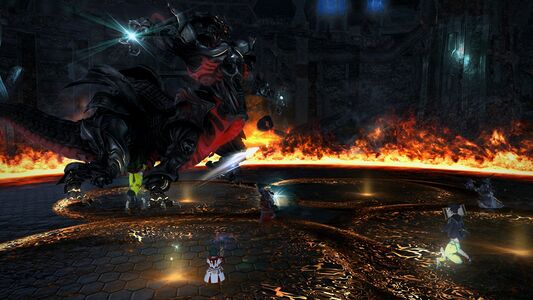
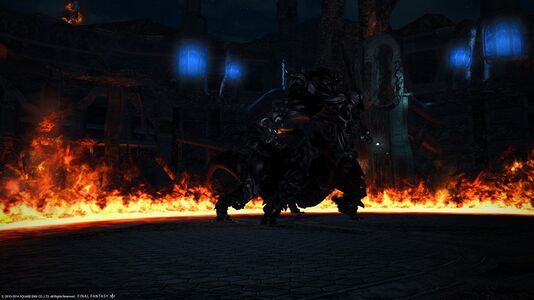
 Anti-Eikon Warmachina: The Ultima Weapon
- Ultima is a fight of speed, ability to dodge, and coordination. It's not a particularly hard fight as much as it is knowing what is coming next. Very little is random in this fight. Who is targeted by orbs, which players get eruptions, and where the magitek bits target are the only real random factors in the fight.
- Three phases are make or break points in this fight. Ifrit is the first. People tend to struggle with the dashes in this phase. Airship 2 can be dangerous as the airships deal massive damage, the lasers could hit the tanks, and ultima could use diffractive laser all during this phase. And the Final Aetheric Boon is completely win or lose. If you don't trip all 4 sets, you lose instantly.
- Ultima will apply the buff Negative Aetheroplasm (may need confirmation on exact name). Tanks swap at 3 stacks of the debuff, one stack is applied every ~20 seconds. If the stack reaches 5, that player dies. All personnel not presently taking Ultima should not be in front of Ultima or risk getting a stack. Originally it was stated at 4. Reason for change is that 4 leaves really 0 room for mistakes. If you swap at 4 and the new tank eats fast heavy damage and dies, the run is over, as the original tank must take over with 4 stacks and dies on the next. At the least with 3 if this happens the original tank can take over again until the other tank is brought back up and healed up to take over.
- Tank Purge is an attack repeated through every phase from Titan onward, it's an area-wide AoE that does a lot of damage.
- It is strongly recommend you tank in the center until after the Garuda phase. Move Ultima to the Northwest or Northeast edge afterwards, NOT THE CENTER NORTH. This is for the Aetheric Boons. If tanked due north, the first boon will hit the tank immediately on spawn.
- Ultima has a 10-minute enrage timer, so keep the DPS up.
- Main tank doesn't have to dodge attack unless specified.
Phase 1: Garuda
Garuda appears in the center, and Ultima will try to knock you into her AoE. Get behind Garuda and make sure Ultima can't knock you into the AoE.
Eye of the storm appears, get to the VERY EDGE of the center, move to the outside ring as soon as the purple graphic disappears to avoid Titan smashing down in the center. THE TANK SHOULD DODGE THIS AS WELL.
Most times you should only see: Mistral Shriek, Eye of the Storm, Mistral Shriek before Garuda vanishes for good.
Phase 2: Titan
Full rotation is Outer Plumes, Inner Plumes, Tank Purge, Inner Plumes, Outer Plumes. Avoid the plumes, and gather up in center for Tank Purge so the healer can A.O.E. heal. Tank Purge starts to show during this phase.
Average run is: Outside/Inside plumes, Tank Purge, Inner/Outer Plumes, Outer/Inner Plumes. Titan done.
Phase 3: Ifrit
Ifrit phase begins with eruptions. Eruptions will appear under two random party members, they should run IN THE SAME DIRECTION around the edge of the map. I usually just go clockwise. After five eruptions, this attack ends. Do not run eruptions into the tank zone. If you have to eat one, just eat it. It will not be lethal.
Four plumes will appear, then a line of them, with Ifrit charging the field while the second set explodes. Avoid them by going to the edge and adjusting position as necessary. Ifrit can charge from any direction. It is recommended that players stay out of the center during Ifrit's stage, as Ifrits Dash will always go through the center in some direction.
If all goes well you should get: Eruption, purge, plumes/charge, eruption, purge. Done with Ifrit. This phase is heavy in dps speed. The faster your dps the less you see. If they are quick enough you can avoid the second eruption, if they are slow you will get another plume/charge phase.
Phase Change
After the primals are done, the fight changes a little. New attacks become available. Magitek Ray is now in use. Similar to story ultima, he will turn around and draw green lines on the ground. Can deal moderate to heavy damage if you stay in it.
Orbs. He will cast out green orbs that track a player. The player will be noted with a symbol over their head. Run it out.
Diffractive laser. No cast display bar. Deals heavy damage to all players in front of ultima. Recommended that only the main tank stay in front at this time. This attack is very deadly in airship phases. I can confirm 3600 roughly to my i80 bard.
Tank Purge is still used through out the fight. Can be really bad if the tank purge and the healers have not healed it when Boons appear.
Phase 4: Aetheric Boon
Four orbs appear on long tethers. 1 North to South. 1 East to West. They're connected in pairs, and will converge towards the center. If the orbs hit each other, they wipe the group. It is recommended ahead of time designate the player to stack on. When Aetheric Boon is cast, all players will be sent backwards. Players should then group up on the designated player and walk into an orb. Then repeat for the second, healing as necessary. Time is not critical for these two sets. You should have plenty of time to take these out.
Phase 5a: Magitek Bits 1
Five Magitek bits will appear in the center, and will start to spam lasers. It is recommended to start killing these bits from the closest to the melee dps in a clockwise fashion. Be aware that phase 5b starts shortly into this phase.
Phase 5b: Airship 1
Two airships will strike. One to the East and one to the West. Optimal safe zone is directly south along the outer rim for non-tanks. Tanks should be due North. Also recommended that one healer stay in range on the outside rim as near the tanks as possible to heal. As soon as the airship crash finishes, destroy the remaining bits.
Phase 6: Aetheric Boon 2
6 orbs will appear this time. A short tether running north to south (first priority). Two long tethers running east to west. Immediately group up after knockback to eliminate the short tether. Then work your way through the other two sets allowing healing when necessary. Time is critical for the short tether.
Phase 7a: Magitek Bits 2
Magitek bits will appear around the outer circumference of the map. Have dps work a clockwise rotation. Recommend starting in the North East since the melee dps will be nearest that bit.
Phase 7b: Airship 2
Shortly after clearing a few bits, 4 airships will be called in. One Northeast, Southeast, Southwest, Northwest. Optimal safe zone is dead center for non-tanks. Do not run to early as the bits will trigger lines into the dead center. During this time, Main tank will eat heavy damage (can't turn ultima to center as he will use diffractive laser at this time). Recommend getting out of the center as soon as the airships start to crash as lasers will be targeting the center. Return to burning bits on the outer rim. It seems you can leave the center as soon as the airship animation comes into view. Graphics will be intense during this phase.
Phase 8: Aetheric Boon 3
Last phase is 4 incredibly short diagonal tethers. 1 West to south. 1 west to north. 1 north to east. 1 east to south (looks like a diamond). Timing is critical. If level 3 limit break is available, have tank cast it during boons cast time. Then have players run through all 4. With the level 3 limit break up players should be able to survive the tethers. If it is not available. Sacrifices will have to be made. Personally recommend that 2 players take this duty. One takes the two on the west and one takes the two to the east. Time is critical. If any orbs touch, raid wipe.
Phase 9: End
Assuming you are through the final boons, and still under 10 minutes, you enter the final stage. Basically its just a burn phase. DPS race to the end. If you are fast enough you will win. If you took too long you may still have a chance as Ultima will teleport to the center at 10 minutes from starting the fight and start casting Ultima. Could possibly still win if Ultima is low enough. Limit Break if available.
Loot
 15 Allagan Tomestone of Poetics
- Ultima Weapon Card (Drops at a fixed rate.)
 Treasure Coffer
| Name | Type | Item Level | Rarity | Quantity |
|---|---|---|---|---|
| Ultima Choker of Fending | Necklace | 80 | Blue | 1 |
| Ultima Choker of Slaying | Necklace | 80 | Blue | 1 |
| Ultima Choker of Aiming | Necklace | 80 | Blue | 1 |
| Ultima Choker of Casting | Necklace | 80 | Blue | 1 |
| Ultima Choker of Healing | Necklace | 80 | Blue | 1 |
| Ultima Band of Fending | Ring | 80 | Blue | 1 |
| Ultima Band of Slaying | Ring | 80 | Blue | 1 |
| Ultima Band of Aiming | Ring | 80 | Blue | 1 |
| Ultima Band of Casting | Ring | 80 | Blue | 1 |
| Ultima Band of Healing | Ring | 80 | Blue | 1 |
| Faded Copy of The Maker's Ruin | Orchestrion Roll | N/A | Basic | 1 |
Lore
The Wandering Minstrel is wont to regale those who would listen with the heroic deeds of adventurers. News of your death-defying feats have reached him, and he would have you recount your fateful encounter with the Ultima Weapon.
However, one must always be wary of the Wandering Minstrel and his gift for exaggeration. Upon hearing his ballad, you come to find your clash with the Ultima Weapon has been transformed into something far more epic than you remember.


