Difference between revisions of "The Dusk Vigil"
| (85 intermediate revisions by 16 users not shown) | |||
| Line 1: | Line 1: | ||
{{ | {{Duty infobox | ||
|name= The Dusk Vigil | | name = The Dusk Vigil | ||
| | | description = In the days following the Calamity, western Coerthas was abandoned by the knights of Ishgard, save for the Dusk Vigil, whose defenders refused to withdraw. Since then, the fortress has only fallen further into disrepair, and her garrison has long since been presumed dead. Unlike most Ishgardians, who would sooner put the tragic episode behind them, Father Wealdtheow would have you enter the forsaken fortress and reclaim a priceless treasure: an ice rondel set in the crown of a sculpture within the vigil's chapel. A simple request, perhaps, but if experience has taught you anything, such tasks are anything but... | ||
| image = The Dusk Vigil.png | |||
| type = dungeon | |||
| level = 51 | |||
| level-sync = 52 | |||
| ilvl = 100 | |||
| ilvl-sync = | |||
| difficulty = normal | |||
| size = 4man | |||
| time-limit = 90 | |||
| duty-finder = Dungeons (Heavensward) | |||
| roulette = leveling | |||
| entrance = Coerthas Western Highlands | |||
| entrance-coordinates = 20,7 | |||
| req-quest = For All the Nights to Come | |||
| modes = explorer | |||
== | | patch = 3.0 | ||
| release = heavensward | |||
}} {{TOC limit|3}} | |||
==Objectives== | |||
#Clear the outer training grounds. | |||
#Topple the [[Towering Oliphant|towering oliphant]]. | |||
#Clear the barracks. | |||
#Slay [[Ser Yuhelmeric]]. | |||
#Clear the keep. | |||
#Defeat [[Opinicus]]. | |||
== | ==Enemies== | ||
* [[Nestless Falcon]] | |||
* [[Muddy Zoblyn]] | |||
* [[Stronghold Mylodon]] | |||
* [[Snoll]] | |||
* [[Frostbitten Chirurgeon]] | |||
* [[Frostbitten Archer]] | |||
* [[Fading Soul]] | |||
* [[Frostbitten Officer]] | |||
* [[Frostbitten Conscript]] | |||
* [[Frostbitten Soldier]] | |||
* [[Frostbitten War Hound]] | |||
* [[Frostbitten Sentry]] | |||
* [[Frozen Knight]] | |||
* [[Frozen Chirurgeon]] | |||
* [[Stronghold Tursus]] | |||
* [[Icetrap]] | |||
* [[Hailstorm Sprite]] | |||
* [[Dusk Wolf]] | |||
==Bosses== | ==Bosses== | ||
===== Towering | {{#ev:youtube|v=lvpRi0wNsS0|350|right|Dusk Vigil Guide}} | ||
{{#ev:youtube|pvVoCqt81iI|350|right|Dusk Vigil Guide}} | |||
===[[File:Aggressive difficulty r5.png|link=]] [[Towering Oliphant]]=== | |||
* Casts '''Rear''', an AoE around himself | * Casts '''Rear''', an AoE around himself | ||
* Roomwide '''Prehistoric Trumpet''' attack | * Roomwide '''Prehistoric Trumpet''' attack | ||
* Will occasionally target a player and use '''Rock of Ages''' (stun), '''Wooly Inspiration''' (conal pull attack), and/or '''Rout''' (charge) | * Will occasionally target a player and use '''Rock of Ages''' (stun), '''Wooly Inspiration''' (conal pull attack), and/or '''Rout''' (charge) When Rout is used, one of the party (usually tank) can stand between the Oliphaunt and the targeted player to share the damage. This will result in less damage taken from the attack. | ||
==== | ===[[File:Aggressive difficulty r5.png|link=]] [[Ser Yuhelmeric]]=== | ||
* Summons adds, | * Summons adds. Melee adds do some AoE attacks, caster adds cast a buff around themselves. Move the boss away from the caster adds as they spawn to avoid stacking the buff. | ||
* Uses '''Death Spiral''', an AoE which hits everything not in/near melee range of him. Be aware of this when dealing with adds. | * Uses '''Death Spiral''', an AoE which hits everything not in/near melee range of him. Be aware of this when dealing with adds. | ||
==== | ===[[File:Aggressive difficulty r6.png|link=]] [[Opinicus]]=== | ||
* '''Alpine Draft''' line attack | * The boss starts with several crumbled piles of masonry scattered around the room, similar to Garuda. | ||
* '''{{action icon|Alpine Draft}}''' line attack, easy to avoid. | |||
* '''Freefall''' - Opinicus turns to face one player and jumps on them. This will destroy any piles of rubble the player is standing near. | |||
* '''Whirling Gaol''' room wide - the outer sides of the room will start pushing you in towards the center, where you will be stunned and then hit for some damage. Hiding behind some of the crumbled masonry in the room will prevent you from being pushed into the center. | * '''Whirling Gaol''' room wide - the outer sides of the room will start pushing you in towards the center, where you will be stunned and then hit for some damage. Hiding behind some of the crumbled masonry in the room will prevent you from being pushed into the center. | ||
* '''Winds of Winter''' | * '''Winds of Winter''' - AE attack for moderate damage and stacks wind vulnerability on anyone struck. Avoid by standing so there is a pile of rubble between you and the boss. This attack will destroy all piles of rubble and new ones will fall from the ceiling. | ||
==Loot== | ==Loot== | ||
{{see also|Martial Weapons|Ishgardian Armor|Ishgardian Accessories}} | |||
{| | ===[[File:Silver Coffer (small).png|link=]] [[Towering Oliphant]]=== | ||
| | * 40,000 {{exp}} [[Experience Points]] | ||
{{Drops list|Towering Oliphant}} | |||
===[[File:Silver Coffer (small).png|link=]] [[Ser Yuhelmeric]]=== | |||
* 70,000 {{exp}} [[Experience Points]] | |||
{{Drops list|Ser Yuhelmeric}} | |||
===[[File:Gold Coffer (small).png|link=]] [[Opinicus]]=== | |||
*{{Item icon|Griffin Card}} (Drops at a fixed rate) | |||
* 90,000 {{exp}} [[Experience Points]] | |||
{{Drops list|Opinicus}} | |||
| | |||
===Additional Treasure Coffers=== | |||
| | ====[[File:Bronze Coffer (small).png|link=]] Treasure Coffer 1 (X: 13.8 Y: 11.1)==== | ||
{{Drops table header}} | |||
| | {{Drops table row|Ishgardian Knight's Sabatons}} | ||
| | {{Drops table row|Ishgardian Banneret's Sabatons}} | ||
| | {{Drops table row|Ishgardian Monastic's Boots}} | ||
| | {{Drops table row|Ishgardian Outrider's Boots}} | ||
{{Drops table row|Ishgardian Bowman's Boots}} | |||
{{Drops table row|Ishgardian Historian's Thighboots}} | |||
{{Drops table row|Ishgardian Chaplain's Thighboots}} | |||
{{Drops table row|Ishgardian Knight's Bracelets}} | |||
{{Drops table row|Ishgardian Monastic's Bracelets}} | |||
{{Drops table row|Ishgardian Outrider's Bracelets}} | |||
{{Drops table row|Ishgardian Historian's Bracelets}} | |||
{{Drops table row|Ishgardian Chaplain's Bracelets}} | |||
{{Drops table row|Ishgardian Knight's Ring}} | |||
{{Drops table row|Ishgardian Monastic's Ring}} | |||
{{Drops table row|Ishgardian Outrider's Ring}} | |||
{{Drops table row|Ishgardian Historian's Ring}} | |||
{{Drops table row|Ishgardian Chaplain's Ring}} | |||
{{Drops table row|Clear Prism}} | |||
{{Drops table row|Snow White Dye}} | |||
{{Drops table row|Goobbue Grey Dye}} | |||
{{Drops table row|Slate Grey Dye}} | |||
{{Drops table row|Charcoal Grey Dye}} | |||
{{Table footer}} | |||
====[[File:Bronze Coffer (small).png|link=]] Treasure Coffer 2 (X: 15.8 Y: 10.3)==== | |||
{{Drops table header}} | |||
{{Drops table row|Ishgardian Knight's Helm}} | |||
{{Drops table row|Ishgardian Banneret's Helm}} | |||
{{Drops table row|Ishgardian Monastic's Cap}} | |||
{{Drops table row|Ishgardian Outrider's Cap}} | |||
{{Drops table row|Ishgardian Bowman's Cap}} | |||
{{Drops table row|Ishgardian Historian's Hat}} | |||
{{Drops table row|Ishgardian Chaplain's Klobuk}} | |||
{{Drops table row|Ishgardian Knight's Gauntlets}} | |||
{{Drops table row|Ishgardian Banneret's Gauntlets}} | |||
{{Drops table row|Ishgardian Monastic's Armguards}} | |||
{{Drops table row|Ishgardian Outrider's Armguards}} | |||
{{Drops table row|Ishgardian Bowman's Armguards}} | |||
{{Drops table row|Ishgardian Historian's Gloves}} | |||
{{Drops table row|Ishgardian Chaplain's Gloves}} | |||
{{Drops table row|Ishgardian Knight's Earrings}} | |||
{{Drops table row|Ishgardian Monastic's Earrings}} | |||
{{Drops table row|Ishgardian Outrider's Earrings}} | |||
{{Drops table row|Ishgardian Historian's Earrings}} | |||
{{Drops table row|Ishgardian Chaplain's Earrings}} | |||
{{Drops table row|Ishgardian Knight's Choker}} | |||
{{Drops table row|Ishgardian Monastic's Choker}} | |||
{{Drops table row|Ishgardian Outrider's Choker}} | |||
{{Drops table row|Ishgardian Historian's Choker}} | |||
{{Drops table row|Ishgardian Chaplain's Choker}} | |||
{{Drops table row|Clear Prism}} | |||
{{Drops table row|Snow White Dye}} | |||
{{Drops table row|Goobbue Grey Dye}} | |||
{{Drops table row|Slate Grey Dye}} | |||
{{Drops table row|Charcoal Grey Dye}} | |||
{{Table footer}} | |||
===== Treasure | ====[[File:Bronze Coffer (small).png|link=]] Treasure Coffer 3 (X: 12.7 Y: 5.8)==== | ||
{{Drops table header}} | |||
{{Drops table row|Ishgardian Knight's Armor}} | |||
{{Drops table row|Ishgardian Banneret's Armor}} | |||
{{Drops table row|Ishgardian Monastic's Cyclas}} | |||
{{Drops table row|Ishgardian Outrider's Cyclas}} | |||
{{Drops table row|Ishgardian Bowman's Cyclas}} | |||
{{Drops table row|Ishgardian Historian's Robe}} | |||
{{Drops table row|Ishgardian Chaplain's Alb}} | |||
{{Drops table row|Ishgardian Knight's Trousers}} | |||
{{Drops table row|Ishgardian Banneret's Trousers}} | |||
{{Drops table row|Ishgardian Monastic's Hose}} | |||
{{Drops table row|Ishgardian Outrider's Hose}} | |||
{{Drops table row|Ishgardian Bowman's Hose}} | |||
{{Drops table row|Ishgardian Historian's Breeches}} | |||
{{Drops table row|Ishgardian Chaplain's Breeches}} | |||
{{Drops table row|Ishgardian Knight's Bracelets}} | |||
{{Drops table row|Ishgardian Monastic's Bracelets}} | |||
{{Drops table row|Ishgardian Outrider's Bracelets}} | |||
{{Drops table row|Ishgardian Historian's Bracelets}} | |||
{{Drops table row|Ishgardian Chaplain's Bracelets}} | |||
{{Drops table row|Ishgardian Knight's Ring}} | |||
{{Drops table row|Ishgardian Monastic's Ring}} | |||
{{Drops table row|Ishgardian Outrider's Ring}} | |||
{{Drops table row|Ishgardian Historian's Ring}} | |||
{{Drops table row|Ishgardian Chaplain's Ring}} | |||
{{Drops table row|Clear Prism}} | |||
{{Drops table row|Snow White Dye}} | |||
{{Drops table row|Goobbue Grey Dye}} | |||
{{Drops table row|Slate Grey Dye}} | |||
{{Drops table row|Charcoal Grey Dye}} | |||
{{Table footer}} | |||
===== Treasure | ====[[File:Bronze Coffer (small).png|link=]] Treasure Coffer 4 (X: 10.3 Y: 5.6)==== | ||
{{Drops table header}} | |||
{{Drops table row|Paladin's Martial Arms (IL 120)}} | |||
{{Drops table row|Martial Axe}} | |||
{{Drops table row|Martial Greatsword}} | |||
{{Drops table row|Martial Halberd}} | |||
{{Drops table row|Martial Patas}} | |||
{{Drops table row|Martial Katana}} | |||
{{Drops table row|Martial Main Gauches}} | |||
{{Drops table row|Martial Bow}} | |||
{{Drops table row|Martial Musketoon}} | |||
{{Drops table row|Martial Rod}} | |||
{{Drops table row|Martial Grimoire}} | |||
{{Drops table row|Martial Foil}} | |||
{{Drops table row|Martial Crook}} | |||
{{Drops table row|Martial Codex}} | |||
{{Drops table row|Martial Planisphere}} | |||
{{Drops table row|Ishgardian Knight's Earrings}} | |||
{{Drops table row|Ishgardian Monastic's Earrings}} | |||
{{Drops table row|Ishgardian Outrider's Earrings}} | |||
{{Drops table row|Ishgardian Historian's Earrings}} | |||
{{Drops table row|Ishgardian Chaplain's Earrings}} | |||
{{Drops table row|Ishgardian Knight's Choker}} | |||
{{Drops table row|Ishgardian Monastic's Choker}} | |||
{{Drops table row|Ishgardian Outrider's Choker}} | |||
{{Drops table row|Ishgardian Historian's Choker}} | |||
{{Drops table row|Ishgardian Chaplain's Choker}} | |||
{{Drops table row|Clear Prism}} | |||
{{Drops table row|Snow White Dye}} | |||
{{Drops table row|Goobbue Grey Dye}} | |||
{{Drops table row|Slate Grey Dye}} | |||
{{Drops table row|Charcoal Grey Dye}} | |||
{{Table footer}} | |||
==== | ==Achievements== | ||
This duty is associated with the following [[achievements]]: | |||
{| {{STDT| mech1 sortable align-left}} | |||
{{achievement table header}} | |||
{{achievement table row|Mapping the Realm: Dusk Vigil}} | |||
{| | |||
| | |||
|} | |} | ||
==Images== | ==Images== | ||
===Gear Images=== | |||
<gallery heights=225px widths=400px mode=packed> | |||
File:The Dusk Vigil gear2.jpg | |||
File:The vault gear1.jpg | |||
File:The Dusk Vigil gear1.jpg | |||
File:Gearsets Dusk Vigil.jpg | |||
</gallery> | |||
===Dungeon Images=== | |||
<gallery mode="packed"> | |||
Heavensward artwork3.jpg | |||
Dark Vigil.jpeg | |||
The dusk vigil4.jpg | |||
the dusk vigil1.jpg | |||
the dusk vigil2.jpg | |||
the dusk vigil3.jpg | |||
</gallery> | |||
==Lore== | |||
===Torn Journal Page 1=== | |||
{{quotation|Torn Journal Page|To whoever reads this─if there is anyone left to read it─let it be known that I, Ser Pascaleret Neurtaille, bore witness to Dalamud's fall. The lesser moon's descent, the black doom which emerged from within, the flames which spread across the horizon, turning night to day─it shall haunt me for the rest of my days. | |||
It is the dawn of the “Seventh Umbral Era,” according to some of the men. I told them to put no stock in the ravings of the prophetess, but even I do not know what to believe anymore.}} | |||
===Torn Journal Page 2=== | |||
{{quotation|Torn Journal Page|The engineers are still surveying the damage, but anyone with eyes can tell that the Dusk Vigil is beyond repair. Some walls are hardly fit to be called as such, piles of crumbling masonry as they are. | |||
The officers have been pleading with Ser Yuhelmeric, asking him to order a withdrawal. He knows our position is untenable, yet he refuses. “We will hold it to the last, for we are the shields on the wall─the defenders of the Holy See,” he says. He is a brave, pious man. Less so, we who serve under him.}} | |||
===Torn Journal Page 3=== | |||
{{quotation|Torn Journal Page|The men we rescued from the collapsed wing have not fared well. Given our dwindling supplies and this seemingly endless blizzard, we may be forced to make difficult decisions soon. | |||
This unseasonable weather grows worse with every passing day, and the toll it has taken on morale is plain. We have yet to receive reinforcements from the Holy See, and I fear none shall come. | |||
Nevertheless, Ser Yuhelmeric remains steadfast in his decision and will suffer no talk of withdrawal. | |||
Ser Yuhelmeric's steward tells me he passes hours in the chapel, praying to the Fury for guidance... But I chanced to see him once, as he knelt before the statue. His eyes were transfixed upon the jewel in its helm, and he was whispering things I dare not write.}} | |||
===Torn Journal Page 4=== | |||
{{quotation|Torn Journal Page|Ser Yuhelmeric has taken me into his confidence. He says I am an honest man. I wish I were a braver one. | |||
The mutiny has been quelled. Among the starving, half-mad knights were Ser Yuhelmeric's most trusted officers. He wielded the axe himself. | |||
Ser Yuhelmeric received me in the chapel afterwards. I told him we will not last a fortnight without food. He smiled and told me that the Fury has blessed us with a bounty of fresh meat, then returned to his prayers. I joined him.}} | |||
===Torn Journal Page 5=== | |||
{{quotation|Torn Journal Page|O Halone, pray forgive Your humble servant. For too long have I let fear rule my heart, and in my cowardice have I been party to unspeakable acts. | |||
I know now I shall never see my children again─nor would I want them to look upon their father's face...and what it has become. | |||
I am outside Her grace.}} | |||
===Ser Yuhelmeric's Resolve=== | |||
Counterpart to the Dawn Vigil in the east, this watchtower served as Ishgard's shield against the Dravanian Horde in the west. Garrisoned by the brave knights of House Durendaire, for long years the Dusk Vigil stood firm against the enemy, but it was brought to its knees by the Calamity, which wrought extensive damage to the structure before ushering in a bitter freeze, encasing it in ice. According to a knight’s account as writ in a recovered journal, those engineers who surveyed the watchtower’s crumbling walls pled with their commander, Ser Yuhelmeric, asking him to order a withdrawal, but the man would not hear of it. Heedless of the extreme cold, he was determined to discharge his duty to the last and refused to abandon the Vigil, holding his ground even when the garrison’s supplies dwindled with no prospect of aid from the Holy See. Many men died—first of the cold, then of starvation, then in a bloody, failed mutiny. Of what followed, little is known, but the Dusk Vigil has since come to be inhabited by all manner of fell beasts, and gods only know what else. | |||
===Ser Yuhelmeric=== | |||
A knight of House Durendaire, Ser Yuhelmeric commanded the garrison at the Dusk Vigil. Unin-terred upon his death, he rose again as a revenant to haunt the watchtower he once defended. He left behind in Ishgard a loving wife, who to this day awaits his return. | |||
===Opinicus=== | |||
After the Dusk Vigil fell into disuse, this imposing griffin claimed it for its domain. The creature has adapted remarkably well to the cold that descended upon Coerthas, lying in wait for prey that enters the watchtower in search of shelter. | |||
===More=== | |||
A sculpture of Halone, the Fury, is consecrated at Saint Guenriol’s Chapel deep inside the Dusk Vigil, within whose helm is set a priceless sapphire known as an ice rondel. Desiring to retrieve this treasure, a memento of his son Yuhelmeric, Father Wealdtheow drew upon his personal funds to recruit an adventurer to brave the dangers within the watchtower. | |||
{{ | {{Duties nav|dungeon}} | ||
Latest revision as of 17:16, 28 September 2024
The Dusk Vigil
- Level
- 51 (Sync: 52)
- Item Level
- 100
- Difficulty
- Normal
- Party size
- Light Party
4 man • 1 1
1  2
2 
- Unsyncing
- Allowed
- Time limit
- 90 minutes
- Duty Finder
- Dungeons (Heavensward)
- Roulette
- Leveling
- Req. quest
 For All the Nights to Come
- Entrance
- Coerthas Western Highlands (X:20, Y:7)
- Modes
- Explorer
- Patch
- 3.0
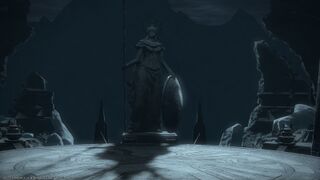
“In the days following the Calamity, western Coerthas was abandoned by the knights of Ishgard, save for the Dusk Vigil, whose defenders refused to withdraw. Since then, the fortress has only fallen further into disrepair, and her garrison has long since been presumed dead. Unlike most Ishgardians, who would sooner put the tragic episode behind them, Father Wealdtheow would have you enter the forsaken fortress and reclaim a priceless treasure: an ice rondel set in the crown of a sculpture within the vigil's chapel. A simple request, perhaps, but if experience has taught you anything, such tasks are anything but...
— In-game description
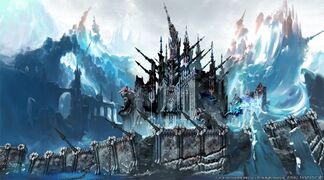
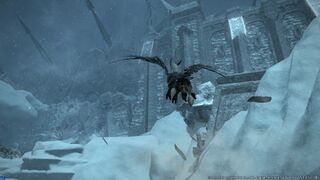
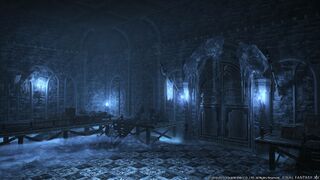
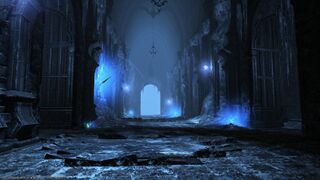
The Dusk Vigil is a level 51 dungeon introduced in patch 3.0 with Heavensward.
Objectives
- Clear the outer training grounds.
- Topple the towering oliphant.
- Clear the barracks.
- Slay Ser Yuhelmeric.
- Clear the keep.
- Defeat Opinicus.
Enemies
- Nestless Falcon
- Muddy Zoblyn
- Stronghold Mylodon
- Snoll
- Frostbitten Chirurgeon
- Frostbitten Archer
- Fading Soul
- Frostbitten Officer
- Frostbitten Conscript
- Frostbitten Soldier
- Frostbitten War Hound
- Frostbitten Sentry
- Frozen Knight
- Frozen Chirurgeon
- Stronghold Tursus
- Icetrap
- Hailstorm Sprite
- Dusk Wolf
Bosses
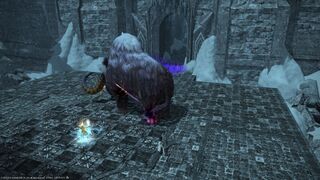
 Towering Oliphant
- Casts Rear, an AoE around himself
- Roomwide Prehistoric Trumpet attack
- Will occasionally target a player and use Rock of Ages (stun), Wooly Inspiration (conal pull attack), and/or Rout (charge) When Rout is used, one of the party (usually tank) can stand between the Oliphaunt and the targeted player to share the damage. This will result in less damage taken from the attack.
 Ser Yuhelmeric
- Summons adds. Melee adds do some AoE attacks, caster adds cast a buff around themselves. Move the boss away from the caster adds as they spawn to avoid stacking the buff.
- Uses Death Spiral, an AoE which hits everything not in/near melee range of him. Be aware of this when dealing with adds.
 Opinicus
- The boss starts with several crumbled piles of masonry scattered around the room, similar to Garuda.
- Alpine Draft line attack, easy to avoid.
- Freefall - Opinicus turns to face one player and jumps on them. This will destroy any piles of rubble the player is standing near.
- Whirling Gaol room wide - the outer sides of the room will start pushing you in towards the center, where you will be stunned and then hit for some damage. Hiding behind some of the crumbled masonry in the room will prevent you from being pushed into the center.
- Winds of Winter - AE attack for moderate damage and stacks wind vulnerability on anyone struck. Avoid by standing so there is a pile of rubble between you and the boss. This attack will destroy all piles of rubble and new ones will fall from the ceiling.
Loot
- See also: Martial Weapons, Ishgardian Armor and Ishgardian Accessories
 Towering Oliphant
- 40,000
 Experience Points
| Name | Type | Item Level | Rarity | Quantity |
|---|---|---|---|---|
| Ishgardian Banneret's Sabatons | Feet | 120 | Green | 1 |
| Ishgardian Bowman's Boots | Feet | 120 | Green | 1 |
| Ishgardian Chaplain's Bracelets | Bracelets | 120 | Green | 1 |
| Ishgardian Chaplain's Ring | Ring | 120 | Green | 1 |
| Ishgardian Chaplain's Thighboots | Feet | 120 | Green | 1 |
| Ishgardian Historian's Bracelets | Bracelets | 120 | Green | 1 |
| Ishgardian Historian's Ring | Ring | 120 | Green | 1 |
| Ishgardian Historian's Thighboots | Feet | 120 | Green | 1 |
| Ishgardian Knight's Bracelets | Bracelets | 120 | Green | 1 |
| Ishgardian Knight's Ring | Ring | 120 | Green | 1 |
| Ishgardian Knight's Sabatons | Feet | 120 | Green | 1 |
| Ishgardian Monastic's Boots | Feet | 120 | Green | 1 |
| Ishgardian Monastic's Bracelets | Bracelets | 120 | Green | 1 |
| Ishgardian Monastic's Ring | Ring | 120 | Green | 1 |
| Ishgardian Outrider's Boots | Feet | 120 | Green | 1 |
| Ishgardian Outrider's Bracelets | Bracelets | 120 | Green | 1 |
| Ishgardian Outrider's Ring | Ring | 120 | Green | 1 |
 Ser Yuhelmeric
- 70,000
 Experience Points
 Opinicus
- Griffin Card (Drops at a fixed rate)
- 90,000
 Experience Points
Additional Treasure Coffers
 Treasure Coffer 1 (X: 13.8 Y: 11.1)
 Treasure Coffer 2 (X: 15.8 Y: 10.3)
 Treasure Coffer 3 (X: 12.7 Y: 5.8)
 Treasure Coffer 4 (X: 10.3 Y: 5.6)
Achievements
This duty is associated with the following achievements:
| Name | Points | Task | Reward | Patch |
|---|---|---|---|---|
| Mapping the Realm: Dusk Vigil | 10 | Discover every location in the Dusk Vigil. | - | 3.0 |
Images
Gear Images
Dungeon Images
Lore
Torn Journal Page 1
“To whoever reads this─if there is anyone left to read it─let it be known that I, Ser Pascaleret Neurtaille, bore witness to Dalamud's fall. The lesser moon's descent, the black doom which emerged from within, the flames which spread across the horizon, turning night to day─it shall haunt me for the rest of my days.
It is the dawn of the “Seventh Umbral Era,” according to some of the men. I told them to put no stock in the ravings of the prophetess, but even I do not know what to believe anymore.
— Torn Journal Page
Torn Journal Page 2
“The engineers are still surveying the damage, but anyone with eyes can tell that the Dusk Vigil is beyond repair. Some walls are hardly fit to be called as such, piles of crumbling masonry as they are.
The officers have been pleading with Ser Yuhelmeric, asking him to order a withdrawal. He knows our position is untenable, yet he refuses. “We will hold it to the last, for we are the shields on the wall─the defenders of the Holy See,” he says. He is a brave, pious man. Less so, we who serve under him.
— Torn Journal Page
Torn Journal Page 3
“The men we rescued from the collapsed wing have not fared well. Given our dwindling supplies and this seemingly endless blizzard, we may be forced to make difficult decisions soon.
This unseasonable weather grows worse with every passing day, and the toll it has taken on morale is plain. We have yet to receive reinforcements from the Holy See, and I fear none shall come.
Nevertheless, Ser Yuhelmeric remains steadfast in his decision and will suffer no talk of withdrawal. Ser Yuhelmeric's steward tells me he passes hours in the chapel, praying to the Fury for guidance... But I chanced to see him once, as he knelt before the statue. His eyes were transfixed upon the jewel in its helm, and he was whispering things I dare not write.
— Torn Journal Page
Torn Journal Page 4
“Ser Yuhelmeric has taken me into his confidence. He says I am an honest man. I wish I were a braver one.
The mutiny has been quelled. Among the starving, half-mad knights were Ser Yuhelmeric's most trusted officers. He wielded the axe himself.
Ser Yuhelmeric received me in the chapel afterwards. I told him we will not last a fortnight without food. He smiled and told me that the Fury has blessed us with a bounty of fresh meat, then returned to his prayers. I joined him.
— Torn Journal Page
Torn Journal Page 5
“O Halone, pray forgive Your humble servant. For too long have I let fear rule my heart, and in my cowardice have I been party to unspeakable acts.
I know now I shall never see my children again─nor would I want them to look upon their father's face...and what it has become.
I am outside Her grace.
— Torn Journal Page
Ser Yuhelmeric's Resolve
Counterpart to the Dawn Vigil in the east, this watchtower served as Ishgard's shield against the Dravanian Horde in the west. Garrisoned by the brave knights of House Durendaire, for long years the Dusk Vigil stood firm against the enemy, but it was brought to its knees by the Calamity, which wrought extensive damage to the structure before ushering in a bitter freeze, encasing it in ice. According to a knight’s account as writ in a recovered journal, those engineers who surveyed the watchtower’s crumbling walls pled with their commander, Ser Yuhelmeric, asking him to order a withdrawal, but the man would not hear of it. Heedless of the extreme cold, he was determined to discharge his duty to the last and refused to abandon the Vigil, holding his ground even when the garrison’s supplies dwindled with no prospect of aid from the Holy See. Many men died—first of the cold, then of starvation, then in a bloody, failed mutiny. Of what followed, little is known, but the Dusk Vigil has since come to be inhabited by all manner of fell beasts, and gods only know what else.
Ser Yuhelmeric
A knight of House Durendaire, Ser Yuhelmeric commanded the garrison at the Dusk Vigil. Unin-terred upon his death, he rose again as a revenant to haunt the watchtower he once defended. He left behind in Ishgard a loving wife, who to this day awaits his return.
Opinicus
After the Dusk Vigil fell into disuse, this imposing griffin claimed it for its domain. The creature has adapted remarkably well to the cold that descended upon Coerthas, lying in wait for prey that enters the watchtower in search of shelter.
More
A sculpture of Halone, the Fury, is consecrated at Saint Guenriol’s Chapel deep inside the Dusk Vigil, within whose helm is set a priceless sapphire known as an ice rondel. Desiring to retrieve this treasure, a memento of his son Yuhelmeric, Father Wealdtheow drew upon his personal funds to recruit an adventurer to brave the dangers within the watchtower.

