Difference between revisions of "Pharos Sirius (Hard)"
| (56 intermediate revisions by 18 users not shown) | |||
| Line 1: | Line 1: | ||
{{ | {{other uses|the optional level '''60''' [[dungeon]] from [[Heavensward]]|the optional level 50 [[dungeon]]|Pharos Sirius}} | ||
{{Duty infobox | |||
| name = Pharos Sirius (Hard) | |||
| description = With the siren banished from Pharos Sirius, reconstruction of the lighthouse is well under way. Or rather, it was, until an order of kobolds forced workers to evacuate. The Maelstrom has been swift to plan a retaking of the tower, but time is of the essence. The kobolds' love for explosives will surely spell destruction if the beastmen are not purged with utmost haste. Once again, Limsa Lominsa asks for your aid. Descend to the depths of the tower this time, and assist in defusing the kobold threat. | |||
| image = Pharos Sirius (Hard).png | |||
|level | | type = dungeon | ||
| level = 60 | |||
| level-sync = 60 | |||
| ilvl = 170 | |||
| ilvl-sync = 240 | |||
| difficulty = hard | |||
| | | size = 4man | ||
| time-limit = 90 | |||
| duty-finder = Dungeons (Heavensward) | |||
| | | roulette = High-level Dungeons | ||
}} | | tomestones = 30 Poetics | ||
{{ | | entrance = Limsa Lominsa Upper Decks | ||
| entrance-coordinates = 10,11 | |||
| req-quest = Things Are Getting Sirius | |||
== | | modes = command, explorer | ||
| patch = 3.1 | |||
| release = heavensward | |||
}} {{TOC limit|3}} | |||
==Objectives== | ==Objectives== | ||
#Arrive in the fuel chamber: 0/1 | |||
#Slay the [[Ghrah Luminary]]: 0/1 | |||
#Arrive in the second spire: 0/1 | |||
#Slay [[8th Order Patriarch Be Gu]]: 0/1 | |||
#Arrive at Incubator 66: 0/1 | |||
#Secure Incubator 66: 0/1 | |||
==Bosses== | ==Bosses== | ||
===Ghrah Luminary=== | {{#ev:youtube|-vSr5RLUkIw|350|right|Pharos Sirius HM Dungeon Guide by Mizzteq}} | ||
{{#ev:youtube|CxfHlOlQB3w|350|right|Pharos Sirius HM Dungeon Guide}} | |||
===[[File:Aggressive difficulty r5.png|link=]] [[Ghrah Luminary]]=== | |||
Ghrah Luminary will create [[Corruption|Corruptions]] that tether and mark players with Prey. The Corruptions will cast {{item icon|Aetheric Mimicry}}, and marked players should run up to one of the passive mobs circling the room to pass the debuff before the cast finishes. After a short time, the afflicted mob will transform and become aggressive; these have very little HP and should die easily. Note that the spider mobs will leave behind a small pool of poison when they die, so be sure to pull them aside before killing. | |||
===8th Order Patriarch Be Gu=== | ===[[File:Aggressive difficulty r5.png|link=]] [[8th Order Patriarch Be Gu]]=== | ||
The boss will periodically perform a room-wide AoE that opens a fissure in the floor. Aether will leak out from these fissures until they are plugged by pulling a Corrupted Gel add and killing it on top of the plume. Eventually, the boss will summon a set of Kobold adds in addition to one or more purple Alchemy Engines; these engines provide a tether to the boss and should be destroyed immediately. | |||
===Progenitor | ===[[File:Aggressive difficulty r6.png|link=]] [[Progenitrix]] and [[Progenitor]]=== | ||
Progenitrix will periodically summon a mixture of Grey bombs and Lava bombs around the perimeter of the arena. The Grey bombs should be killed immediately. Once Progenitrix is killed, Progenitor will spawn. Like his predecessor, Progenitor will also summon Grey bombs around the perimeter of the arena; however, they will be accompanied by blue Remedy bombs rather than Lava Bombs. The Remedy bombs will attach a tether to a Grey bomb and slowly move toward it. Hitting the Remedy bombs will push them away, allowing time for the Grey bombs to be killed. | |||
==Loot== | ==Loot== | ||
{{see also|Ilvl 185 Dungeon Armor|Ilvl 185 Dungeon Accessories}} | |||
===[[File:Silver Coffer (small).png|link=]] [[Ghrah Luminary]]=== | |||
{| | *{{Item reward|5|Allagan Tomestone of Poetics}} | ||
{{Drops list|Ghrah Luminary}} | |||
===[[File:Silver Coffer (small).png|link=]] [[8th Order Patriarch Be Gu]]=== | |||
*{{Item reward|10|Allagan Tomestone of Poetics}} | |||
{{Drops list|8th Order Patriarch Be Gu}} | |||
| | |||
| | |||
| | |||
| | |||
| | |||
|} | |||
=== | ===[[File:Gold Coffer (small).png|link=]] [[Progenitrix]] and [[Progenitor]]=== | ||
*{{Item reward|15|Allagan Tomestone of Poetics}} | |||
*{{Item icon|Progenitrix Card}} (Drops at a fixed rate) | |||
*{{Item icon|Upon the Rocks Orchestrion Roll}} (Drops at a fixed rate) | |||
| | |||
| | |||
| | |||
| | |||
{{Drops list|Progenitrix}} | |||
{| | |||
===Additional Treasure Coffers=== | ===Additional Treasure Coffers=== | ||
====Treasure Coffer 1==== | ====[[File:Bronze Coffer (small).png|link=]] Treasure Coffer 1 (X: 11.3 Y: 10.0)==== | ||
{{Drops table header}} | |||
{{Drops table row|Boots of the Defiant Duelist}} | |||
{{Drops table row|Boots of the Daring Duelist}} | |||
{{Drops table row|Boots of the Red Thief}} | |||
{{Drops table row|Boots of the Ghost Thief}} | |||
{{Drops table row|Boots of the Lost Thief}} | |||
{{Drops table row|Plague Bringer's Shoes}} | |||
{{Drops table row|Plague Doctor's Shoes}} | |||
{{Drops table row|Bracelet of the Defiant Duelist}} | |||
{{Drops table row|Bracelet of the Daring Duelist}} | |||
{{Drops table row|Bracelet of the Lost Thief}} | |||
{{Drops table row|Plague Bringer's Bracelet}} | |||
{{Drops table row|Plague Doctor's Bracelet}} | |||
{{Drops table row|Ring of the Defiant Duelist}} | |||
{{Drops table row|Ring of the Daring Duelist}} | |||
{{Drops table row|Ring of the Lost Thief}} | |||
{{Drops table row|Plague Bringer's Ring}} | |||
{{Drops table row|Plague Doctor's Ring}} | |||
{{Table footer}} | |||
====[[File:Bronze Coffer (small).png|link=]] Treasure Coffer 2 (X: 10.9 Y: 10.5)==== | |||
{{Drops table header}} | |||
{{Drops table row|Tricorne of the Defiant Duelist}} | |||
{{Drops table row|Tricorne of the Daring Duelist}} | |||
{{Drops table row|Hat of the Red Thief}} | |||
{{Drops table row|Hat of the Ghost Thief}} | |||
{{Drops table row|Hat of the Lost Thief}} | |||
{{Drops table row|Plague Bringer's Mask}} | |||
{{Drops table row|Plague Doctor's Mask}} | |||
{{Drops table row|Gloves of the Defiant Duelist}} | |||
{{Drops table row|Gloves of the Daring Duelist}} | |||
{{Drops table row|Gloves of the Red Thief}} | |||
{{Drops table row|Gloves of the Ghost Thief}} | |||
{{Drops table row|Gloves of the Lost Thief}} | |||
{{Drops table row|Plague Bringer's Gloves}} | |||
{{Drops table row|Plague Doctor's Gloves}} | |||
{{Drops table row|Earrings of the Defiant Duelist}} | |||
{{Drops table row|Earrings of the Daring Duelist}} | |||
{{Drops table row|Earrings of the Lost Thief}} | |||
{{Drops table row|Plague Bringer's Earrings}} | |||
{{Drops table row|Plague Doctor's Earrings}} | |||
{{Drops table row|Choker of the Defiant Duelist}} | |||
{{Drops table row|Choker of the Daring Duelist}} | |||
{{Drops table row|Choker of the Lost Thief}} | |||
{{Drops table row|Plague Bringer's Choker}} | |||
{{Drops table row|Plague Doctor's Choker}} | |||
{{Table footer}} | |||
====[[File:Bronze Coffer (small).png|link=]] Treasure Coffer 3 (X: 10.7 Y: 9.7)==== | |||
{{Drops table header}} | |||
{{Drops table row|Coat of the Defiant Duelist}} | |||
{{Drops table row|Coat of the Daring Duelist}} | |||
{{Drops table row|Coat of the Red Thief}} | |||
{{Drops table row|Coat of the Ghost Thief}} | |||
{{Drops table row|Coat of the Lost Thief}} | |||
{{Drops table row|Plague Bringer's Coat}} | |||
{{Drops table row|Plague Doctor's Coat}} | |||
{{Drops table row|Trousers of the Defiant Duelist}} | |||
{{Drops table row|Trousers of the Daring Duelist}} | |||
{{Drops table row|Trousers of the Red Thief}} | |||
{{Drops table row|Trousers of the Ghost Thief}} | |||
{{Drops table row|Trousers of the Lost Thief}} | |||
{{Drops table row|Plague Bringer's Trousers}} | |||
{{Drops table row|Plague Doctor's Trousers}} | |||
{{Drops table row|Bracelet of the Defiant Duelist}} | |||
{{Drops table row|Bracelet of the Daring Duelist}} | |||
{{Drops table row|Bracelet of the Lost Thief}} | |||
{{Drops table row|Plague Bringer's Bracelet}} | |||
{{Drops table row|Plague Doctor's Bracelet}} | |||
{{Drops table row|Ring of the Defiant Duelist}} | |||
{{Drops table row|Ring of the Daring Duelist}} | |||
{{Drops table row|Ring of the Lost Thief}} | |||
{{Drops table row|Plague Bringer's Ring}} | |||
{{Drops table row|Plague Doctor's Ring}} | |||
{{Table footer}} | |||
====[[File:Bronze Coffer (small).png|link=]] Treasure Coffer 4 (X: 8.8 Y: 9.6)==== | |||
{{Drops table header}} | |||
{{Drops table row|Earrings of the Defiant Duelist}} | |||
{{Drops table row|Earrings of the Daring Duelist}} | |||
{{Drops table row|Earrings of the Lost Thief}} | |||
{{Drops table row|Plague Bringer's Earrings}} | |||
{{Drops table row|Plague Doctor's Earrings}} | |||
{{Drops table row|Choker of the Defiant Duelist}} | |||
{{Drops table row|Choker of the Daring Duelist}} | |||
{{Drops table row|Choker of the Lost Thief}} | |||
{{Drops table row|Plague Bringer's Choker}} | |||
{{Drops table row|Plague Doctor's Choker}} | |||
{{Table footer}} | |||
==Achievements== | |||
This duty is associated with the following [[achievements]]: | |||
{| {{STDT| mech1 sortable align-left}} | |||
{{achievement table header}} | |||
{| | {{achievement table row|Remapping the Realm: Pharos Sirius}} | ||
| | |||
|} | |} | ||
==Images== | ==Images== | ||
[[File:Pharos sirius hard1.jpg | ===Gear Images=== | ||
[[File:Saint Mociannes Arboretum Pharos Sirius (Hard) Gear1.png|center|400px]] | |||
===Dungeon Images=== | |||
<gallery mode=packed> | |||
File:Pharos sirius hard1.jpg | |||
File:Pharos sirius hard2.jpg | |||
File:Pharos sirius hard3.jpg | |||
File:Pharos sirius hard4.jpg | |||
File:Pharos sirius hard5.jpg | |||
</gallery> | |||
==Dialogue== | |||
===Dungeon Dialogue=== | |||
'''Progenitrix:''' Ghilgh... Mom mad! | |||
'''Progenitrix:''' Ghllgh... Ghlllggh! | |||
{{ | {{Duties nav|dungeon}} | ||
Latest revision as of 20:04, 15 December 2024
 This article is about the optional level 60 dungeon from Heavensward. For the optional level 50 dungeon, see Pharos Sirius.
Pharos Sirius (Hard)
- Level
- 60 (Sync: 60)
- Item Level
- 170 (Sync: 240)
- Difficulty
- Hard
- Party size
- Light Party
4 man • 1 1
1  2
2 
- Unsyncing
- Allowed
- Time limit
- 90 minutes
- Duty Finder
- Dungeons (Heavensward)
- Roulette
- High-level Dungeons
- Tomestones
 30
30 - Req. quest
 Things Are Getting Sirius
- Entrance
- Limsa Lominsa Upper Decks (X:10, Y:11)
- Modes
- Command Mission, Explorer
- Patch
- 3.1
“With the siren banished from Pharos Sirius, reconstruction of the lighthouse is well under way. Or rather, it was, until an order of kobolds forced workers to evacuate. The Maelstrom has been swift to plan a retaking of the tower, but time is of the essence. The kobolds' love for explosives will surely spell destruction if the beastmen are not purged with utmost haste. Once again, Limsa Lominsa asks for your aid. Descend to the depths of the tower this time, and assist in defusing the kobold threat.
— In-game description
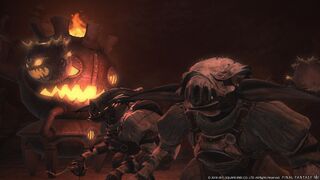
Pharos Sirius (Hard) is a level 60 dungeon introduced in patch 3.1 with Heavensward.
Objectives
- Arrive in the fuel chamber: 0/1
- Slay the Ghrah Luminary: 0/1
- Arrive in the second spire: 0/1
- Slay 8th Order Patriarch Be Gu: 0/1
- Arrive at Incubator 66: 0/1
- Secure Incubator 66: 0/1
Bosses
 Ghrah Luminary
Ghrah Luminary will create Corruptions that tether and mark players with Prey. The Corruptions will cast Aetheric Mimicry, and marked players should run up to one of the passive mobs circling the room to pass the debuff before the cast finishes. After a short time, the afflicted mob will transform and become aggressive; these have very little HP and should die easily. Note that the spider mobs will leave behind a small pool of poison when they die, so be sure to pull them aside before killing.
 8th Order Patriarch Be Gu
The boss will periodically perform a room-wide AoE that opens a fissure in the floor. Aether will leak out from these fissures until they are plugged by pulling a Corrupted Gel add and killing it on top of the plume. Eventually, the boss will summon a set of Kobold adds in addition to one or more purple Alchemy Engines; these engines provide a tether to the boss and should be destroyed immediately.
 Progenitrix and Progenitor
Progenitrix will periodically summon a mixture of Grey bombs and Lava bombs around the perimeter of the arena. The Grey bombs should be killed immediately. Once Progenitrix is killed, Progenitor will spawn. Like his predecessor, Progenitor will also summon Grey bombs around the perimeter of the arena; however, they will be accompanied by blue Remedy bombs rather than Lava Bombs. The Remedy bombs will attach a tether to a Grey bomb and slowly move toward it. Hitting the Remedy bombs will push them away, allowing time for the Grey bombs to be killed.
Loot
- See also: Ilvl 185 Dungeon Armor and Ilvl 185 Dungeon Accessories
 Ghrah Luminary
| Name | Type | Item Level | Rarity | Quantity |
|---|---|---|---|---|
| Boots of the Daring Duelist | Feet | 185 | Green | 1 |
| Boots of the Defiant Duelist | Feet | 185 | Green | 1 |
| Boots of the Ghost Thief | Feet | 185 | Green | 1 |
| Boots of the Lost Thief | Feet | 185 | Green | 1 |
| Boots of the Red Thief | Feet | 185 | Green | 1 |
| Bracelet of the Daring Duelist | Bracelets | 185 | Green | 1 |
| Bracelet of the Defiant Duelist | Bracelets | 185 | Green | 1 |
| Bracelet of the Lost Thief | Bracelets | 185 | Green | 1 |
| Plague Bringer's Bracelet | Bracelets | 185 | Green | 1 |
| Plague Bringer's Ring | Ring | 185 | Green | 1 |
| Plague Bringer's Shoes | Feet | 185 | Green | 1 |
| Plague Doctor's Bracelet | Bracelets | 185 | Green | 1 |
| Plague Doctor's Ring | Ring | 185 | Green | 1 |
| Plague Doctor's Shoes | Feet | 185 | Green | 1 |
| Ring of the Daring Duelist | Ring | 185 | Green | 1 |
| Ring of the Defiant Duelist | Ring | 185 | Green | 1 |
| Ring of the Lost Thief | Ring | 185 | Green | 1 |
 8th Order Patriarch Be Gu
 Progenitrix and Progenitor
- 15 Allagan Tomestone of Poetics
- Progenitrix Card (Drops at a fixed rate)
- Upon the Rocks Orchestrion Roll (Drops at a fixed rate)
| Name | Type | Item Level | Rarity | Quantity |
|---|---|---|---|---|
| Coat of the Daring Duelist | Body | 185 | Green | 1 |
| Coat of the Defiant Duelist | Body | 185 | Green | 1 |
| Coat of the Ghost Thief | Body | 185 | Green | 1 |
| Coat of the Lost Thief | Body | 185 | Green | 1 |
| Coat of the Red Thief | Body | 185 | Green | 1 |
| Plague Bringer's Coat | Body | 185 | Green | 1 |
| Plague Bringer's Trousers | Legs | 185 | Green | 1 |
| Plague Doctor's Coat | Body | 185 | Green | 1 |
| Plague Doctor's Trousers | Legs | 185 | Green | 1 |
| Trousers of the Daring Duelist | Legs | 185 | Green | 1 |
| Trousers of the Defiant Duelist | Legs | 185 | Green | 1 |
| Trousers of the Ghost Thief | Legs | 185 | Green | 1 |
| Trousers of the Lost Thief | Legs | 185 | Green | 1 |
| Trousers of the Red Thief | Legs | 185 | Green | 1 |
Additional Treasure Coffers
 Treasure Coffer 1 (X: 11.3 Y: 10.0)
| Name | Type | Item Level | Rarity | Quantity |
|---|---|---|---|---|
| Boots of the Defiant Duelist | Feet | 185 | Green | 1 |
| Boots of the Daring Duelist | Feet | 185 | Green | 1 |
| Boots of the Red Thief | Feet | 185 | Green | 1 |
| Boots of the Ghost Thief | Feet | 185 | Green | 1 |
| Boots of the Lost Thief | Feet | 185 | Green | 1 |
| Plague Bringer's Shoes | Feet | 185 | Green | 1 |
| Plague Doctor's Shoes | Feet | 185 | Green | 1 |
| Bracelet of the Defiant Duelist | Bracelets | 185 | Green | 1 |
| Bracelet of the Daring Duelist | Bracelets | 185 | Green | 1 |
| Bracelet of the Lost Thief | Bracelets | 185 | Green | 1 |
| Plague Bringer's Bracelet | Bracelets | 185 | Green | 1 |
| Plague Doctor's Bracelet | Bracelets | 185 | Green | 1 |
| Ring of the Defiant Duelist | Ring | 185 | Green | 1 |
| Ring of the Daring Duelist | Ring | 185 | Green | 1 |
| Ring of the Lost Thief | Ring | 185 | Green | 1 |
| Plague Bringer's Ring | Ring | 185 | Green | 1 |
| Plague Doctor's Ring | Ring | 185 | Green | 1 |
 Treasure Coffer 2 (X: 10.9 Y: 10.5)
 Treasure Coffer 3 (X: 10.7 Y: 9.7)
 Treasure Coffer 4 (X: 8.8 Y: 9.6)
| Name | Type | Item Level | Rarity | Quantity |
|---|---|---|---|---|
| Earrings of the Defiant Duelist | Earrings | 185 | Green | 1 |
| Earrings of the Daring Duelist | Earrings | 185 | Green | 1 |
| Earrings of the Lost Thief | Earrings | 185 | Green | 1 |
| Plague Bringer's Earrings | Earrings | 185 | Green | 1 |
| Plague Doctor's Earrings | Earrings | 185 | Green | 1 |
| Choker of the Defiant Duelist | Necklace | 185 | Green | 1 |
| Choker of the Daring Duelist | Necklace | 185 | Green | 1 |
| Choker of the Lost Thief | Necklace | 185 | Green | 1 |
| Plague Bringer's Choker | Necklace | 185 | Green | 1 |
| Plague Doctor's Choker | Necklace | 185 | Green | 1 |
Achievements
This duty is associated with the following achievements:
| Name | Points | Task | Reward | Patch |
|---|---|---|---|---|
| Remapping the Realm: Pharos Sirius | 10 | Discover every location within Pharos Sirius (Hard). | - | 3.1 |
Images
Gear Images
Dungeon Images
Dialogue
Dungeon Dialogue
Progenitrix: Ghilgh... Mom mad!
Progenitrix: Ghllgh... Ghlllggh!


