Difference between revisions of "Euphrosyne"
(→Bosses) |
|||
| Line 29: | Line 29: | ||
*Clear the Chamber of Revolutions: 0/1 | *Clear the Chamber of Revolutions: 0/1 | ||
==Bosses== | ==Enemies and Bosses== | ||
{{#ev:youtube|r_HvxYaj5t0|350|right|Raid Guide by MTQcapture}} | {{#ev:youtube|r_HvxYaj5t0|350|right|Raid Guide by MTQcapture}} | ||
===[[File:Aggressive difficulty r6.png|link=]] [[Nophica (Boss)|Nophica]]=== | ===[[File:Aggressive difficulty r6.png|link=]] [[Nophica (Boss)|Nophica]]=== | ||
| Line 46: | Line 46: | ||
*'''Furrow:''' Telegraphed stack AoE. | *'''Furrow:''' Telegraphed stack AoE. | ||
*'''Heavens' Earth''': Telegraphed AoE tankbusters that target all 3 tanks. | *'''Heavens' Earth''': Telegraphed AoE tankbusters that target all 3 tanks. | ||
===The Roots=== | |||
'''Enemies (platform 1): [[Euphrosynos Gigantoad]] x3, [[Euphrosynos Werewood]] x6''' | |||
Group up all enemies and defeat them with AoE attacks. The enemies have no notable mechanics aside from telegraphed AoEs to avoid. | |||
'''Enemies (platform 2): [[Euphrosynos Ktenos]] x3''' | |||
The Ktenos will each use '''Roaring Rumble''', dealing magical raid-wide damage, '''Rock Throw''', a telegraphed circle AoE, and '''Sweeping Gouge''', a telegraphed tankbuster. After defeating them, a large circle AoE will appear, spawning a '''[[Euphrosynos Behemoth]]'''. It will use '''Localized Maelstrom''', a telegraphed stack tankbuster, and '''Ecliptic Comet''', spawning a proximity AoE telegraph that deals magical damage. It will also use '''Trounce''', a late telegraphed conal AoE in front of it. | |||
===[[File:Aggressive difficulty r6.png|link=]] [[Althyk (Boss)|Althyk]] and [[Nymeia (Boss)|Nymeia]]=== | ===[[File:Aggressive difficulty r6.png|link=]] [[Althyk (Boss)|Althyk]] and [[Nymeia (Boss)|Nymeia]]=== | ||
| Line 69: | Line 78: | ||
*'''Time and Tide''' (version 2): '''Althyk''' will tether the '''Hydrostasis''' puddle numbered 3, causing it to resolve first. The puddle previously numbered 1 will resolve second, followed by the one previously numbered as 2. | *'''Time and Tide''' (version 2): '''Althyk''' will tether the '''Hydrostasis''' puddle numbered 3, causing it to resolve first. The puddle previously numbered 1 will resolve second, followed by the one previously numbered as 2. | ||
*'''Spinner's Wheel / Hydrorythmos / Time and Tide''': '''Nymeia''' will give everyone a '''Spinner's Wheel''' debuff, which will either be normal or reversed. She will also telegraph '''Hydrorythmos'''. '''Althyk''' will tether the line AoE and speed up the cascading AoEs after a certain point, so players should dodge into the initial line and resolve their debuffs immediately after. | *'''Spinner's Wheel / Hydrorythmos / Time and Tide''': '''Nymeia''' will give everyone a '''Spinner's Wheel''' debuff, which will either be normal or reversed. She will also telegraph '''Hydrorythmos'''. '''Althyk''' will tether the line AoE and speed up the cascading AoEs after a certain point, so players should dodge into the initial line and resolve their debuffs immediately after. | ||
===Hanging Tributary=== | |||
'''Enemies: [[Euphrosynos Colossus]] x3, [[Euphrosynos Dhruva]] x6''' | |||
The Dhruva will use '''Aetherial Blizzard''', a telegraphed frontal line AoE. The Colossi will use '''Frozen Perimeter''', a telegraphed donut AoE, and '''Inner Bladestorm''', a point-blank AoE. Both of these attacks can be [[interrupt]]ed. Finally, they will also use '''Rapid Sever''', a telegraphed tankbuster. | |||
===[[File:Aggressive difficulty r6.png|link=]] [[Halone (Boss)|Halone]]=== | ===[[File:Aggressive difficulty r6.png|link=]] [[Halone (Boss)|Halone]]=== | ||
Latest revision as of 03:07, 17 January 2025
Euphrosyne
- Level
- 90 (Sync: 90)
- Item Level
- 595
- Difficulty
- Normal
- Party size
- Alliance
24 man • 3 6
6  15
15 
- Unsyncing
- Allowed
- Time limit
- 120 minutes
- Duty Finder
- Alliance Raids (Endwalker)
- Roulette
- Alliance Raids
- Tomestones
 100
100  100
100  12
12 - Req. quest
 Return to the Phantom Realm
- Entrance
- The Omphalos (X:4.3, Y:7.7)
- Region
- ???
- Patch
- 6.3
“The Twelve, Eorzea's guardian deities, seek to fulfill their enigmatic aspirations, and for this they claim they must engage in battle with men. Continuing your efforts to uncover the truth, you and your comrades have turned your attention to the monument at the heart of the Omphalos, which contains an incomplete epigraph. The goddess Nophica promises you the key to deciphering it, but in exchange you must do battle with more gods, herself included. So it is that you prepare yourself for another grueling foray into their sanctum, there to grant the divinities their heart's desire...
— In-game description
Euphrosyne is a level 90 raid introduced in patch 6.3 with Endwalker. It is the second part of Myths of the Realm.
Objectives
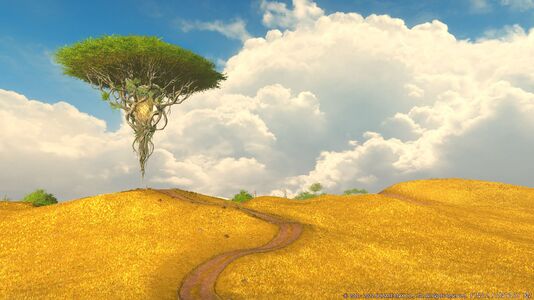
- Clear the fertile plains: 0/1
- Clear the Roots: 0/1
- Clear the Bole: 0/1
- Clear the hanging tributary: 0/1
- Clear the Barbs: 0/1
- Clear the Chamber of Revolutions: 0/1
Enemies and Bosses
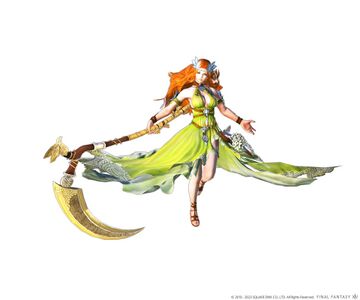
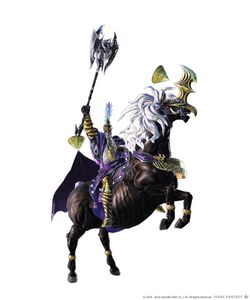
 Nophica
- Matron's Plenty: Transitions arena to pink flower field or green forest. Will also spawn brambles at the edge of the arena that will deal heavy damage-over-time to anyone who touches it.
- The Giving Land: An attack that depends on the current arena. If it is currently a pink flower field, the boss will do a point-blank AoE (Spring Flowers). If the arena is in a green forest, she will do a donut AoE (Summer Shade). Both will have a very brief telegraph indicator. Anyone hit will be knocked up in addition to the
 Vulnerability Up stack.
 - Matron's Harvest: Unavoidable raidwide damage and transitions arena back to yellow field.
- Reaper's Gale: Two sets of telegraphed line AoEs that crisscross the arena.
- Floral Haze: Assigns everyone with a


 Face direction debuff, that will cause them to run in the direction shown in relation to where they are facing once the debuff runs out. Players will run for the duration of the
  Forced March debuff.
- The boss will then use two The Giving Land attacks. Players should dodge the first one normally, then position themselves so their Forced March will move them away from the second AoE.
- Duration of the initial debuff in repeats of this mechanic can vary between players.
- Matron's Breath: Summons a blue circle and yellow circle on the arena, followed by multiple beacons that are either blue or yellow. Each beacon will have a shrinking circle and a number of dots, indicating when it will resolve. Standing in the circles will inflict either
 Blooming Blue or
  Blooming Gold depending on the color. Players must be in the same color circle as the beacon when it resolves to avoid taking damage. The first set will be 3 beacons of alternating colors, while later usages will have 6 beacons with a random pattern for the other 3.
 - Abundance: Unavoidable raidwide damage.
- Landwaker: Raidwide damage and summons several telegraphed circular AoEs. Used in combination with Reaper's Gale.
- This is followed by Floral Haze debuffs resolving and The Giving Land.
- Sowing Circle: Spawns two sets of "exaflare" AoEs from the middle. Wait until the first two explosions have gone off, then move into the previously unsafe area to dodge the next set of AoEs.
- Furrow: Telegraphed stack AoE.
- Heavens' Earth: Telegraphed AoE tankbusters that target all 3 tanks.
The Roots
Enemies (platform 1): Euphrosynos Gigantoad x3, Euphrosynos Werewood x6
Group up all enemies and defeat them with AoE attacks. The enemies have no notable mechanics aside from telegraphed AoEs to avoid.
Enemies (platform 2): Euphrosynos Ktenos x3
The Ktenos will each use Roaring Rumble, dealing magical raid-wide damage, Rock Throw, a telegraphed circle AoE, and Sweeping Gouge, a telegraphed tankbuster. After defeating them, a large circle AoE will appear, spawning a Euphrosynos Behemoth. It will use Localized Maelstrom, a telegraphed stack tankbuster, and Ecliptic Comet, spawning a proximity AoE telegraph that deals magical damage. It will also use Trounce, a late telegraphed conal AoE in front of it.
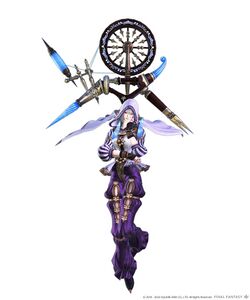
 Althyk and Nymeia
Note that it is possible to fall off the edge of the arena.
- Both bosses will have the
 Arcane Triumph buff that lasts around 8 minutes. When this buff expires, they will begin casting a hard enrage (Neikos) that will wipe the party, so they must be defeated before this happens. The buff will also be removed (without causing a wipe) once either boss is defeated.
 - Both bosses should be separated from each other at all times. If they are too close, they will tether and receive the
 Sibling Revelry buff, increasing their damage dealt and decreasing damage taken.
 - If the health difference between the bosses become too large, the higher HP boss will transfer some of its health to the lower HP boss.
- Spinner's Wheel: Nymeia will give everyone a debuff that is also indicated by a card icon above players. All players will receive the same debuff for the first few usages of this action.
 Arcane Attraction: Players must not be facing Nymeia when the debuff expires or they will take damage and be
  Seduced, incapacitating them for several seconds.
 Attraction Reversed: Players must be facing Nymeia when the debuff expires or they will take damage and be Seduced.
 Arcane Fever: Players will receive
  Pyretic when the debuff expires, so they should stop moving and attacking to prevent excess damage.
 Fever Reversed: Players will receive
  Freezing Up when the debuff expires. They must be moving as it expires, or they will be inflicted with
  Deep Freeze, incapacitating them for several seconds.
- Note that in a given pull, the boss will only use either Arcane Attraction / Reversed or Arcane Fever / Reversed, not both.
- Mythril Greataxe: Althyk will face a random player and use a telegraphed conal AoE that will likely kill anyone it hits.
- Time and Tide: Althyk will speed up the expiration of each player's Spinner's Wheel debuff when the system message countdown finishes, so players must be prepared to resolve their debuff earlier than expected.
- Axioma: Althyk will use an unavoidable raidwide AoE that also spawns dark purple streaks on the arena. Standing in these will inflict
 Heavy and
  Magic Vulnerability Up. They will persist for the entire fight and should be avoided as much as possible barring one mechanic.
 - Hydroptosis: Nymeia spawns several AoE telegraphs on random players. Spread out to avoid overlap.
- Inexorable Pull: Althyk uses a roomwide AoE that will knock up and damage players. This can be dodged by standing in the dark purple streaks.
- Hydrorythmos: Nymeia spawns a water line AoE through the middle of the arena that will cascade outwards. Dodge by moving into the previously unsafe area. Anyone hit will be knocked back and inflicted with
 Sustained Damage.
 - Petrai: Althyk uses a telegraphed shared AoE tankbuster.
- Hydrostasis: Nymeia summons three water puddles numbered 1-3, indicating the order in which a ball of water will drop on them, inflicting a knockback from the puddle's location. Arm's Length and Surecast can be used to mitigate two of the three knockbacks if timed properly. Otherwise, players should aim their knockback to the next puddle to resolve to avoid being knocked off the arena.
- Time and Tide (version 2): Althyk will tether the Hydrostasis puddle numbered 3, causing it to resolve first. The puddle previously numbered 1 will resolve second, followed by the one previously numbered as 2.
- Spinner's Wheel / Hydrorythmos / Time and Tide: Nymeia will give everyone a Spinner's Wheel debuff, which will either be normal or reversed. She will also telegraph Hydrorythmos. Althyk will tether the line AoE and speed up the cascading AoEs after a certain point, so players should dodge into the initial line and resolve their debuffs immediately after.
Hanging Tributary
Enemies: Euphrosynos Colossus x3, Euphrosynos Dhruva x6
The Dhruva will use Aetherial Blizzard, a telegraphed frontal line AoE. The Colossi will use Frozen Perimeter, a telegraphed donut AoE, and Inner Bladestorm, a point-blank AoE. Both of these attacks can be interrupted. Finally, they will also use Rapid Sever, a telegraphed tankbuster.
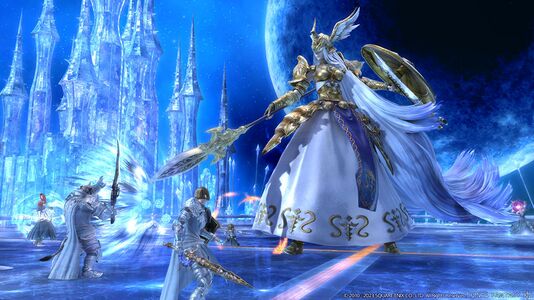
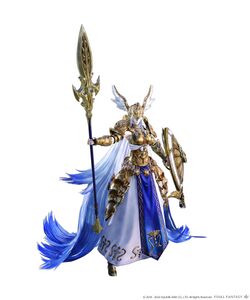
 Halone
- Rain of Spears: Unavoidable roomwide AoE that hits 3 times.
- Tetrapagos: The boss will telegraph four sequential AoEs (point-blank, donut, left cleave, right cleave). All four will be used in quick succession in the same order they were telegraphed. To dodge most patterns, go to an area that is safe from the first two AoEs (e.g., right and out) if applicable. After the first two AoEs resolve, go to the opposite area (left and in).
- Doom Spear: Three towers will spawn, each with a stack marker. Roughly each alliance should take one tower. The boss will jump to each, dealing split damage. As with all tower mechanics, if one of them has nobody covering it, the whole raid will take heavy damage.
- Spears Three: Telegraphed AoE tankbusters that target all 3 tanks.
- Thousandfold Thrust: Several red targeting circles will appear around the boss. They will then converge into a single one and spread out, indicating where the boss will use a 180 degree multi-hit cleave.
- Lochos: The boss will spawn two rows of spears, indicated by the yellow electric tethers. These spears will then use a half-room line aoe straight across, always leaving one quadrant safe (while always intersecting in one)
- This will later be combined with Thousandfold Thrust, leaving only a eighth of the room safe.
- Will of the Fury: The boss spawns a narrow donut AoE that originates from the sides of the arena and cascades inward. This will be coupled with Wrath of Halone, a proximity AoE from the center. Players will need to move to the edge of the arena while dodging the cascading donut. Anyone hit will be inflicted with
 Deep Freeze and will likely die.
 - Adds phase: The boss will summon three Glacial Spears, while telegraphing an AoE that hits the entire arena except for an octagonal region around each spear. When the AoE resolves, it will block off each region with ice and inflict
 Frostbite to anyone outside, likely killing them. As usual, each alliance should take one of the spears.
- A larger Glacial Spear will spawn in the middle. All spears must be defeated before the Fury's Frost duty gauge reaches 100, or the party will wipe. Once a group has killed their initial spear, the barrier around it will disappear, allowing them to fight the center add. Defeating the middle spear causes any remaining barriers to disappear.
- Niphas: Random players will be given AoE telegraphs, so spread out. Each spear will also use a telegraphed point-blank AoE.
- Cheimon: The spear in the middle will use a telegraphed line AoE that will rotate clockwise or counterclockwise a few times. Players should move to the side of their octagon that will dodge this.
- Fury's Aegis: Multi-hit raidwide AoE. Heal through and mitigate.
- Chalaza: Telegraphed AoEs on random players. One player will also be given a stack marker.
- Tetrapagos Thrust: A combination of Tetrapagos and Thousandfold Thrust, in which the red targeting circles will appear during the Tetrapagos telegraphs. Players should dodge the four Tetrapagos AoEs as usual while preparing to quickly move for Thousandfold Thrust if needed.
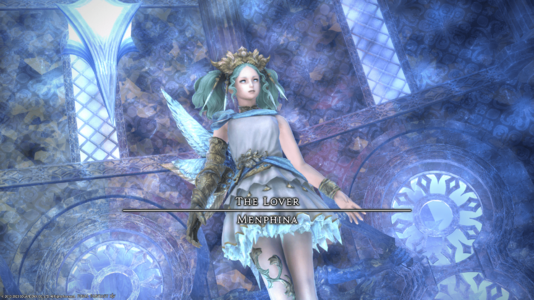
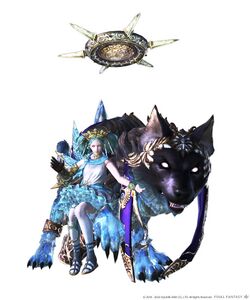
 The Lover: Menphina
Shortly after engaging the boss, the arena will be surrounded by an AoE that will deal heavy damage-over-time to anyone who steps in it.
- Blue Moon: Unavoidable raidwide damage.
- Love's Light: Summons a large moon outside the arena.
- Full Bright: The summoned moon will begin to wax (brighten). When it fully waxes, it will use a large line AoE through the middle of the arena.
- Midnight Frost: The floor on one side of the boss (in front or behind) will be partially covered in ice, telegraphing a half-room cleave AoE.
- Lunar Kiss: Telegraphed line AoE tankbusters that targets all 3 tanks.
- Silver Mirror: Spawns three sets of telegraphed medium-sized AoEs on random players.
- Moonset: Spawns three telegraphed large AoEs. The boss will jump to each one.
- Winter Halo: Telegraphed donut AoE. Often used after Moonset, so keep track of the boss's final location.
- Love's Light / Full Bright (version 2): Summons four small moons on the arena, each with a circular AoE telegraph. Two moons will be half waxed. Full Bright will cause all moons to begin waxing. The initially half-filled moons will resolve first, followed by the other two.
- Selenain Mysteria: Adds phase. Four Ceremonial Pillars and four untargetable Ice Sprites will spawn. The pillars must be defeated before The Lover's Power reaches 100, or the party will wipe. Defeating one pillar will slow the rate the gauge fills.
- The Ice Sprites will use Ancient Blizzard, which are telegraphed conal AoEs aimed at random players. Other random players will also receive telegraphed spread AoE markers.
- Rise of the Twin Moons: Unavoidable AoE that follows the adds phase. The boss will also summon Dalamud and mount it, gaining new attacks. The boss's hitbox size will also significantly increase.
- Midnight Frost (version 2): Functions similarly as before, except Dalamud will also raise a glowing claw to its left or right, telegraphing another half-room cleave. Therefore, only a quarter of the room is safe.
- Playful Orbit: The boss will unmount Dalamud, who will jump to one edge of the arena. Both Menphina and Dalamud will use Midnight Frost, so dodge appropriately.
- Keen Moonbeam: Telegraphed spread AoEs on random players. Immediately followed by a Midnight Frost.
- Cratering Chill: Two proximity AoE markers will spawn on opposite ends of the arena.
- Winter Solstice: Freezes the floor, inflicting
 Thin Ice on everyone and causing them to slide when they move. This will be coupled by a Playful Orbit / Winter Halo, so players will need to dodge the donut AoE and the half-room cleave at the same time by sliding into the safe area.
 - Moonset Rays: Telegraphed stack AoE on one random player.
- A later combination mechanic will use Love's Light (large moon) and Playful Orbit / Midnight Frost. Players will need to dodge the line AoE first, then dodge the half-room cleaves.
Loot
- See also: Hypostatic Armor
 Nophica
| Name | Type | Item Level | Rarity | Quantity |
|---|---|---|---|---|
| Hypostatic Hairpin of Aiming | Head | 620 | Blue | 1 |
| Hypostatic Hairpin of Fending | Head | 620 | Blue | 1 |
| Hypostatic Hairpin of Maiming | Head | 620 | Blue | 1 |
| Hypostatic Hairpin of Scouting | Head | 620 | Blue | 1 |
| Hypostatic Hairpin of Striking | Head | 620 | Blue | 1 |
| Hypostatic Sabatons of Aiming | Feet | 620 | Blue | 1 |
| Hypostatic Sabatons of Scouting | Feet | 620 | Blue | 1 |
| Hypostatic Sabatons of Striking | Feet | 620 | Blue | 1 |
| Hypostatic Shoes of Casting | Feet | 620 | Blue | 1 |
| Hypostatic Shoes of Healing | Feet | 620 | Blue | 1 |
| Hypostatic Sollerets of Fending | Feet | 620 | Blue | 1 |
| Hypostatic Sollerets of Maiming | Feet | 620 | Blue | 1 |
| Hypostatic Visor of Casting | Head | 620 | Blue | 1 |
| Hypostatic Visor of Healing | Head | 620 | Blue | 1 |
 Althyk and Nymeia
| Name | Type | Item Level | Rarity | Quantity |
|---|---|---|---|---|
| Hypostatic Armlets of Casting | Hands | 620 | Blue | 1 |
| Hypostatic Armlets of Healing | Hands | 620 | Blue | 1 |
| Hypostatic Bottoms of Casting | Legs | 620 | Blue | 1 |
| Hypostatic Bottoms of Healing | Legs | 620 | Blue | 1 |
| Hypostatic Breeches of Fending | Legs | 620 | Blue | 1 |
| Hypostatic Breeches of Maiming | Legs | 620 | Blue | 1 |
| Hypostatic Gauntlets of Fending | Hands | 620 | Blue | 1 |
| Hypostatic Gauntlets of Maiming | Hands | 620 | Blue | 1 |
| Hypostatic Gloves of Aiming | Hands | 620 | Blue | 1 |
| Hypostatic Gloves of Scouting | Hands | 620 | Blue | 1 |
| Hypostatic Gloves of Striking | Hands | 620 | Blue | 1 |
| Hypostatic Hose of Aiming | Legs | 620 | Blue | 1 |
| Hypostatic Hose of Scouting | Legs | 620 | Blue | 1 |
| Hypostatic Hose of Striking | Legs | 620 | Blue | 1 |
 Halone
| Name | Type | Item Level | Rarity | Quantity |
|---|---|---|---|---|
| Hypostatic Cloak of Casting | Body | 620 | Blue | 1 |
| Hypostatic Cloak of Healing | Body | 620 | Blue | 1 |
| Hypostatic Mail of Fending | Body | 620 | Blue | 1 |
| Hypostatic Mail of Maiming | Body | 620 | Blue | 1 |
| Hypostatic Sabatons of Aiming | Feet | 620 | Blue | 1 |
| Hypostatic Sabatons of Scouting | Feet | 620 | Blue | 1 |
| Hypostatic Sabatons of Striking | Feet | 620 | Blue | 1 |
| Hypostatic Shoes of Casting | Feet | 620 | Blue | 1 |
| Hypostatic Shoes of Healing | Feet | 620 | Blue | 1 |
| Hypostatic Sollerets of Fending | Feet | 620 | Blue | 1 |
| Hypostatic Sollerets of Maiming | Feet | 620 | Blue | 1 |
| Hypostatic Tunic of Aiming | Body | 620 | Blue | 1 |
| Hypostatic Tunic of Scouting | Body | 620 | Blue | 1 |
| Hypostatic Tunic of Striking | Body | 620 | Blue | 1 |
 Menphina
| Name | Type | Item Level | Rarity | Quantity |
|---|---|---|---|---|
| Wind-up Halone | Minion | N/A | Basic | 1 |
| Favor Orchestrion Roll | Orchestrion Roll | N/A | Basic | 1 |
| Rhythm of the Realm Orchestrion Roll | Orchestrion Roll | N/A | Basic | 1 |
| Dedicated to Moonlight Orchestrion Roll | Orchestrion Roll | N/A | Basic | 1 |
| Menphina Card | Triple Triad Card | N/A | 1 |
Rewards
When originally released, you could receive only one reward item per week for completing duties in Euphrosyne. This restriction was removed in Patch 6.4.
Each party in the alliance will receive its own treasure chest, the contents of which will be identical regardless of the route taken.
- Players cannot open a treasure chest belonging to another party.
Historical Completion Reward
Prior to patch 7.0, upon completing Euphrosyne, players could also earn a separate reward: an Euphrosyne Coin. The Euphrosyne Coin could have been exchanged with Nesvaaz in Radz-at-Han (X:10.6 Y:10.0) for items used to enhance equipment purchased with Allagan Tomestones of ![]() Causality or
Causality or ![]() Comedy.
Comedy.
Achievements
This duty is associated with the following achievements:
| Name | Points | Task | Reward | Patch |
|---|---|---|---|---|
| Divine Revelry | 5 | Complete Euphrosyne. | - | 6.3 |
| Mapping the Realm: Euphrosyne | 10 | Discover every location within Euphrosyne. | - | 6.3 |
Images
Gear Images
Raid Images
Concept Art
Lore
“To create the Heaven of Earth, Nophica planted a single sapling which Althyk instantly coaxed to maturity by bending time itself. Under this mighty sentinel's boughs sit farmers and naturalists, historians and archaeologists.
— The Hell and Heaven of Earth, Encyclopædia Eorzea Volume I, p. 19
“In the center of the Heaven of Ice rises a lofty palace of ice—ice made of frozen moonbeams and carved with The Fury's own spear. Here reside epic heroes and gallant knights, the benevolent and the faithful.
— The Hell and Heaven of Ice, Encyclopædia Eorzea Volume I, p. 19

