Difference between revisions of "Bardam's Mettle"
| Line 85: | Line 85: | ||
==Loot== | ==Loot== | ||
===Garula Loot=== | ===Garula Loot=== | ||
{| class="wikitable sortable" style="text-align:center" | |||
|- | |||
!Item | |||
!Icon | |||
!Level | |||
!Item Level | |||
!Requirement | |||
!Slot | |||
!Defence | |||
!Magic Defence | |||
!Materia Slots | |||
!Stats and Attributes | |||
|- | |||
|[[Nomad's Belt of Aiming]]||[[File:nomads belt of aiming icon1.png]]||65||276||[[Archer|ARC]], [[Bard|BRD]], [[MCH]]||Waist||208||208||1||align = "left" |[[Dexterity]] +83, [[Vitality]] +91, [[Critical Hit]] +66, [[Determination]] +46 | |||
|- | |||
|[[Nomad's Belt of Casting]]||[[File:nomads belt of casting icon1.png]]||65||276||[[Thaumaturge|THM]], [[Arcanist|ACN]], [[Black Mage|BLM]], [[Summoner|SMN]], [[RDM]]||Waist||151||264||1||align = "left" |[[Vitality]] +82, [[Intelligence]] +83, [[Spell Speed]] +66, [[Direct Hit Rate]] +47 | |||
|- | |||
|[[Nomad's Belt of Fending]]||[[File:nomads belt of fending icon1.png]]||65||276||[[Gladiator|GLA]], [[Marauder|MRD]], [[Paladin|PLD]], [[Warrior|WAR]], [[DRK]]||Waist||377||377||1||align = "left" |[[Strength]] +83, [[Vitality]] +91, [[Critical Hit]] +66, [[Tenacity]] +47 | |||
|- | |||
|[[Nomad's Belt of Healing]]||[[File:nomads belt of healing icon1.png]]||65||276||[[Conjurer|CNJ]], [[White Mage|WHM]], [[Scholar|SCH]], [[AST]]||Waist||151||264||1||align = "left" |[[Vitality]] +82, [[Mind]] +83, [[Spell Speed]] +47, [[Piety]] +66 | |||
|- | |||
|[[Nomad's Belt of Maiming]]||[[File:nomads belt of maiming icon1.png]]||65||276||[[Lancer|LNC]], [[Dragoon|DRG]]||Waist||264||208||1||align = "left" |[[Strength]] +83, [[Vitality]] +91, [[Determination]] +46, [[Direct Hit Rate]] +66 | |||
|- | |||
|[[Nomad's Belt of Scouting]]||[[File:nomads belt of scouting icon1.png]]||65||276||[[Rogue|ROG]], [[Ninja|NIN]]||Waist||208||208||1||align = "left" |[[Dexterity]] +83, [[Vitality]] +91, [[Skill Speed]] +66, [[Direct Hit Rate]] +47 | |||
|- | |||
|[[Nomad's Belt of Striking]]||[[File:nomads belt of striking icon1.png]]||65||276||[[Pugilist|PGL]], [[Monk|MNK]], [[SAM]]||Waist||208||208||1||align = "left" |[[Strength]] +83, [[Vitality]] +91, [[Critical Hit]] +47, [[Direct Hit Rate]] +66 | |||
|- | |||
|[[Nomad's Boots of Aiming]]||[[File:nomads boots of aiming icon1.png]]||65||276||[[Archer|ARC]], [[Bard|BRD]], [[MCH]]||Feet||240||240||2||align = "left" |[[Dexterity]] +111, [[Vitality]] +122, [[Skill Speed]] +89, [[Direct Hit Rate]] +62 | |||
|- | |||
|[[Nomad's Boots of Casting]]||[[File:nomads boots of casting icon1.png]]||65||276||[[Thaumaturge|THM]], [[Arcanist|ACN]], [[Black Mage|BLM]], [[Summoner|SMN]], [[RDM]]||Feet||174||305||2||align = "left" |[[Vitality]] +110, [[Intelligence]] +111, [[Determination]] +88, [[Direct Hit Rate]] +62 | |||
|- | |||
|[[Nomad's Boots of Fending]]||[[File:nomads boots of fending icon1.png]]||65||276||[[Gladiator|GLA]], [[Marauder|MRD]], [[Paladin|PLD]], [[Warrior|WAR]], [[DRK]]||Feet||435||435||2||align = "left" |[[Strength]] +111, [[Vitality]] +122, [[Determination]] +88, [[Skill Speed]] +62 | |||
|- | |||
|[[Nomad's Boots of Healing]]||[[File:nomads boots of healing icon1.png]]||65||276||[[Conjurer|CNJ]], [[White Mage|WHM]], [[Scholar|SCH]], [[AST]]||Feet||174||305||2||align = "left" |[[Vitality]] +110, [[Mind]] +111, [[Determination]] +61, [[Piety]] +89 | |||
|- | |||
|[[Nomad's Boots of Maiming]]||[[File:nomads boots of maiming icon1.png]]||65||276||[[Lancer|LNC]], [[Dragoon|DRG]]||Feet||305||240||2||align = "left" |[[Strength]] +111, [[Vitality]] +122, [[Critical Hit]] +62, [[Skill Speed]] +89 | |||
|- | |||
|[[Nomad's Boots of Scouting]]||[[File:nomads boots of scouting icon1.png]]||65||276||[[Rogue|ROG]], [[Ninja|NIN]]||Feet||240||240||2||align = "left" |[[Dexterity]] +111, [[Vitality]] +122, [[Determination]] +88, [[Direct Hit Rate]] +62 | |||
|- | |||
|[[Nomad's Boots of Striking]]||[[File:nomads boots of striking icon1.png]]||65||276||[[Pugilist|PGL]], [[Monk|MNK]], [[SAM]]||Feet||240||240||2||align = "left" |[[Strength]] +111, [[Vitality]] +122, [[Critical Hit]] +89, [[Determination]] +61 | |||
|- | |||
|[[Nomad's Ring of Aiming]]||[[File:nomads ring of aiming icon1.png]]||65||276||[[Archer|ARC]], [[Rogue|ROG]], [[Bard|BRD]], [[Ninja|NIN]], [[MCH]]||Ring||1||1||1||align = "left" |[[Dexterity]] +83, [[Critical Hit]] +47, [[Direct Hit Rate]] +66 | |||
|- | |||
|[[Nomad's Ring of Casting]]||[[File:nomads ring of casting icon1.png]]||65||276||[[Thaumaturge|THM]], [[Arcanist|ACN]], [[Black Mage|BLM]], [[Summoner|SMN]], [[RDM]]||Ring||1||1||1||align = "left" |[[Intelligence]] +83, [[Determination]] +46, [[Direct Hit Rate]] +66 | |||
|- | |||
|[[Nomad's Ring of Fending]]||[[File:nomads ring of fending icon1.png]]||65||276||[[Gladiator|GLA]], [[Marauder|MRD]], [[Paladin|PLD]], [[Warrior|WAR]], [[DRK]]||Ring||1||1||1||align = "left" |[[Vitality]] +91, [[Determination]] +46, [[Skill Speed]] +66 | |||
|- | |||
|[[Nomad's Ring of Healing]]||[[File:nomads ring of healing icon1.png]]||65||276||[[Conjurer|CNJ]], [[White Mage|WHM]], [[Scholar|SCH]], [[AST]]||Ring||1||1||1||align = "left" |[[Mind]] +83, [[Critical Hit]] +47, [[Piety]] +66 | |||
|- | |||
|[[Nomad's Ring of Slaying]]||[[File:nomads ring of slaying icon1.png]]||65||276||[[Pugilist|PGL]], [[Lancer|LNC]], [[Monk|MNK]], [[Dragoon|DRG]], [[SAM]]||Ring||1||1||1||align = "left" |[[Strength]] +83, [[Critical Hit]] +66, [[Direct Hit Rate]] +47 | |||
|- | |||
|[[Nomad's Wristbands of Aiming]]||[[File:nomads wristbands of aiming icon1.png]]||65||276||[[Archer|ARC]], [[Rogue|ROG]], [[Bard|BRD]], [[Ninja|NIN]], [[MCH]]||Bracelets||1||1||1||align = "left" |[[Dexterity]] +83, [[Critical Hit]] +66, [[Direct Hit Rate]] +47 | |||
|- | |||
|[[Nomad's Wristbands of Casting]]||[[File:nomads wristbands of casting icon1.png]]||65||276||[[Thaumaturge|THM]], [[Arcanist|ACN]], [[Black Mage|BLM]], [[Summoner|SMN]], [[RDM]]||Bracelets||1||1||1||align = "left" |[[Intelligence]] +83, [[Critical Hit]] +66, [[Spell Speed]] +47 | |||
|- | |||
|[[Nomad's Wristbands of Fending]]||[[File:nomads wristbands of fending icon1.png]]||65||276||[[Gladiator|GLA]], [[Marauder|MRD]], [[Paladin|PLD]], [[Warrior|WAR]], [[DRK]]||Bracelets||1||1||1||align = "left" |[[Vitality]] +91, [[Determination]] +66, [[Tenacity]] +47 | |||
|- | |||
|[[Nomad's Wristbands of Healing]]||[[File:nomads wristbands of healing icon1.png]]||65||276||[[Conjurer|CNJ]], [[White Mage|WHM]], [[Scholar|SCH]], [[AST]]||Bracelets||1||1||1||align = "left" |[[Mind]] +83, [[Critical Hit]] +47, [[Piety]] +66 | |||
|- | |||
|[[Nomad's Wristbands of Slaying]]||[[File:nomads wristbands of slaying icon1.png]]||65||276||[[Pugilist|PGL]], [[Lancer|LNC]], [[Monk|MNK]], [[Dragoon|DRG]], [[SAM]]||Bracelets||1||1||1||align = "left" |[[Strength]] +83, [[Critical Hit]] +66, [[Skill Speed]] +47 | |||
|- | |||
|} | |||
===Bardem Loot=== | ===Bardem Loot=== | ||
Revision as of 01:40, 20 July 2017
Lore
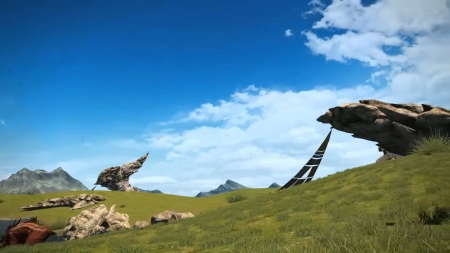
"If you are to participate in the Naadam, and fight alongside the Mol, you must first be recognized as a warrior of the Steppe. To earn this honor, you will be required to complete a rite of passage involving walking in the footsteps of the legendary hero Bardam and taming a yol. Each must do this by themselves, of course, and so you shall... though if by pure coincidence some of your fellow adventurers happened to have made the long journey to the Far East, and simply insisted on accompanying you... surely no one would be any the wiser?" — Game Description
Unlock
- Quest: In the Footsteps of Bardam the Brave
- Quest-giver Location: Hein - The Azim Steppe (x11.2,y11.4)
- Prerequisites: Main Scenario Quest A Trial Before the Trial
Objectives
- Arrive at Bardam's Hunt
- Defeat Galura
- Arrive at the Rebirth of Bardam the Brave
- Defeat Bardam
- Arrive in the Voiceless Muse
- Defeat Yol
Bosses
Galura
- Heave Frontal cone AOE. Tank to dodge as required.
- Crumbling Crust After a short cast time, 4 telegraphed quick casting AoEs appears around Galura. Deals moderate damage, but AoEs can stack. Melees to dodge as required.
- Rush Galura will mark an off-aggro target and channel a straight line charge. Marked players should distances themselves from Galura to reduce damage taken. Other players should move out of Galura's path.
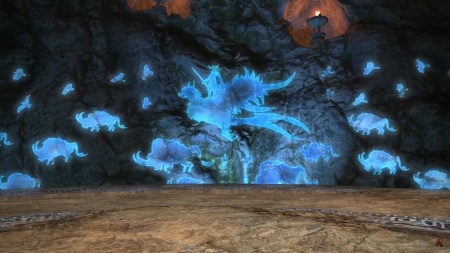
- Earthquake Occurs immediately after Rush, stunning all players. Animals marked with a '!' symbol in the pen will begin charging up their AoE attacks. The type of animal determines the type of attack that will occur. Galura does this three times in his fight.
- Ram: Straight line AoE. Appears in all 3 phases.
- Coeurl: Large frontal cone AoE. Appears after the second time Rush is used.
- Kukurul: Small circle AoE. Appears after the third time Rush is used.
Bardam
Phase 1
- Magnetism Pulls all players towards the center of the room.
- Travail (shockwave) Occurs immediately after Magnetism. A circle AoE will appear in the center, followed by a circle AoE covering the remainder of the outer arena. Stand just outside the inner AoE facing away from the Hunter of Bardam. Wait for the inner AoE to cast, then immediately walk backwards to avoid the outer AoE.
- Spear charge Spears appear along to edge of the map and fire off AoEs that makes the map a chessboard of safe zones.
- Empty gaze Empty Gaze will charge while Travail and Spear charges are running. Turn away to dodge it.
Phase 2
- Travail (lightning) Lightning attack on the whole party. Stand on prism towers to dodge the attack.
- Travail (firestorm) All players are marked and rings of fire drops periodically over their heads. Rings will remain active for a few seconds after dropping. To prevent dropping your AOE onto an ally's escape path, everyone should spread out and run clockwise.
- Heavy strike 270 degree front cone. Safe spot is behind the golem.
- Star fall Spawns 4 large circular AoEs that leaves behind Star shards to be used in the next phase. Safe spots include the center and the outer edge of the arena.
Phase 3
- Looming Shadow Meteor attack with an extremely long cast time. Hide behind Star shard to dodge.
- Travial (summon warriors) Breaks the East and West star shards.
- Magnetism + Spear charge + Heavy Strike + Shockwave combo The floor is lava. Find safe spot. Will destroy one of the two remaining star shards. After these attacks, the meteor will land. Hide behind the last star shard.
This is a non-combat boss fight. Phases are composed of various mechanics players will have to successfully complete or dodge. Players who fail twice during any phase will receive a fetters debuff until the end of the phase. Debuffs will be cleansed at the end of each phase. At least one player must survive the mechanics to proceed to the next phase. If all players fail the mechanics, you'll be forced to repeat the fight.
Yol
Phase 1
- Feathercut Frontal cleave tank-buster.
- Wind Unbound Group-wide AoE. Spawns a number of orbs around the outer edge of the arena. Orbs will periodically fire line AoEs.
- Flutterfall Marks all players with orange markers. Players need to spread to avoid overlapping splash damage.
- Eye of the Fierce Gaze attack that causes Confusion. Look away to avoid status infliction.
At the end of this phase, Yol will retreat and spawn a Corpsecleaner Eagle. Once the first is killed, Yol will spawn one more and after killing it Yol will return to the arena. During this time, Yol will periodically appear the edge of the arena, performing line AoE attacks with no markers. Move out from in front of Yol when it appears to avoid damage.
Phase 2
- Wingbeat Marks a player with a green marker. The marked player will be knocked to the outer edge of the arena. Get back to the center of the arena to avoid outer AoEs.
At the start of this phase, Yol's wings will become targetable and Yol will become untargetable. Players must kill both wings to proceed. During this time, Yol will spawn three circular AoEs that will rotate clock-wise around the outer edge of the arena. Players should stay close to the center to avoid these. Once Yol's wings are shattered, the fight's mechanics will repeat until Yol is defeated.
Note: This phase can be entirely skipped with a well-timed Limit Break just before Yol starts his second phase.
Loot
Garula Loot
Bardem Loot
Yol Loot
Additional Treasure Coffers
Treasure Coffer 1
Coordinates: (x??,y??)
Treasure Coffer 2
Coordinates: (x??,y??)
Treasure Coffer 3
Coordinates: (x??,y??)
Treasure Coffer 4
Coordinates: (x??,y??)
Treasure Coffer 5
Coordinates: (x??,y??)
Available in All Treasure Coffers Except Treasure Coffer 1
- Halgai Mane
- Manzasiri Hair
- Gagana Skin
- Gyuki Hide
- Tiger Skin
- Marid Hide
- Gazelle Hide
- Muud Suud Horn
- Gazelle Horn
- Dzo Horn
- Rhino Beetle Carapace
- Moth Scales
- Fire Shard
- Ice Shard
- Wind Shard
- Earth Shard
- Lightning Shard
- Water Shard
- Fire Crystal
- Ice Crystal
- Wind Crystal
- Earth Crystal
- Lightning Crystal
- Water Crystal

