Difference between revisions of "Halatali (Hard)"
| Line 2: | Line 2: | ||
{{TOCRIGHT}} | {{TOCRIGHT}} | ||
{{#ev:youtube|eKkcGShV_ik|350|right|Halatali (Hard) Video Guide}} | {{#ev:youtube|eKkcGShV_ik|350|right|Halatali (Hard) Video Guide}} | ||
Halatali (Hard) is a level 50 [[dungeons|dungeon]] released in Patch 2.2. It is the hard mode of the dungeon [[Halatali]]. | Halatali (Hard) is a level 50 [[dungeons|dungeon]] released in Patch 2.2. It is the hard mode of the dungeon [[Halatali]]. | ||
*Talk to [[Hugubert]] in [[Mor Dhona]] (x22,y8) to unlock. | |||
*Players must have completed the main storyline [[The Ultimate Weapon]] and the quest [[This Time's for Fun]]. | *Players must have completed the main storyline [[The Ultimate Weapon]] and the quest [[This Time's for Fun]]. | ||
*Light Party (4 Players) | *Light Party (4 Players) | ||
Revision as of 15:49, 29 March 2014
- See also: Halatali
Halatali (Hard) is a level 50 dungeon released in Patch 2.2. It is the hard mode of the dungeon Halatali.
- Talk to Hugubert in Mor Dhona (x22,y8) to unlock.
- Players must have completed the main storyline The Ultimate Weapon and the quest This Time's for Fun.
- Light Party (4 Players)
- Time Restriction: 90 minutes
- Average Ilvl 55+
- Rewards: Allagan Tomestone of Mythology x50 (Added in Patch 2.2)
- Rewards: Allagan Tomestone of Soldiery x45 (Added in Patch 2.2)
Objectives
Bestiary
Bosses
Pyracmon
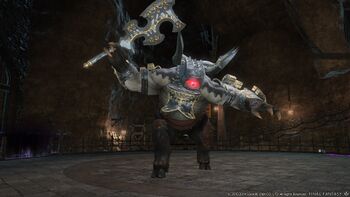
The fight is similar to The Aurum Vale's Coincounter. He will use Eye of the Beholder. Avoid his lasers. Throughout the fight, a mechanical Mammet will start marching aimlessly around the room with a tether attaching it to a lever at the back of the room. Interacting with the lever will cause the Mammet to stop and start radiating a blue aura that will grant the Manawall buff to anyone standing inside it before it fades away about 10 seconds later. The trick is to wait until the cyclops starts charging his 100 Tonze Swing attack, which will cover the entire arena, and then activate the lever and get the buff before his charge bar fills. The Manawall effect will negate his swing attack, otherwise expect to take several thousand damage.
Catoblepas
The boss room has four pedestals placed in a square around the edges. Once the battle begins, each pedestal will light up with a Tainted Eye activate-able lever. They're important, make sure you assign one to each party member. Throughout the fight, he will periodically use Demonic Eye, which has a fairly long cast timer. When he starts to cast Demon Eye, one of the party members has to activate the Tainted Eye to gain a buff called Gloam that prevents you from taking damage.
Catoblepas will also make his eye target-able from time to time. This is a DPS check. It starts out blue, then turns yellow, and then red. Not sure what happens when it turns red? Lastly, this boss has some rough cone AOEs. It can turn toward a player and cover a good 1/3rd of the arena in a massive cone AOE that can be somewhat hard to dodge if you're directly in the center of it.
Big Battle
The final boss is a series of battles. It starts with four combatants that will try to break apart your party. The Lancer seems to have no aggro table and will target someone randomly (he chose me as a Bard on our run), so just kite him around at first. There's a healer which obviously should die first. The Bard should probably die third, followed by the Gladiator. Keep in mind that these characters appear to have level 50 abilities appropriate to their job, so expect the Gladiator to be using Spirits Within and such. Overall, this section was pretty easy.
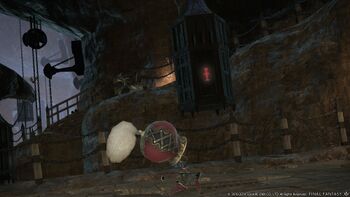
The second phase starts after the trash people are killed off. A red demon and a little Lalafell named Mumepo the Beholden show up. Mumepo does not appear to need tanking, but the red demon does. Kill Mumoepo first because he casts more and chains players in place before starting a massive AOE with a slow cast bar. The remaining unchained person needs to save them by finding the "Thal's Scepter" interactive lever around the arena to unchain them before the cast bar fills up. Then the two chained players run out of the AOE before it goes off if everything goes well and no on takes damage. The damage is pretty severe if this fails (it was doing upwards of 1/2 to 3/4 of our WHM health bar). Once Mumoepo goes down, the rest of the fight is unremarkable. The red demon thing has a rear tail swipe, so keep that in mind if you're melee. Otherwise it was tank-and-spank from there on.
Loot
Images
Lore
Halatali! The very name turns some spines to water and others to steel. Lurid marks of the recent lawlessness remain still, but daily the drudges conquer halls slick with ichor and doorways festooned with things not for gentle eyes. No less deadly for its newly-restored order, the fabled training grounds yearn for new blood─perhaps to brighten the freshly-scrubbed walls of its vast chambers.


