Difference between revisions of "Another Mount Rokkon"
| Line 67: | Line 67: | ||
**'''Twice:''' Spawns two line AoEs. Locate the "corners" of the first AoE and dodge into the only empty corner without a cloud once it resolves. | **'''Twice:''' Spawns two line AoEs. Locate the "corners" of the first AoE and dodge into the only empty corner without a cloud once it resolves. | ||
**'''Thrice:''' Spawns three line AoEs. Locate the singular cloud in the path of the first AoE and go opposite it inside a "slice" that is not covered by any line AoEs. Once the first line AoE resolves and cloud explodes, run into the center of the first explosion, staying at the wall. Using {{action icon|Sprint}} is highly recommended. | **'''Thrice:''' Spawns three line AoEs. Locate the singular cloud in the path of the first AoE and go opposite it inside a "slice" that is not covered by any line AoEs. Once the first line AoE resolves and cloud explodes, run into the center of the first explosion, staying at the wall. Using {{action icon|Sprint}} is highly recommended. | ||
*'''Splitting Cry''': A wide line AoE tankbuster. | |||
*'''Slither''': An untelegraphed conal AoE at the boss's rear immediately following the tankbuster. | |||
*'''Noble Pursuit''': Four lines of rings will spawn: two vertical, one horizontal, and one diagonal, indicating the path the boss will charge through. These will use an untelegraphed line AoE perpendicular to them when the boss dashes through them. Each set of rings will have an empty space. The safe area is entirely surrounded by empty spaces. Once the boss finishes charging, it will cast '''Enkyo''' again. | |||
===[[File:Aggressive difficulty r6.png|link=]] [[Gorai the Uncaged]]=== | ===[[File:Aggressive difficulty r6.png|link=]] [[Gorai the Uncaged]]=== | ||
Revision as of 04:57, 10 August 2023
- See also: Mount Rokkon and Another Mount Rokkon (Savage)
Another Mount Rokkon
- Level
- 90
- Item Level
- 640 (Sync: 665)
- Difficulty
- Extreme
- Party size
- Light Party
4 man • 1 1
1  2
2 
- Unsyncing
- Allowed
- Time limit
- 90 minutes
- Duty Finder
- V&C Dungeon Finder
- Tomestones
- Patch
- 6.45
“Delighted beyond measure to hear tell of the mononoke haunting Mount Rokkon, Osmon cannot help but speculate upon the nature of spirits—and what should result were they to grow more powerful than nature is wont to allow...
— In-game description
Another Mount Rokkon is a level 90 criterion dungeon introduced in patch 6.45 with Endwalker.
Objectives
- Clear the Single Step: 0/1
- Defeat Shishio: 0/1
- Clear the Clever Roost: 0/1
- Defeat Gorai the Uncaged: 0/1
- Defeat Moko the Restless: 0/1
Enemies
There are two rooms with "trash mobs" in this dungeon. Each room will be sealed 15 seconds after engaging the first enemy, similar to a boss room. If the party wipes before defeating all the enemies in a room, they will all respawn. Being hit by any avoidable AoEs will inflict a stack of ![]() Vulnerability Up.
Vulnerability Up.
The Single Step
There are three groups of enemies in this room.
- Shishu Yuki - A lone enemy that will begin patrolling the room upon engaging the first enemy. It has a buff that significantly increases its damage dealt and reduces damage received until the Shishu Raiko and Shishu Fuko are defeated. While its buff is active, if aggroed by sight or being hit by any attack from players, it will instantly kill any party member with its auto-attacks. Defeating the other enemies will remove the buff and make it manageable to fight.
- It will initially walk south then do a 360 degree loop clockwise around the room, then back to the middle. While in the middle, it will raise one of its arms and do either Left Swipe or Right Swipe, a telegraphed half-room AoE. Afterwards, it will head north again, turn left, and keep looping around the room in a "figure-8" pattern.
- Jobs with large AoE attacks (e.g.,
 dancer and
  dragoon) should be especially careful not to accidentally aggro the Yuki.
- Shishu Furutsubaki x 2, Shishu Raiko (east) - The party should engage this pack first. The tank should pull the Raiko to the southeastern part of the room, near the entrance, but not to the corner.
- Bloody Caress (Furutsubaki): A telegraphed conal AoE.
- Disciples of Levin (Raiko): A briefly telegraphed point-blank AoE. The party should dodge to the southeast corner.
- Barreling Smash (Raiko): A non-tank is marked with an orange overhead marker. The Raiko will then charge at them with a briefly telegraphed line AoE that will reduce anyone hit to 1 HP. The tank needs to avoid being hit with the AoE as they will instantly die from auto-attacks.
- Howl (Raiko): Moderate partywide damage that should be mitigated. The player hit with Barreling Smash needs to be healed in time for this attack.
- Master of Levin (Raiko): A briefly telegraphed donut AoE with inside its hitbox safe.
- By this point the Yuki will begin nearing the party in its patrol, so the party should begin move to the southwest corner and defeat these enemies as fast as possiblie.
- Red Shishu Penghou x 2, Shishu Fuko (west) - The party should engage this pack after defeating the east one.
- Tornado (Penghou): A telegraphed circular AoE aimed at a random player.
- Scythe Tail (Fuko): A briefly telegraphed point-blank AoE. The party should dodge to the southeast corner.
- Twister (Fuko): Stack marker on a random player.
- Crosswind (Fuko): Partywide damage and a briefly telegraphed knockback from the Fuko. This knockback can be prevented with knockback immune. Otherwise, ensure not to be knocked back to the Yuki.
- Once the other enemies are defeated, it is safe to engage the Yuki, who is straightforward to fight. It will use Left Swipe or Right Swipe, so dodge accordingly.
The Clever Roost
Bosses
Failing any boss mechanic will result in a ![]() Damage Down debuff.
Damage Down debuff.
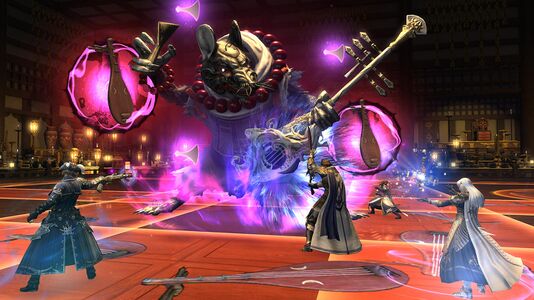
 Shishio
Shortly after engaging the boss, the arena will be surrounded with an AoE that will instantly kill anyone who touches it.
- Enkyo: High partywide damage that should be mitigated.
- Stormcloud Summons: Spawns several untargetable Raiun (small red clouds) and extends the lethal outside AoE to compress the arena to a circle.
- Smokeater: The boss will inhale one, two, or three sets of clouds, removing them from the arena. The number of inhalations determines the number of line AoEs the boss will do and the resulting size of the cloud explosions in its next attack.
- Rokujo Revel: An attack that is resolved by how many times the boss inhaled. The boss will sequentially spawn one to three line AoEs with dark red telegraphs, whose ranges are also denoted by the arrangement of rocks on the floor.
- After the AoE resolves, the clouds inside the AoE will explode as a point-blank AoE (Leaping Levin) with a brief telegraph. The size of the AoEs is determined by the number of inhalations.
- Other clouds in range of the prior cloud explosions will explode themselves, leading to a chain reaction.
- Once: Spawns one line AoE. Locate the first AoE. There are six locations where a cloud may appear inside it (at the "corners", or in the middle). Find an empty location without a cloud inside the AoE and dodge into it once it resolves.
- Twice: Spawns two line AoEs. Locate the "corners" of the first AoE and dodge into the only empty corner without a cloud once it resolves.
- Thrice: Spawns three line AoEs. Locate the singular cloud in the path of the first AoE and go opposite it inside a "slice" that is not covered by any line AoEs. Once the first line AoE resolves and cloud explodes, run into the center of the first explosion, staying at the wall. Using Sprint is highly recommended.
- Splitting Cry: A wide line AoE tankbuster.
- Slither: An untelegraphed conal AoE at the boss's rear immediately following the tankbuster.
- Noble Pursuit: Four lines of rings will spawn: two vertical, one horizontal, and one diagonal, indicating the path the boss will charge through. These will use an untelegraphed line AoE perpendicular to them when the boss dashes through them. Each set of rings will have an empty space. The safe area is entirely surrounded by empty spaces. Once the boss finishes charging, it will cast Enkyo again.
 Gorai the Uncaged
 Moko the Restless
Loot
Another Mount Rokkon uses personal loot, so players have to be sure to click and loot the chest themselves.
 Treasure Coffer
| Name | Type | Item Level | Rarity | Quantity |
|---|---|---|---|---|
| Currency | N/A | Basic | 4 | |
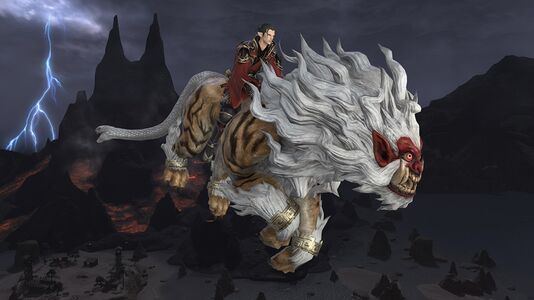
| Shishioji Flute | Other | N/A | Basic | 1 |
Achievements
This duty is associated with the following achievements:
| Name | Points | Task | Reward | Patch |
|---|---|---|---|---|
| Moving a Mountain | 10 | Complete the criterion dungeon Another Mount Rokkon. | - | 6.45 |
| Mapping the Realm: Another Mount Rokkon | 10 | Discover every location within Another Mount Rokkon. | - | 6.45 |


