Difference between revisions of "User:Boblers/sandbox"
(testing marker page idea) |
(testing an idea for the mudra table) |
||
| Line 1: | Line 1: | ||
==Mudra table test== | |||
{| {{STDT|sortable dps-role table}} | |||
|- | |||
! rowspan=2 | Action !! rowspan=2 | Description !! colspan=3 | Mudra Combination | |||
|- | |||
! step 1 !! step 2 !! step 3 | |||
|- | |||
| {{action icon|Rabbit Medium}} || {{action description|Rabbit Medium}} || colspan=3 | Wrong mudra combinations. | |||
|- | |||
| {{action icon|Fuma Shuriken}} || {{action description|Fuma Shuriken}} || colspan=3 | Any mudra ({{action icon|Ten}}, {{action icon|Chi}}, or {{action icon|Jin}}) | |||
|- | |||
| rowspan=2 | {{action icon|Katon}} (Lv. 35+) || rowspan=2 | {{action description|Katon}} || {{action icon|Chi}} || {{action icon|Ten}} || - | |||
|- | |||
| {{action icon|Jin}} || {{action icon|Ten}} || - | |||
|- | |||
| rowspan=2 | {{action icon|Raiton}} (Lv. 35+) || rowspan=2 | {{action description|Raiton}} Grants a stack of Raiju Ready. || {{action icon|Ten}} || {{action icon|Chi}} || - | |||
|- | |||
| {{action icon|Jin}} || {{action icon|Chi}} || - | |||
|- | |||
| rowspan=2 | {{action icon|Hyoton}} (Lv. 45+) || rowspan=2 | {{action description|Hyoton}} Additional Effect: Bind || {{action icon|Ten}} || {{action icon|Jin}} || - | |||
|- | |||
| {{action icon|Chi}} || {{action icon|Jin}} || - | |||
|- | |||
| rowspan=2 | {{action icon|Huton}} (Lv. 45+) || rowspan=2 | {{action description|Huton}} Additional Effect: Allows execution of actions which require the effect of Hidden, without being under that effect. || {{action icon|Jin}} || {{action icon|Chi}} || {{action icon|Ten}} | |||
|- | |||
| {{action icon|Chi}} || {{action icon|Jin}} || {{action icon|Ten}} | |||
|- | |||
| rowspan=2 | {{action icon|Doton}} (Lv. 45+) || rowspan=2 | {{action description|Doton}} || {{action icon|Ten}} || {{action icon|Jin}} || {{action icon|Chi}} | |||
|- | |||
| {{action icon|Jin}} || {{action icon|Ten}} || {{action icon|Chi}} | |||
|- | |||
| rowspan=2 | {{action icon|Suiton}} (Lv. 45+) || rowspan=2 | {{action description|Suiton}} Additional Effect: Allows execution of actions which require the effect of Hidden, without being under that effect. || {{action icon|Ten}} || {{action icon|Chi}} || {{action icon|Jin}} | |||
|- | |||
| {{action icon|Chi}} || {{action icon|Ten}} || {{action icon|Jin}} | |||
|- | |||
| rowspan=2 | {{action icon|Goka Mekkyaku}} (Lv. 76+) || rowspan=2 | {{action description|Goka Mekkyaku}} || {{action icon|Kassatsu}} || {{action icon|Chi}} || {{action icon|Ten}} | |||
|- | |||
| {{action icon|Kassatsu}} || {{action icon|Jin}} || {{action icon|Ten}} | |||
|- | |||
| rowspan=2 | {{action icon|Hyosho Ranryu}} (Lv. 76+) || rowspan=2 | {{action description|Hyosho Ranryu}} || {{action icon|Kassatsu}} || {{action icon|Ten}} || {{action icon|Jin}} | |||
|- | |||
| {{action icon|Kassatsu}} || {{action icon|Chi}} || {{action icon|Jin}} | |||
|} | |||
==Markers== | ==Markers== | ||
===Circle AoE=== | ===Circle AoE=== | ||
Revision as of 11:19, 1 September 2024
Mudra table test
| Action | Description | Mudra Combination | ||
|---|---|---|---|---|
| step 1 | step 2 | step 3 | ||
| Rabbit Medium | Thumpity thump thump, thumpity thump thump... | Wrong mudra combinations. | ||
| Fuma Shuriken | Delivers a ranged ninjutsu attack with a potency of 500. | Any mudra ( Ten, Chi, or Jin) | ||
| Katon (Lv. 35+) | Delivers fire damage with a potency of 350 to target and all enemies nearby it. | Chi | Ten | - |
| Jin | Ten | - | ||
| Raiton (Lv. 35+) | Delivers lightning damage with a potency of 740. Grants a stack of Raiju Ready. | Ten | Chi | - |
| Jin | Chi | - | ||
| Hyoton (Lv. 45+) | Delivers ice damage with a potency of 350. Additional Effect: Bind | Ten | Jin | - |
| Chi | Jin | - | ||
| Huton (Lv. 45+) | Deals wind damage with a potency of 240 to target and all enemies nearby it. Additional Effect: Allows execution of actions which require the effect of Hidden, without being under that effect. | Jin | Chi | Ten |
| Chi | Jin | Ten | ||
| Doton (Lv. 45+) | Creates a patch of corrupted earth, dealing damage with a potency of 80 to any enemies who enter. | Ten | Jin | Chi |
| Jin | Ten | Chi | ||
| Suiton (Lv. 45+) | Delivers water damage with a potency of 580. Additional Effect: Allows execution of actions which require the effect of Hidden, without being under that effect. | Ten | Chi | Jin |
| Chi | Ten | Jin | ||
| Goka Mekkyaku (Lv. 76+) | Deals fire damage with a potency of 600 to target and all enemies nearby it. | Kassatsu | Chi | Ten |
| Kassatsu | Jin | Ten | ||
| Hyosho Ranryu (Lv. 76+) | Deals ice damage with a potency of 1,300. | Kassatsu | Ten | Jin |
| Kassatsu | Chi | Jin | ||
Markers
Circle AoE
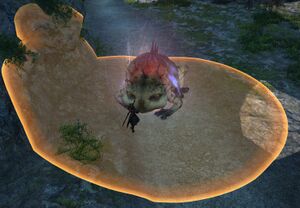
A Circle AoE, more commonly referred to as just an AoE, is a common Area of Effect marker that indicates the area an attack will cover. Anything within the AoE by the time the enemies' attack finishes casting will take damage. This type of AoE can range from very small to the width of the arena, and may be telegraphed or untelegraphed. To avoid taking damage, players simply need to move out of the telegraphed hitbox by the time the enemy finishes casting it.
Proximity AoE
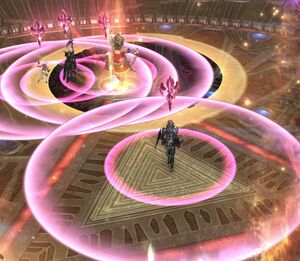
A Proximity AoE is a marker that indicates where an attack will soon land. This type of AoE will pulsate from its center with a large ring, indicating that anything close to the marked point will take heavy, oftentimes fatal damage. As the pulsating rings move further out, they become fainter and fainter, indicating that the further away players are, the less damage they will take (generally exponentially less). These can appear individually, or in groups, requiring players to locate a safe location to avoid multiple attacks. To avoid damage, players need to simply move as far away from the center of the AoE as possible.
AoE marker
An AoE Marker, commonly referred to as a Spread Marker, is an Area of Effect that targets a player and tracks their movement, and will explode shortly afterwards, affecting anyone within the highlighted area. This marker is generally used in conjunction with other mechanics, such as requiring players to spread out in a limited safe zone. The player marked will take damage, but if they move away from the party, they can spare others additional damage.
Stack marker
A stack marker splits the damage between everyone within the marker. If nobody stacks to share the damage, it will usually kill the target.
It's recommended to place it close to the boss so everyone can share the damage easily.
Materiel CratePossible Yielded Item(s)
Mounts
| Item | Original source | |
|---|---|---|
| Dodo Horn | Deep Dungeons | Random drop from Platinum-haloed Sacks received on floors 71-100 of |
| Eldthurs Horn | Field Operations | Random drop from Gold Coffers in |
| Eurekan Petrel Horn | Field Operations | Random drop from Gold Coffers in |
| Flying Chair | Crafting (Alchemist) | Crafted by an |


