The Labyrinth of the Ancients
 This article is about the level 50 Alliance Raid. For the Feature Quest, see Labyrinth of the Ancients.
The Labyrinth of the Ancients
- Level
- 50 (Sync: 50)
- Item Level
- 50
- Difficulty
- Normal
- Party size
- Alliance
24 man • 3 6
6  15
15 
- Unsyncing
- Allowed
- Time limit
- 120 minutes
- Duty Finder
- Alliance Raids (A Realm Reborn)
- Roulette
- Alliance Raids
- Tomestones
 100
100 - Req. quest
 Labyrinth of the Ancients
- Entrance
- Mor Dhona (X:35.7, Y:20.0)
- Location
- The Labyrinth of the Ancients
- Region
- Mor Dhona
- Patch
- 2.1
“With the help of Cid nan Garlond, members of the expedition to the Crystal Tower have successfully penetrated the defenses of the Eight Sentinels. The ancient Allagan structure is not so easily entered, however, and the Labyrinth of the Ancients now awaits the fellowship of NOAH as they seek the ultimate prize.
— In-game description
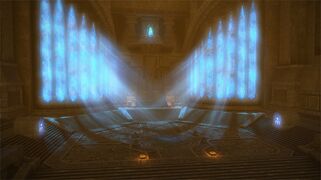
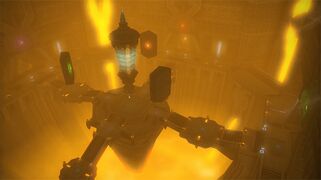
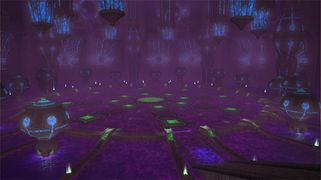
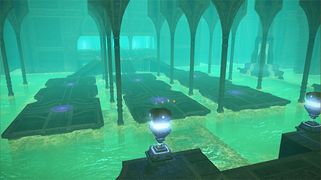
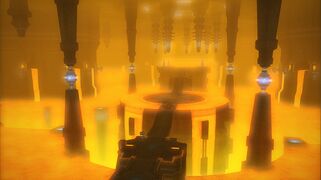
The Labyrinth of the Ancients is a level 50 raid introduced in patch 2.1. It is the first part of Crystal Tower.
Objectives
- Activate the Allagan teleporters: 0/1
- Clear the Pools of Obllivion: 0/1
- Defeat the bone dragon: 0/1
- Clear the Walk of Lament: 0/1
- Defeat Thanatos: 0/1
- Clear the Walk of Fire: 0/1
- Defeat the king behemoth: 0/1
- Defeat Phlegethon: 0/1
Enemies and Bosses
Owing its lack of an IL sync, the first two Crystal Tower alliance raids have become tediously easy duties that are often completed with little difficulty, to the point where mechanics on several bosses are ignored or outright skipped. As a result the guide below includes mechanics that players will normally not experience unless on Minimum IL mode.
The Pools
The Pools of Folly
Enemies: Earth Homunculus, Fire Homunculus, Ice Homunculus, Lightning Homunculus, Valefor x2, Water Homunculus, Wind Homunculus
The first four rooms of enemies have raised green platforms. The ground will fill with poison after a certain period of time, making the platforms safe. The Valefors will use Tail Drive, a large telegraphed rear cone AoE, and The Look, an instant untelegraphed frontal conal AoE.
The Pools of Demise
Enemies: Greater Demon x2, Valar x8
The Greater Demons will occasionally use an attack that knocks back their target.
The Pools of Oblivion
Enemies: Cursed Eye x3, Dira x3
The Dira will occasionally use an instant untelegraphed frontal conal cleave (Sweet Steel).
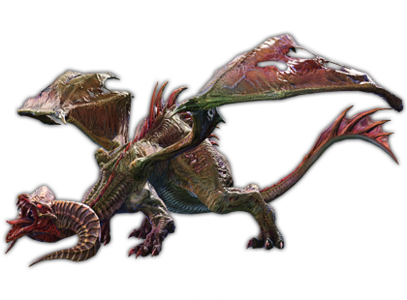
 Bone Dragon
Bone Dragon is the 1st boss of the Labyrinth of the Ancients. Players will encounter the Dragon when they take the left path from the entrance. Bone Dragon must be killed 3 times before it is finally defeated.
The arena has platforms similar to previous rooms. Poison will occasionally fill all lower areas of the room so be aware of this. The boss will spawn 3 waves of Platinal skeleton adds, which should be killed. Once the bone dragon dies, all skeleton adds will respawn and move towards the dragon. If two skeletons were close to each other when they died, they will move too fast to be killed. Each skeleton that reaches the boss will do 1500 unblockable damage to the raid. This phase will repeat once. The second time the dragon comes back to life, it will spawn Rotting Eyes instead. These should be picked up by tanks but dps should focusing on killing boss instead of adds then the dragon will die for good this time.
Summary:
- Tank the Bone Dragon on the center platform. This allows for an even spread of adds around the room, while minimizing confusion on where to pull the adds as 1 spawns per "path". This will also reduce damage taken by the DPS, as they will spend more time on the raised sections out of the poison.
- Kill skeletons before they reach dragon.
- Healers should be prepared to heal the party if/when the skeletons reach the dragon.
The Walk of Lament
Enemies: Atomos x3
The raid will need to divide into their 3 groups based on their party (A, B, C): 1 for each path, which each has a platform. 4 people need to stand on each platform (preferably ranged dps and healers) to allow the other groups to kill Atomos. Atomos does not need to be tanked but will continuously spawn adds (Valefors and Diras) that should be killed. The tanks should move these adds within range of the players on the platforms. If a sector does not contain enough people to stand on the platform, once the room is sealed, several Iron Giants will spawn and quickly wipe the raid in order for the encounter to reset.
It is common for A, B, and C waymarks to be placed from left to right in front of the entrance to a sector as a reminder for where to go based on your party.
Summary:
- Go to your party's assigned sector. Do not cross the purple line before the alliance has all arrived, that will start the encounter and force the late players to teleport into the left chamber.
- 4 people stand on each colored platform, which will remove the corresponding color-coded barrier around an Atomos from a different party, making it vulnerable. The other four focus on killing Atomos.
 Thanatos
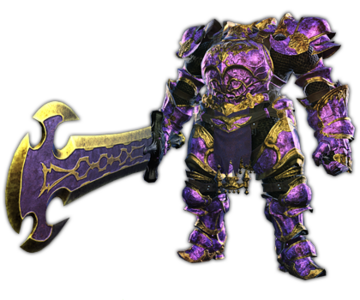
Thanatos is the 3rd boss of the dungeon. Players will encounter the boss when they take the right path from the labyrinth entrance.
Thanatos is a ghostly iron giant that is surrounded by three Magic Pots on the corner of his chamber. The Magic Pots are friendly mobs, and should be healed if they're damaged. If all three die, then you will be unable to harm the boss and will wipe. (For typical Duty Finder runs, it is usually not necessary to heal the Magic Pots due to the speed at which the boss is killed.)
Thanatos is “ghostly” and cannot be harmed ordinarily. At the beginning of the fight, one of the Magic Pots will shoot green lines out to several alliance members, giving them an buff called ![]() Astral Realignment. The first group to receive the buff is always A.
Astral Realignment. The first group to receive the buff is always A. ![]() Astral Realignment allows you to deal damage to the boss. A tank with the buff should pick up the boss immediately, and a tank swap should occur whenever a tank picks up
Astral Realignment allows you to deal damage to the boss. A tank with the buff should pick up the boss immediately, and a tank swap should occur whenever a tank picks up ![]() Astral Realignment and the one on the boss loses it. Thanatos does have a cleave, so he should be faced away from the group and the pots.
Astral Realignment and the one on the boss loses it. Thanatos does have a cleave, so he should be faced away from the group and the pots.
Anyone who doesn't have ![]() Astral Realignment should focus on killing the adds (Sandman, Nemesis) that spawn throughout the fight. They will charge the Pots and attack, and occasionally will have a red line connecting them to a pot. Anytime you see this, these adds must be killed immediately. While that red line is active, Thanatos will be pulling the Pot to himself with a giant Holmgang chain -- if he gets it to him, he will kill it pretty fast. Once the adds connected to the Pot die and the Pot is healed, it can escape back to its safe spot.
Astral Realignment should focus on killing the adds (Sandman, Nemesis) that spawn throughout the fight. They will charge the Pots and attack, and occasionally will have a red line connecting them to a pot. Anytime you see this, these adds must be killed immediately. While that red line is active, Thanatos will be pulling the Pot to himself with a giant Holmgang chain -- if he gets it to him, he will kill it pretty fast. Once the adds connected to the Pot die and the Pot is healed, it can escape back to its safe spot.
This fight progresses fairly straightforwardly from here, just repeating the basic mechanics until he dies or all three Pots die.
Summary:
- If you have
 Astral Realignment and are ghostly, DPS the boss. If not, kill adds. Healers should keep the pots alive.
 - The party should avoid pulling the boss early (at least until Alliance A has arrived) as this can potentially cause some players in A to miss the buff, prolonging the fight.
The Walk of Fire
Enemies: Allagan Bomb, Vassago x3
Allagan Bomb initially does nothing. Each group takes one of the large sword adds (A left, B north, C right - waymarks may sometimes be used to denote each party's add). Those Vassagos WILL NOT aggro anyone automatically, so each tank should stand in front of each adds to avoid the boss running to the middle. The boss will periodically spawn Allagan Balloon adds that need to be killed (high priority) before they reach the center, or they will explode and cause the Allagan Bomb to enlarge. If the bomb enlarges too much, it will explode and wipe the raid. In addition, an Allagan Napalm add may spawn and will have the highest priority to kill. The boss can be damaged once the 3 adds are down.
A Vassago will get invulnerability if it has too little HP compared to the healthiest Vassago.
Summary:
- Attack your party's correct Vassago.
- Non-tanks should not be directly in front of a Vassago, because they will periodically used untelegraphed frontal cleaves.
- Kill Priority for adds: Napalm first, Balloon second and Sword third.
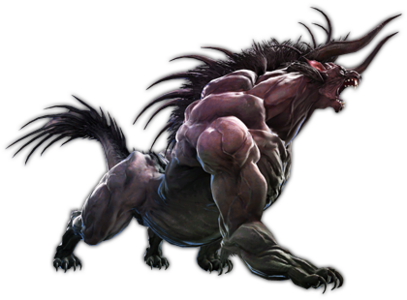
 King Behemoth
King Behemoth is the 3rd boss of the raid. Players will encounter Behemoth when they take the center path from the entrance.
Iron Giant adds will spawn early in the fight. The tanks who are not tanking the boss should pick these up and face them away from other players or meteors that drop later, as they will use untelegraphed frontal cleaves.
The arena contains interact-able towers. Each tower should be covered by one ranged DPS or healer, activating it when it begins to glow. (For a typical Duty Finder run, this mechanic can be ignored). Puroboros (bomb) adds will also spawn and move towards the towers, but they are less important than Iron Giants.
The only mechanic that is likely to kill unsuspecting players is Ecliptic Meteor. King Behemoth will target a few players with a comet (green mark above head). These players should be outside the boss's hitbox and drop the comet to be used later. Adds will continually spawn and attempt to reach the towers. These need to be killed as soon as possible. In addition, an iron giant will spawn that will try to destroy the comets. The giant needs to be killed before all comets are destroyed or you will wipe. When King Behemoth stands up, it will begin casting Ecliptic Meteor. Each player must stand behind a meteor to block line-of-sight with the boss, of they will instantly die. Rinse and repeat and the fight is done.
Comets that are placed inside the hitbox of the Behemoth will not provide protection from Ecliptic Meteor.
Summary:
- Tanks should face the Iron Giants away from other players and from the rocks.
- Marked players should drop their rocks outside of the boss's hitbox.
- Hide behind a rock when the boss stands up and starts casting Ecliptic Meteor.
 Phlegethon
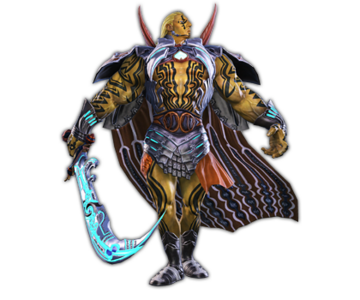
Phlegethon is the final boss of Labyrinth of the Ancients. The boss room is unlocked from defeating the other 3 bosses.
Each group should take a position ahead of time (A on the left, B center, C on the right) before pulling the boss - it is common for A, B, and C waymarks to be placed on the appropriate platforms.
Non-tanks should avoid standing in front of Phlegethon due to its untelegraphed frontal cleave. Aside from this, it will use some clearly telegraphed AoEs to avoid.
Phlegethon has only 1 big move to watch out for: Ancient Flare. At around 40-50% HP, Phlegethon will move to the center and start casting Ancient Flare. Each group needs to immediately move to its assigned platform. Doing this will put up a barrier to block his 'Ancient Flare' attack, which is otherwise a wipe. If there is not enough people on each platform, the barrier will not form, and the raid will wipe. Once the barrier spawns, an Iron Giant add will spawn on each platform and should be killed. At around 5-15% HP, he will do this again; either run back to the platform to repeat the mechanic or burn him down (do so if he starts the cast with < 6% HP).
During the fight Iron Claws adds will spawn, and should be killed. These adds stun a nearby target.
It may be useful for healers to Rescue players who may be lagging behind when running to the platform.
Summary:
- Go to your party's assigned platform before pulling the boss.
- Run back to your platform when the boss moves to the center of the room and starts casting Ancient Flare.
Loot
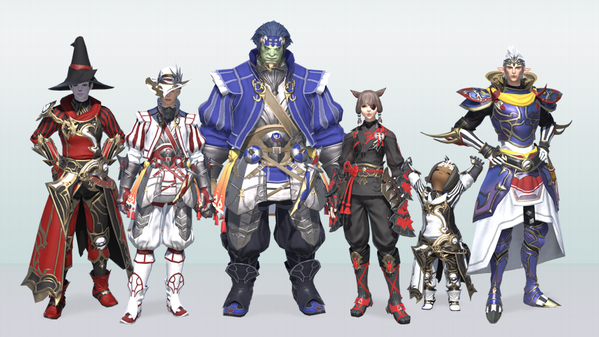
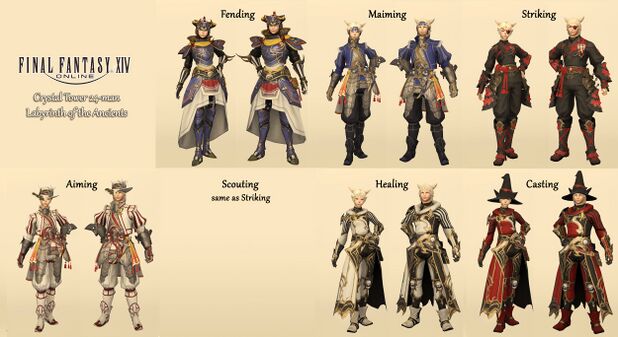
- See also: The Labyrinth of the Ancients Armor
 Bone Dragon
| Name | Type | Item Level | Rarity | Quantity |
|---|---|---|---|---|
| Ballad Boots | Feet | 80 | Blue | 1 |
| Ballad Crown | Head | 80 | Blue | 1 |
| Crimson Hat | Head | 80 | Blue | 1 |
| Crimson Shoes | Feet | 80 | Blue | 1 |
| Crown of Light | Head | 80 | Blue | 1 |
| Fuma Gantai | Head | 80 | Blue | 1 |
| Fuma Kyahan | Feet | 80 | Blue | 1 |
| Onion Boots | Feet | 80 | Blue | 1 |
| Onion Mask | Head | 80 | Blue | 1 |
| Royal Crown | Head | 80 | Blue | 1 |
| Royal Shoes | Feet | 80 | Blue | 1 |
| Sabatons of Light | Feet | 80 | Blue | 1 |
 Thanatos
| Name | Type | Item Level | Rarity | Quantity |
|---|---|---|---|---|
| Ballad Gauntlets | Hands | 80 | Blue | 1 |
| Ballad Sarouel | Legs | 80 | Blue | 1 |
| Breeches of Light | Legs | 80 | Blue | 1 |
| Crimson Breeches | Legs | 80 | Blue | 1 |
| Crimson Celestial Gloves | Hands | 80 | Blue | 1 |
| Fuma Hakama | Legs | 80 | Blue | 1 |
| Fuma Tekko | Hands | 80 | Blue | 1 |
| Gauntlets of Light | Hands | 80 | Blue | 1 |
| Onion Gauntlets | Hands | 80 | Blue | 1 |
| Onion Sarouel | Legs | 80 | Blue | 1 |
| Royal Breeches | Legs | 80 | Blue | 1 |
| Royal Celestial Gloves | Hands | 80 | Blue | 1 |
 King Behemoth
| Name | Type | Item Level | Rarity | Quantity |
|---|---|---|---|---|
| Armor of Light | Body | 80 | Blue | 1 |
| Ballad Boots | Feet | 80 | Blue | 1 |
| Ballad Corselet | Body | 80 | Blue | 1 |
| Crimson Shoes | Feet | 80 | Blue | 1 |
| Crimson Vest | Body | 80 | Blue | 1 |
| Fuma Koromo | Body | 80 | Blue | 1 |
| Fuma Kyahan | Feet | 80 | Blue | 1 |
| Onion Armor | Body | 80 | Blue | 1 |
| Onion Boots | Feet | 80 | Blue | 1 |
| Royal Shoes | Feet | 80 | Blue | 1 |
| Royal Vest | Body | 80 | Blue | 1 |
| Sabatons of Light | Feet | 80 | Blue | 1 |
 Phlegethon
- 40 Allagan Tomestone of Poetics
- 56055
 Experience Points
 - Phlegethon Card (Drops at a fixed rate)
Treasure Coffer 1
| Name | Type | Item Level | Rarity | Quantity |
|---|---|---|---|---|
| Allagan Catalyst | Material | N/A | Basic | 1 |
| Armor of Light | Body | 80 | Blue | 1 |
| Ballad Corselet | Body | 80 | Blue | 1 |
| Ballad Crown | Head | 80 | Blue | 1 |
| Ballad Gauntlets | Hands | 80 | Blue | 1 |
| Ballad Sarouel | Legs | 80 | Blue | 1 |
| Breeches of Light | Legs | 80 | Blue | 1 |
| Crimson Breeches | Legs | 80 | Blue | 1 |
| Crimson Celestial Gloves | Hands | 80 | Blue | 1 |
| Crimson Hat | Head | 80 | Blue | 1 |
| Crimson Vest | Body | 80 | Blue | 1 |
| Crown of Light | Head | 80 | Blue | 1 |
| Faded Copy of Hubris | Orchestrion Roll | N/A | Basic | 1 |
| Faded Copy of Tumbling Down | Orchestrion Roll | N/A | Basic | 1 |
| Fuma Gantai | Head | 80 | Blue | 1 |
| Fuma Hakama | Legs | 80 | Blue | 1 |
| Fuma Koromo | Body | 80 | Blue | 1 |
| Fuma Tekko | Hands | 80 | Blue | 1 |
| Gauntlets of Light | Hands | 80 | Blue | 1 |
| Onion Armor | Body | 80 | Blue | 1 |
| Onion Gauntlets | Hands | 80 | Blue | 1 |
| Onion Mask | Head | 80 | Blue | 1 |
| Onion Sarouel | Legs | 80 | Blue | 1 |
| Royal Breeches | Legs | 80 | Blue | 1 |
| Royal Celestial Gloves | Hands | 80 | Blue | 1 |
| Royal Crown | Head | 80 | Blue | 1 |
| Royal Vest | Body | 80 | Blue | 1 |
Treasure Coffer 2
| Name | Type | Item Level | Rarity | Quantity |
|---|---|---|---|---|
| Dimension Blade Fragment | Material | N/A | Basic | 1 |
Rewards
When originally released, players could receive only one reward item per week for completing duties in The Labyrinth of the Ancients. Weekly limits were lifted in patch 2.2.
Each party in the alliance will receive its own treasure chest, the contents of which will be identical regardless of the route taken.
- Players cannot open a treasure chest belonging to another party.
Achievements
This duty is associated with the following achievements:
| Name | Points | Task | Reward | Patch |
|---|---|---|---|---|
| You Call That a Labyrinth | 10 | Complete the Labyrinth of the Ancients. | - | 2.1 |
| Mapping the Realm: Labyrinth of the Ancients | 10 | Discover every location in the Labyrinth of the Ancients. | - | 2.1 |

