Difference between revisions of "Brayflox's Longstop (Hard)"
Freedom4556 (talk | contribs) m |
Freedom4556 (talk | contribs) |
||
| Line 45: | Line 45: | ||
===[[File:Aggressive difficulty r6.png|link=]] [[Gobmachine G-VI]]=== | ===[[File:Aggressive difficulty r6.png|link=]] [[Gobmachine G-VI]]=== | ||
The machine itself doesn't have many attacks, a straight forward | The machine itself doesn't have many attacks, a straight forward {{action icon|Flame Thrower}} attack with no AoE cone, and a Bombardment Circle-AoE attack that'll target a random player. | ||
At around 75% HP, the boss will start circling the room's outer perimeter and become un-targetable. The party needs to immediately gather in the center of the room to avoid the circling tank. Two Illuminati adds will spawn, one of which is tethered to a party member.A few seconds later, it will launch a massive amount of bombs that cover the entire area. These can be knocked away with attacks and should be moved away from the center with AoE attacks quickly before they explode. Afterwards the boss will stop and becomes targetable again. | At around 75% HP, the boss will start circling the room's outer perimeter and become un-targetable. The party needs to immediately gather in the center of the room to avoid the circling tank. Two Illuminati adds will spawn, one of which is tethered to a party member.A few seconds later, it will launch a massive amount of bombs that cover the entire area. These can be knocked away with attacks and should be moved away from the center with AoE attacks quickly before they explode. Afterwards the boss will stop and becomes targetable again. | ||
| Line 55: | Line 55: | ||
Fully Resistant: Bind, Deep Freeze, Doom, Launcher, Level 5 Death, Level 5 Petrify, Missile, Paralysis, Stun, Tail Screw | Fully Resistant: Bind, Deep Freeze, Doom, Launcher, Level 5 Death, Level 5 Petrify, Missile, Paralysis, Stun, Tail Screw | ||
<br style="clear:both;"> | <br style="clear:both;"> | ||
===Notes=== | ===Notes=== | ||
Players can use {{action icon|Comfort}} [[emotes|emote]] to dispel the {{status effect|misery}} '''[[Misery]]''' debuff used by [[Gremlin]]. | Players can use {{action icon|Comfort}} [[emotes|emote]] to dispel the {{status effect|misery}} '''[[Misery]]''' debuff used by [[Gremlin]]. | ||
Revision as of 16:34, 7 November 2022
 This article is about the optional level 50 dungeon. For the Main Scenario dungeon, see Brayflox's Longstop.
Brayflox's Longstop (Hard)
- Level
- 50 (Sync: 50)
- Item Level
- 55 (Sync: 110)
- Difficulty
- Hard
- Party size
- Light Party
4 man • 1 1
1  2
2 
- Unsyncing
- Allowed
- Time limit
- 90 minutes
- Roulette
- Level 50/60/70/80 Dungeons"Level 50/60/70/80 Dungeons" is not in the list (Expert, Leveling, Main Scenario, Trials, Guildhests, Frontline, Mentor, Normal Raids, Alliance Raids, High-level Dungeons, ...) of allowed values for the "Is available for duty roulette" property.
- Tomestones
 40
40 - Req. quest
 Curds and Slay
- Entrance
- Eastern La Noscea (X:14, Y:24)
- Patch
- 2.2
“Brayflox's Longstop is overrun with forces of the Illuminati; the furious goblin scholars are bent on recovering a secret recipe centuries in the making and a moment in the filching. Having been pressed into service as Brayflox's boon companion, you have no choice but to disregard the facts of her thievery and defend the Longstop from all those who would seize it from its rightful holder.
— In-game description
Brayflox's Longstop (Hard) is a level 50 dungeon introduced in patch 2.2.
Objectives
- Clear Runstop Frontblock: 0/1
- Liberate captured goblins: 0/3
- Clear Brayflox's Drossdump: 0/1
- Open Swiftmake Checkgates: 0/2
- Defeat the gobmachine G-VI: 0/1
Bosses
 Illuminati Commander
Illuminati Commander will spawn sniper add that will fixate on a player, does damage for around 600HP, through the battle, several vertical and horizontal AoE attacks will cover the arena, these will get harder as the battle progresses.
Vulnerabilities: Bind, Doom, Heavy, Launcher, Level 5 Death, Missile, Stun, Slow, Tail Screw
Fully Resistant: Deep Freeze, Level 5 Petrify, Paralysis, Sleep
 Magitek Vangob G-III
Throughout the fight ceruleum spills from the boss, creating vivid blue circles of liquid that start to cover larger and larger chunks of the arena. After several pools of ceruleum have spilled, the boss sets off a bomb of some kind that will explode and cause all of the ceruleum to ignite as well, doing a large chunk of damage to anyone still inside the blue zones when it goes off. Getting out of the blue areas all depends on your tank's ability to kite the boss (similar to Aiatar) and your own positioning around the walls to keep the ceruleum from covering too much ground. From time to time, the boss will call out two Illuminati adds that must be DPS'd down in quick fashion. After a set amount of time, the boss will use a Halicarnassus-like aerial attack that does damage based on the health of the adds. They were always dead by the time the attack happened for my group, so the damage was pretty minimal (maybe 500 HP?) but I would imagine that it gets much worse if an add is still alive.
Vulnerabilities: Bind, Heavy, Poison, Slow
Fully Resistant: Deep Freeze, Doom, Launcher, Level 5 Death, Level 5 Petrify, Missile, Paralysis, Stun, Tail Screw
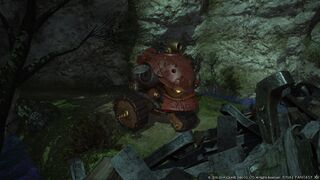
 Gobmachine G-VI
The machine itself doesn't have many attacks, a straight forward Flame Thrower attack with no AoE cone, and a Bombardment Circle-AoE attack that'll target a random player.
At around 75% HP, the boss will start circling the room's outer perimeter and become un-targetable. The party needs to immediately gather in the center of the room to avoid the circling tank. Two Illuminati adds will spawn, one of which is tethered to a party member.A few seconds later, it will launch a massive amount of bombs that cover the entire area. These can be knocked away with attacks and should be moved away from the center with AoE attacks quickly before they explode. Afterwards the boss will stop and becomes targetable again.
This will repeat twice more at 50% and 25%, but in the latter case it will be followed up with a Big Bomb, which must be killed quickly. The boss will also try to ram into players at this point.
Vulnerabilities: Heavy, Poison, Slow
Fully Resistant: Bind, Deep Freeze, Doom, Launcher, Level 5 Death, Level 5 Petrify, Missile, Paralysis, Stun, Tail Screw
Notes
Players can use Comfort emote to dispel the ![]() Misery debuff used by Gremlin.
Misery debuff used by Gremlin.
Loot
 Illuminati Commander
 Magitek Vangob G-III
 Gobmachine G-VI
Other Loot
 Treasure Coffer 1 (X: 12.5 Y: 11.0)
 Treasure Coffer 2 (X: 12.5 Y: 10.1)
 Treasure Coffer 3 (X: 12.5 Y: 9.5)
 Treasure Coffer 4 (X: 10.3 Y: 8.8)
| Name | Type | Item Level | Rarity | Quantity |
|---|---|---|---|---|
| Darklight Earrings of Fending | Earrings | 70 | Blue | 1 |
| Darklight Earrings of Maiming | Earrings | 70 | Blue | 1 |
| Darklight Earrings of Striking | Earrings | 70 | Blue | 1 |
| Darklight Earrings of Aiming | Earrings | 70 | Blue | 1 |
| Darklight Earrings of Casting | Earrings | 70 | Blue | 1 |
| Darklight Earrings of Healing | Earrings | 70 | Blue | 1 |
| Darklight Choker of Fending | Necklace | 70 | Blue | 1 |
| Darklight Choker of Maiming | Necklace | 70 | Blue | 1 |
| Darklight Choker of Striking | Necklace | 70 | Blue | 1 |
| Darklight Choker of Aiming | Necklace | 70 | Blue | 1 |
| Darklight Choker of Casting | Necklace | 70 | Blue | 1 |
| Darklight Choker of Healing | Necklace | 70 | Blue | 1 |
Images
Dungeon Images
- Gobmachine G-VI.png


