Difference between revisions of "FATEs"
Freedom4556 (talk | contribs) m (→Collect 40px) |
(→Rare Boss FATEs: formidable seems to only need 2 fates, not 5) |
||
| (20 intermediate revisions by 5 users not shown) | |||
| Line 1: | Line 1: | ||
{{TOCRIGHT}} | {{TOCRIGHT}} | ||
[[File:fate1.jpg|400px|thumb|FATE in beta]] | [[File:fate1.jpg|400px|thumb|FATE in 2.0 beta]] | ||
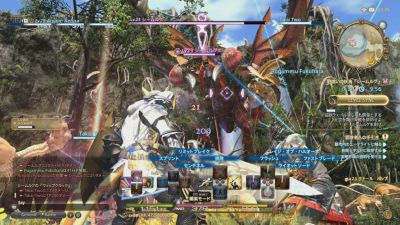
'''FATEs''' (Full Active Time Events) are dynamic scenarios, often battles, that appear around [[Eorzea]]. FATEs involve boss battles, escort missions and other events. Players can complete these events for experience, [[gil]] and [[Grand Company]] [[Company Seals|seals]]. Occasionally players will also receive items for successful completion of a FATE at gold medal. FATE credit is shared amongst all members of a party. Group up for better chances at maximum credit. | '''FATEs''' (Full Active Time Events) are dynamic scenarios, often battles, that appear around [[Eorzea]]. FATEs involve boss battles, escort missions and other events. Players can complete these events for experience, [[gil]] and [[Grand Company]] [[Company Seals|seals]] or [[Bicolor Gemstones]]. Occasionally players will also receive items for successful completion of a FATE at gold medal. FATE credit is shared amongst all members of a party. Group up for better chances at maximum credit. | ||
==Basics== | ==Basics== | ||
| Line 10: | Line 10: | ||
==Types of FATEs== | ==Types of FATEs== | ||
===Kill Enemies [[File:Slay enemy FATE icon.png|40px]]=== | ===Kill Enemies [[File:Slay enemy FATE icon.png|40px]]=== | ||
Monster FATES require the players to defeat waves and waves of monsters. On your map, they show up as icons with | Monster FATES require the players to defeat waves and waves of monsters. On your map, they show up as icons with a crossed sword, axe, and spear. Players can increase their rating by tagging or first hitting monsters, doing damage to the monsters and healing and reviving other players. To obtain participation for a monster slain, players need to get on the aggro table (pops up on the left) for that monster when it is slain. | ||
*Easiest way to achieve Gold Medal rating is by tagging monsters with instant cast spells, damage them with AoE abilities, gaining [[enmity]] for multiple mobs and healing players with high enmity. | *Easiest way to achieve Gold Medal rating is by tagging monsters with instant cast spells, damage them with AoE abilities, gaining [[enmity]] for multiple mobs and healing players with high enmity. | ||
| Line 18: | Line 18: | ||
====Rare Boss FATEs==== | ====Rare Boss FATEs==== | ||
These are not visible on the main map, and must be located on the minimap display. | These FATEs, also referred to as '''world bosses''' by players, have prerequisite weather or completing other FATE chains. Level 70 and lower world boss FATEs are not visible on the main map, and must be located on the minimap display. | ||
{| {{STDT|location align-left}} | {| {{STDT|location align-left}} | ||
|- | |- | ||
| Line 39: | Line 39: | ||
| {{questlink|fate-boss|Foxy Lady}} || [[Tamamo Gozen]] || Level 70 || [[Yanxia]] || 3 FATE prerequisite | | {{questlink|fate-boss|Foxy Lady}} || [[Tamamo Gozen]] || Level 70 || [[Yanxia]] || 3 FATE prerequisite | ||
|- | |- | ||
| {{questlink|fate-boss|A Finale Most Formidable}} || [[Formidable]] || Level 80 || [[Kholusia]] || | | {{questlink|fate-boss|A Finale Most Formidable}} || [[Formidable]] || Level 80 || [[Kholusia]] || 2 FATE prerequisite | ||
|- | |- | ||
| {{questlink|fate-boss|The Head, the Tail, the Whole Damned Thing}} || [[Archaeotania]] || Level 80 || [[The Tempest]] || 6 FATE prerequisite | | {{questlink|fate-boss|The Head, the Tail, the Whole Damned Thing}} || [[Archaeotania]] || Level 80 || [[The Tempest]] || 6 FATE prerequisite | ||
| Line 45: | Line 45: | ||
| {{questlink|fate-boss|Devout Pilgrims vs. Daivadipa}} || [[Daivadipa]] || Level 90 || [[Thavnair]] || 2 FATE prerequisite | | {{questlink|fate-boss|Devout Pilgrims vs. Daivadipa}} || [[Daivadipa]] || Level 90 || [[Thavnair]] || 2 FATE prerequisite | ||
|- | |- | ||
|{{questlink|fate-boss|Omicron Recall: Killing Order}} || [[Chi (boss)|Chi]] || Level 90 || [[Ultima Thule]] || 2 FATE prerequisite | | {{questlink|fate-boss|Omicron Recall: Killing Order}} || [[Chi (boss)|Chi]] || Level 90 || [[Ultima Thule]] || 2 FATE prerequisite | ||
|- | |||
| {{questlink|fate-boss|The Serpentlord Seethes}} || [[Ttokrrone]] || Level 100 || [[Shaaloani]] || 4 FATE prerequisite | |||
|- | |||
| {{questlink|fate-boss|Mascot Murder}} || [[Mica the Magical Mu]] || Level 100 || [[Living Memory]] || 2 FATE prerequisite | |||
|- | |- | ||
|} | |} | ||
====Notorious Monster [[File:Eureka notorious monster (map icon).png|40px]]==== | ====Notorious Monster [[File:Eureka notorious monster (map icon).png|40px]]==== | ||
A type of boss fate only found in {{questlink|eureka|The Forbidden Land, Eureka}}. | {{main|Eureka FATEs}} | ||
A type of boss fate only found in {{questlink|eureka|The Forbidden Land, Eureka}}. Often abbreviated as '''NM'''. | |||
Some types of Eureka FATEs are called "Elemental Conflicts" (i.e. Happy Bunny FATEs), wherein players defeat a few waves of enemies while protecting the resident Happy Bunnies. Completing these allows players to search for hidden treasure. For more information, see [[The Forbidden Land, Eureka Pagos#Happy Bunnies|here]]. | |||
====Chase [[File:FATE-Path.png|40px]]==== | |||
A one-of-a-kind type of boss fate, {{questlink|fate-path|The Magitek Is Back}} involves chasing a boss to a destination marked with a grey version of the FATE icon: [[File:Chase FATE icon2.png|32px|link=]] Players must defeat the boss before it reaches the destination, or the FATE is a failure. | |||
===Collect [[File:Collection FATE icon.png|40px]]=== | ===Collect [[File:Collection FATE icon.png|40px]]=== | ||
| Line 67: | Line 77: | ||
==Shared FATE== | ==Shared FATE== | ||
{{main|Shared FATE}} | {{main|Shared FATE}} | ||
The Shared FATE system was introduced in [[Shadowbringers]] with [[patch 5.0]] and carried forward in | The Shared FATE system was introduced in ''[[Shadowbringers]]'' with [[patch 5.0|5.0]] and carried forward in later expansions. Instead of {{company seal}} [[Company Seals]], players receive {{bicolor gemstone}} [[Bicolor Gemstones]] for participation in FATEs in these zones. | ||
==Hot Spots== | ==Hot Spots== | ||
| Line 112: | Line 122: | ||
| colspan = "2" | '''[[Heavensward]]''' | | colspan = "2" | '''[[Heavensward]]''' | ||
|- | |- | ||
|'''50'''|| [[Sea of Clouds]] | |'''50'''|| [[Sea of Clouds]] (south) | ||
|- | |- | ||
|'''50 - 51'''|| [[Coerthas Western Highlands]] | |'''50 - 51'''|| [[Coerthas Western Highlands]] | ||
| Line 124: | Line 134: | ||
|'''57'''|| [[Dravanian Forelands]] | |'''57'''|| [[Dravanian Forelands]] | ||
|- | |- | ||
|'''57 - 59'''|| [[Sea of Clouds]] | |'''57 - 59'''|| [[Sea of Clouds]] (north) | ||
|- | |- | ||
|'''58 - 59'''|| [[Dravanian Hinterlands]] | |'''58 - 59'''|| [[Dravanian Hinterlands]] | ||
| Line 132: | Line 142: | ||
| colspan = "2" | '''[[Stormblood]]''' | | colspan = "2" | '''[[Stormblood]]''' | ||
|- | |- | ||
|'''60 - 61'''||[[The Fringes]] | |'''60 - 61'''||[[The Fringes]] (west) | ||
|- | |- | ||
|'''60 - 61'''||[[The Peaks]] | |'''60 - 61'''||[[The Peaks]] (north) | ||
|- | |- | ||
|'''62 - 63'''||[[The Ruby Sea]] | |'''62 - 63'''||[[The Ruby Sea]] | ||
|- | |- | ||
|'''64'''||[[Yanxia ]] | |'''64'''||[[Yanxia ]] (south) | ||
|- | |- | ||
|'''65 - 66'''||[[The Azim Steppe]] | |'''65 - 66'''||[[The Azim Steppe]] | ||
|- | |- | ||
|'''67'''||[[Yanxia ]] | |'''67'''||[[Yanxia ]] (north) | ||
|- | |- | ||
|'''67'''||[[The Fringes]] | |'''67'''||[[The Fringes]] (east) | ||
|- | |- | ||
|'''68'''||[[The Peaks]] | |'''68'''||[[The Peaks]] (south) | ||
|- | |- | ||
|'''69'''||[[The Lochs]] | |'''69'''||[[The Lochs]] | ||
| Line 152: | Line 162: | ||
| colspan = "2" | '''[[Shadowbringers]]''' | | colspan = "2" | '''[[Shadowbringers]]''' | ||
|- | |- | ||
|'''70'''||[[Amh Araeng]] | |'''70'''||[[Amh Araeng]] (east) | ||
|- | |- | ||
|'''70'''||[[Kholusia]] | |'''70'''||[[Kholusia]] (south) | ||
|- | |- | ||
|'''71'''||[[Lakeland]] | |'''71'''||[[Lakeland]] | ||
| Line 162: | Line 172: | ||
|'''74 - 75'''||[[The Rak'tika Greatwood]] | |'''74 - 75'''||[[The Rak'tika Greatwood]] | ||
|- | |- | ||
|'''76 - 77'''||[[Amh Araeng]] | |'''76 - 77'''||[[Amh Araeng]] (west) | ||
|- | |- | ||
|'''78'''||[[Kholusia]] | |'''78'''||[[Kholusia]] (north) | ||
|- | |- | ||
|'''79'''||[[The Tempest]] | |'''79'''||[[The Tempest]] | ||
| Line 170: | Line 180: | ||
| colspan = "2" | '''[[Endwalker]]''' | | colspan = "2" | '''[[Endwalker]]''' | ||
|- | |- | ||
|'''80 - 81'''||[[Labyrinthos]] | |'''80 - 81'''||[[Labyrinthos]] (north) | ||
|- | |- | ||
|'''80 - 81'''||[[Thavnair]] | |'''80 - 81'''||[[Thavnair]] (west) | ||
|- | |- | ||
|'''82 - 83'''||[[Garlemald]] | |'''82 - 83'''||[[Garlemald]] | ||
| Line 178: | Line 188: | ||
|'''83 - 84'''||[[Mare Lamentorum]] | |'''83 - 84'''||[[Mare Lamentorum]] | ||
|- | |- | ||
|'''85'''||[[Labyrinthos]] | |'''85'''||[[Labyrinthos]] (north) | ||
|- | |- | ||
|'''85'''||[[Thavnair]] | |'''85'''||[[Thavnair]] (east) | ||
|- | |- | ||
|'''86 - 87'''||[[Elpis]] | |'''86 - 87'''||[[Elpis]] | ||
|- | |- | ||
|'''88'''||[[Labyrinthos]] | |'''88'''||[[Labyrinthos]] (south) | ||
|- | |- | ||
|'''89'''||[[Ultima Thule]] | |'''89'''||[[Ultima Thule]] | ||
|- | |||
| colspan = "2" | '''[[Dawntrail]]''' | |||
|- | |||
|'''90 - 91'''||[[Urqopacha]] (north) | |||
|- | |||
|'''90 - 92'''||[[Kozama'uka]] | |||
|- | |||
|'''93'''||[[Urqopacha]] (south) | |||
|- | |||
|'''94'''||[[Yak T'el]] | |||
|- | |||
|'''95 - 96'''||[[Shaaloani]] | |||
|- | |||
|'''97 - 98'''||[[Heritage Found]] | |||
|- | |||
|'''99'''||[[Living Memory]] | |||
|} | |} | ||
| Line 193: | Line 219: | ||
**You must be in the same [[zone]] as the FATE when it ends to receive any credit, however. Going into a queue or leaving for another zone will forfeit any contribution. | **You must be in the same [[zone]] as the FATE when it ends to receive any credit, however. Going into a queue or leaving for another zone will forfeit any contribution. | ||
*Make sure to join a party. Often if you shout in an area that you are "looking for group" someone will pick you up. You can also use the [[Party Finder]]. | *Make sure to join a party. Often if you shout in an area that you are "looking for group" someone will pick you up. You can also use the [[Party Finder]]. | ||
*By being in a party, you will not only increase your likelihood of getting the | *By being in a party, you will not only increase your likelihood of getting the gold rank for FATE completion, but also allows you to share everyone's experience as monsters are killed. | ||
*Tanks having trouble getting the gold rank for FATE completion should turn on their [[tank stance]] and use their area-of-effect attacks if there are multiple enemies. | |||
*Tanks having trouble getting | *Healers having trouble receiving gold rank FATE completion can spam their area-of-effect healing spells in a party. | ||
*Healers having trouble receiving | |||
==Additional Stormblood+ FATE Mechanics== | ==Additional Stormblood+ FATE Mechanics== | ||
===Experience Points Bonus=== | ===Experience Points Bonus=== | ||
FATEs that appear in [[Stormblood]] (and later) areas will, on occasion, offer a bonus to [[EXP]] awarded upon completion. | FATEs that appear in ''[[Stormblood]]'' (and later) areas will, on occasion, offer a bonus to [[EXP]] awarded upon completion. As of ''[[Dawntrail]]'', these bonuses also apply to the amount of {{#set:Has context=Currency}}{{bicolor gemstone}} [[Bicolor Gemstones]] earned, but not {{#set:Has context=Currency}}{{company seal}} [[Company Seals]] earned from ''Stormblood'' FATEs. | ||
[[File:fate bonus exp1.png]] | [[File:fate bonus exp1.png]] | ||
| Line 225: | Line 247: | ||
[[File:twist of fate2.png]] | [[File:twist of fate2.png]] | ||
Players under the effect of the [[File:Twist of fate icon1.png|link=]] '''Twist of Fate''' status will receive 15% increased EXP rewards upon completing the FATE in which the [[Forlorn Maiden]] was defeated. The status then persists and grants a further 50% increased EXP for a subsequent FATE players participate or receive a rating in. | Players under the effect of the [[File:Twist of fate icon1.png|link=]] '''Twist of Fate''' status will receive 15% increased EXP rewards and 25% increased [[Bicolor Gemstone]]s upon completing the FATE in which the [[Forlorn Maiden]] was defeated. The status then persists and grants a further 50% increased EXP and [[Bicolor Gemstone]]s for a subsequent FATE players participate or receive a rating in. | ||
* The effect of this status will apply even if the FATEs participated in end in failure. | * The effect of this status will apply even if the FATEs participated in end in failure. | ||
* The status' effect does not apply to EXP gained from defeating enemies. | * The status' effect does not apply to EXP gained from defeating enemies. | ||
| Line 246: | Line 268: | ||
{{achievement table row|Date with Destiny VI}} | {{achievement table row|Date with Destiny VI}} | ||
|} | |} | ||
Additionally, [[Shared FATEs]] are also associated with several achievements, and many FATEs award achievements for their completion (39 as of patch 7.0). | |||
{{main|Shared FATEs}} | |||
{{main|Achievement FATEs}} | |||
{{fates}} | {{fates}} | ||
[[Category:Game mechanics]] [[Category:Patch 2.0 Features]] [[Category:Patch 4.0 Features]] | [[Category:Game mechanics]] [[Category:Patch 2.0 Features]] [[Category:Patch 4.0 Features]] | ||
Latest revision as of 09:42, 4 January 2025
FATEs (Full Active Time Events) are dynamic scenarios, often battles, that appear around Eorzea. FATEs involve boss battles, escort missions and other events. Players can complete these events for experience, gil and Grand Company seals or Bicolor Gemstones. Occasionally players will also receive items for successful completion of a FATE at gold medal. FATE credit is shared amongst all members of a party. Group up for better chances at maximum credit.
Basics
- See also: List of FATEs
To locate a FATE, look for FATE indicators that randomly appear on your map. To join a FATE, simply enter the FATE radius (blue circle) on your mini map and attempt to complete the FATE objectives. There are no limits to the number of players that can participate in a FATE at a time. If the player's level is too high, they will be asked to level sync down. FATEs can be completed by finishing the on-screen objectives within the time limit. Players are rewarded with experience and gil when a FATE is completed.
- Enemies that are the objective of a FATE will have a special icon next to their names:

Types of FATEs
Kill Enemies 
Monster FATES require the players to defeat waves and waves of monsters. On your map, they show up as icons with a crossed sword, axe, and spear. Players can increase their rating by tagging or first hitting monsters, doing damage to the monsters and healing and reviving other players. To obtain participation for a monster slain, players need to get on the aggro table (pops up on the left) for that monster when it is slain.
- Easiest way to achieve Gold Medal rating is by tagging monsters with instant cast spells, damage them with AoE abilities, gaining enmity for multiple mobs and healing players with high enmity.
Kill Boss 
Boss FATEs require the players to defeat one large and powerful boss monster. On your map, they show up as icons with monster maw. Players can increase their rating by doing damage to the boss, tanking hits from the boss and healing other players.
Rare Boss FATEs
These FATEs, also referred to as world bosses by players, have prerequisite weather or completing other FATE chains. Level 70 and lower world boss FATEs are not visible on the main map, and must be located on the minimap display.
| FATE | Boss | Level | Location | Notes |
|---|---|---|---|---|
| Behemoth | Level 50 | Coerthas Central Highlands | 1 FATE prerequisite | |
| Odin | Level 50 | The Black Shroud | Weather: Tension | |
| Coeurlregina | Level 60 | The Dravanian Forelands | Weather: Royal Levin 2 FATE prerequisite | |
| Noctilucale | Level 59 | Azys Lla | Weather: Hyperelectricity | |
| Ixion | Level 70 | The Lochs | Weather: Quick Levin | |
| Tamamo Gozen | Level 70 | Yanxia | 3 FATE prerequisite | |
| Formidable | Level 80 | Kholusia | 2 FATE prerequisite | |
| Archaeotania | Level 80 | The Tempest | 6 FATE prerequisite | |
| Daivadipa | Level 90 | Thavnair | 2 FATE prerequisite | |
| Chi | Level 90 | Ultima Thule | 2 FATE prerequisite | |
| Ttokrrone | Level 100 | Shaaloani | 4 FATE prerequisite | |
| Mica the Magical Mu | Level 100 | Living Memory | 2 FATE prerequisite |
Notorious Monster 
- Main article: Eureka FATEs
A type of boss fate only found in ![]() The Forbidden Land, Eureka. Often abbreviated as NM.
The Forbidden Land, Eureka. Often abbreviated as NM.
Some types of Eureka FATEs are called "Elemental Conflicts" (i.e. Happy Bunny FATEs), wherein players defeat a few waves of enemies while protecting the resident Happy Bunnies. Completing these allows players to search for hidden treasure. For more information, see here.
Chase 
A one-of-a-kind type of boss fate, ![]() The Magitek Is Back involves chasing a boss to a destination marked with a grey version of the FATE icon:
The Magitek Is Back involves chasing a boss to a destination marked with a grey version of the FATE icon: ![]() Players must defeat the boss before it reaches the destination, or the FATE is a failure.
Players must defeat the boss before it reaches the destination, or the FATE is a failure.
Collect 
Collect FATEs require the players to collect and turn in Key Items. On your map, they show up as bag icons along with a small bag that indicate the location of the FATE NPC. Players can increase their rating by turning in FATE items before the timer hits 0. You can also obtain items by defeating the FATE mobs that spawn continuously.
- Players can easily obtain the Gold Medal rating by picking up the FATE items on the ground and handing them to the FATE NPC.
Defend 
In these FATEs, players have to defend certain objects/NPCs from destruction/defeat for a specified amount of time. Waves of enemies will attempt to destroy/defeat these objects/NPCs and players must defeat these foes. If the objects/NPCs are destroyed/defeated, players fail the FATE. In the case of Defending NPCs, they can be healed by players and this can be critical to succeeding in the FATE. Objects cannot be healed, and therefore those FATEs benefit most from a tank to immediately grab aggro from the enemies.
Escort 
In these FATEs, players need to escort an NPC or multiple NPCs from one place to another. The NPC will travel from point A to point B, players must defend them from incoming monsters. If the NPC is killed, players fail the FATE.
- Note that the HP of NPCs will regenerate outside of combat.
- Main article: Shared FATE
The Shared FATE system was introduced in Shadowbringers with 5.0 and carried forward in later expansions. Instead of ![]() Company Seals, players receive
Company Seals, players receive ![]() Bicolor Gemstones for participation in FATEs in these zones.
Bicolor Gemstones for participation in FATEs in these zones.
Hot Spots
Players occasionally group up and farm FATEs for experience. Generally this is done while waiting on queues or while simultaneously working on various Relic Weapons. Experience per hour is quite poor from FATEs alone.
Various FATE spots emerge for different levels.
| Level | Town | Zone |
|---|---|---|
| 01 - 12 | Horizon | Western Thanalan |
| 10 - 19 | Aleport | Western La Noscea |
| 21 - 34 | Quarrymill | South Shroud |
| 30 - 34 | Costa del Sol | Eastern La Noscea |
| 35 - 40 | Dragonhead | Coerthas Central Highlands |
| 40 - 44 | Larkscall | East Shroud |
| 44 - 46 | Revenant's Toll | Mor Dhona |
| 49 | Ceruleum Processing Plant | Northern Thanalan |
Large-scale "Hot Spots" diminish rapidly as you progress. After level 50, here are your target zones by FATE level.
Tips and Tricks
- Players do not need to stick around for the entire FATE. If you feel comfortable that you have done enough to receive full exp for the fate, you can leave early to join another FATE that may have popped. For Collect FATEs this is typically 6-8 of the items.
- You must be in the same zone as the FATE when it ends to receive any credit, however. Going into a queue or leaving for another zone will forfeit any contribution.
- Make sure to join a party. Often if you shout in an area that you are "looking for group" someone will pick you up. You can also use the Party Finder.
- By being in a party, you will not only increase your likelihood of getting the gold rank for FATE completion, but also allows you to share everyone's experience as monsters are killed.
- Tanks having trouble getting the gold rank for FATE completion should turn on their tank stance and use their area-of-effect attacks if there are multiple enemies.
- Healers having trouble receiving gold rank FATE completion can spam their area-of-effect healing spells in a party.
Additional Stormblood+ FATE Mechanics
Experience Points Bonus
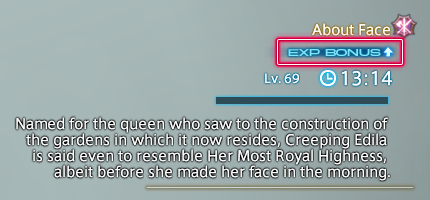
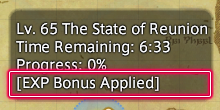
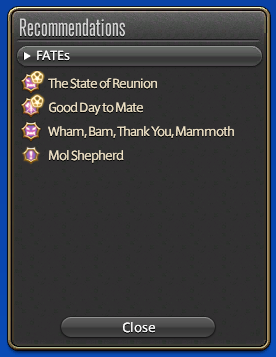
FATEs that appear in Stormblood (and later) areas will, on occasion, offer a bonus to EXP awarded upon completion. As of Dawntrail, these bonuses also apply to the amount of ![]() Bicolor Gemstones earned, but not
Bicolor Gemstones earned, but not ![]() Company Seals earned from Stormblood FATEs.
Company Seals earned from Stormblood FATEs.
FATEs offering bonus EXP can be confirmed via the map or the Recommendations list.
Twist of Fate
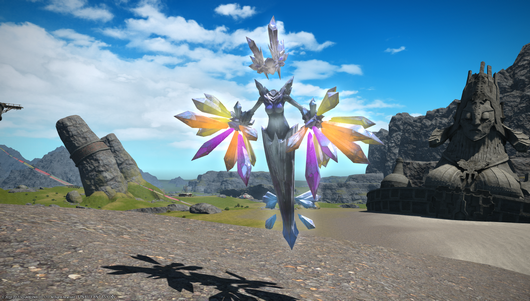
A special enemy called the Forlorn Maiden may appear over the course of any given FATE. Players will see the chat message "The smell of death has drawn a Forlorn maiden to the battlefield!" when one spawns, and "The Forlorn maiden dissipates..." when it is defeated.
In very rare instances a significantly larger, tougher variant called The Forlorn may appear instead.
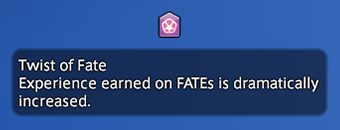
By defeating the Forlorn Maiden or The Forlorn, all players who participated in the FATE and received a rating will be granted the ![]() Twist of Fate status.
Twist of Fate status.
- Players will be granted the status even if the FATE ends in failure so long as the Forlorn Maiden was defeated.
Players under the effect of the ![]() Twist of Fate status will receive 15% increased EXP rewards and 25% increased Bicolor Gemstones upon completing the FATE in which the Forlorn Maiden was defeated. The status then persists and grants a further 50% increased EXP and Bicolor Gemstones for a subsequent FATE players participate or receive a rating in.
Twist of Fate status will receive 15% increased EXP rewards and 25% increased Bicolor Gemstones upon completing the FATE in which the Forlorn Maiden was defeated. The status then persists and grants a further 50% increased EXP and Bicolor Gemstones for a subsequent FATE players participate or receive a rating in.
- The effect of this status will apply even if the FATEs participated in end in failure.
- The status' effect does not apply to EXP gained from defeating enemies.
- The status' effect stacks with other bonuses that apply to FATE completion EXP, including a subsequent
 Twist of Fate buff.
 - The
 Twist of Fate status from The Forlorn grants a significantly greater EXP bonus (+250%) than that from a Forlorn Maiden.
The effect has no expiry time limit. However, players will lose the buff if they leave the zone in any way.
Achievements
FATE completion is associated with the following achievements:
| Name | Points | Task | Reward | Patch |
|---|---|---|---|---|
| Date with Destiny I | 5 | Successfully complete 10 FATEs. | - | 2.1 |
| Date with Destiny II | 5 | Successfully complete 100 FATEs. | - | 2.1 |
| Date with Destiny III | 10 | Successfully complete 300 FATEs. | - | 2.1 |
| Date with Destiny IV | 10 | Successfully complete 1,000 FATEs. | 2.1 | |
| Destiny's Child | 20 | Successfully complete 3,000 FATEs. | Paragon's Gown | 2.1 |
| Date with Destiny V | 20 | Successfully complete 5,000 FATEs. | - | 3.0 |
| Date with Destiny VI | 20 | Successfully complete 10,000 FATEs. | 3.0 |
Additionally, Shared FATEs are also associated with several achievements, and many FATEs award achievements for their completion (39 as of patch 7.0).
- Main article: Shared FATEs
- Main article: Achievement FATEs
